Sign-in with Apple (Optional)
The end users might want to use their Apple accounts to login to RainMaker mobile apps.
This section describes the steps required to configure the Apple sign-in for the end users.
Pre-requisites
-
Apple developer account is already created, and developer program enrollment is completed. (Reference: https://developer.apple.com/programs/enroll/)
-
ESP-RainMaker-Core is deployed.
-
Custom domain is created. (Reference: Configuring custom domain)
Steps to Configure Apple Sign In
Configurations in Apple Developer Account
-
Create an App ID from Apple Developer console, if not created already.
-
Click on Keys in the left section.
-
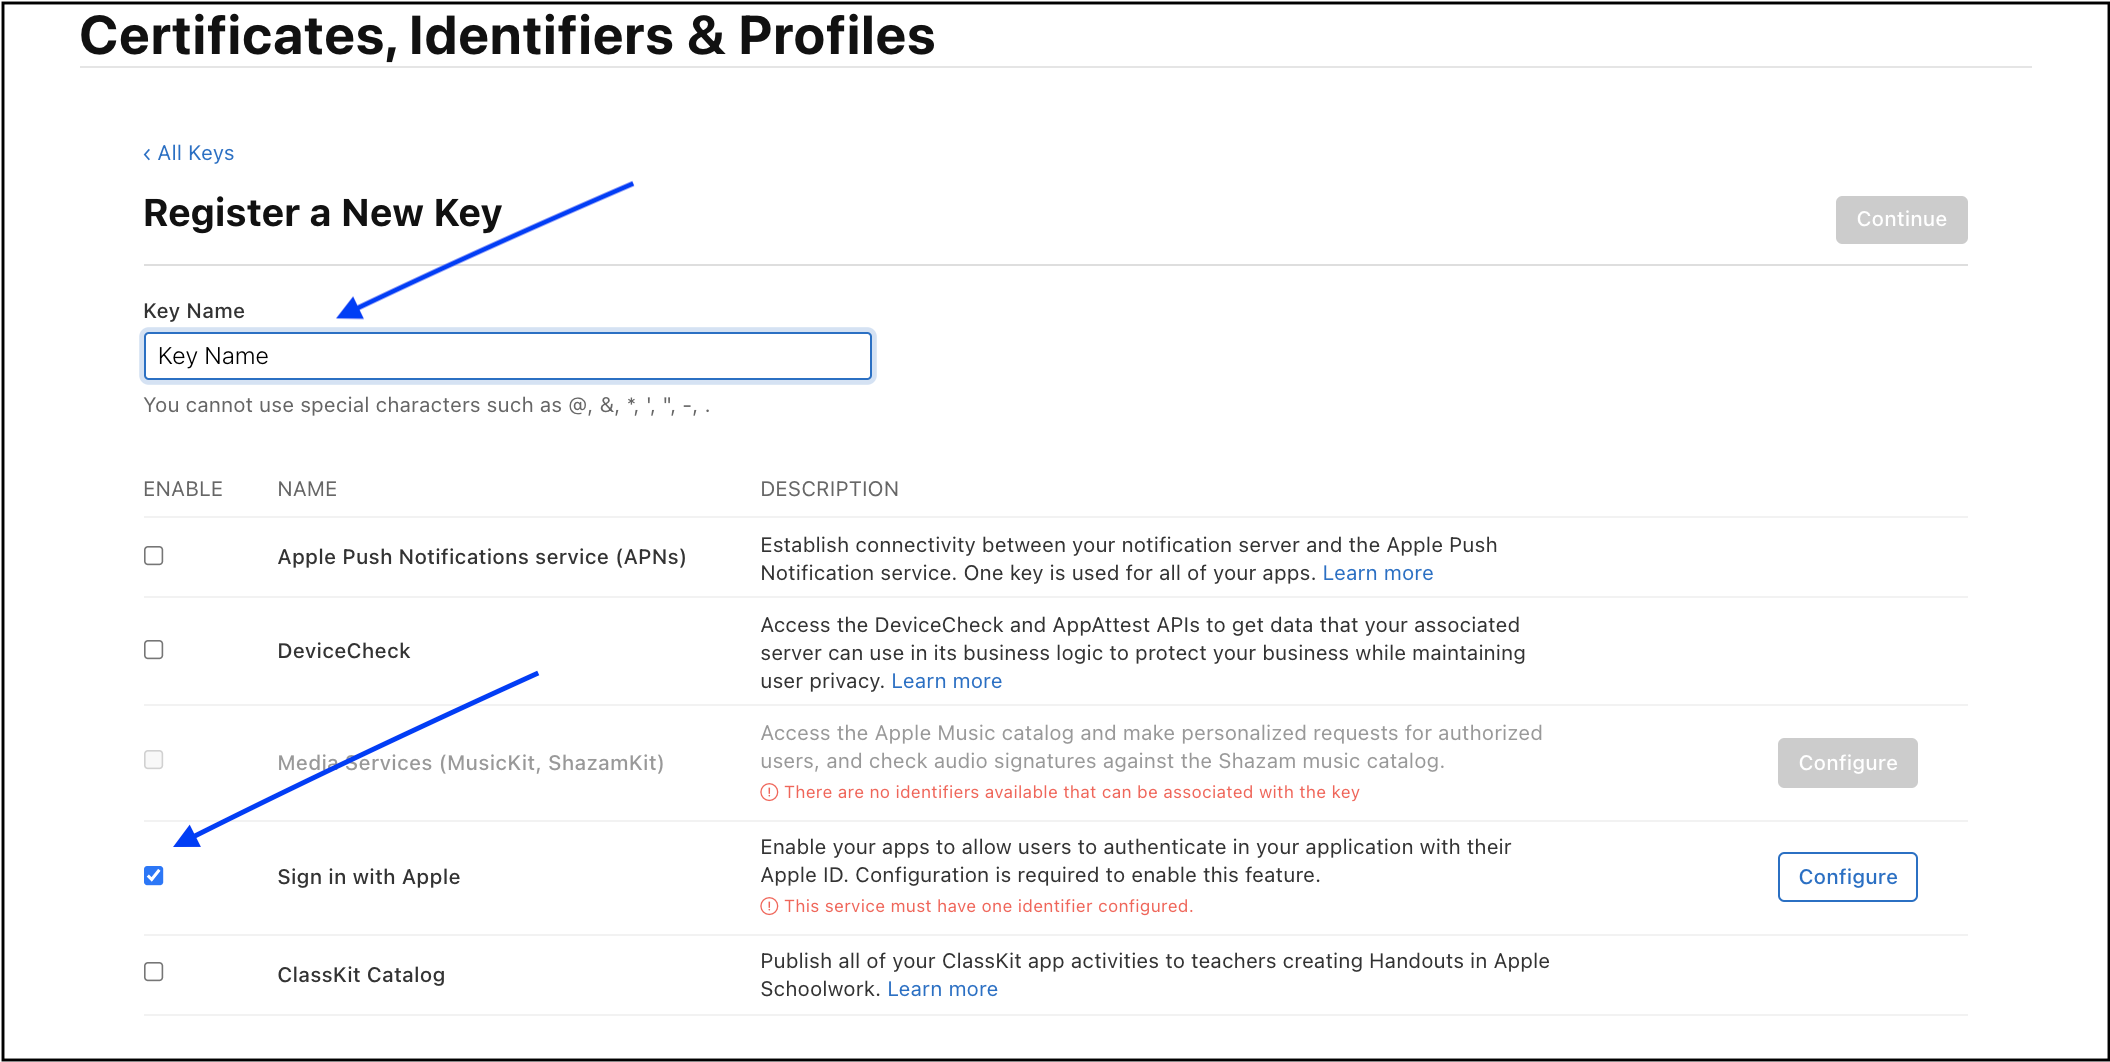
Click on the + button to add a new key.

- Provide a key name and select sign in with apple.
-
Click on Configure button on the right of "Sign in with Apple".
-
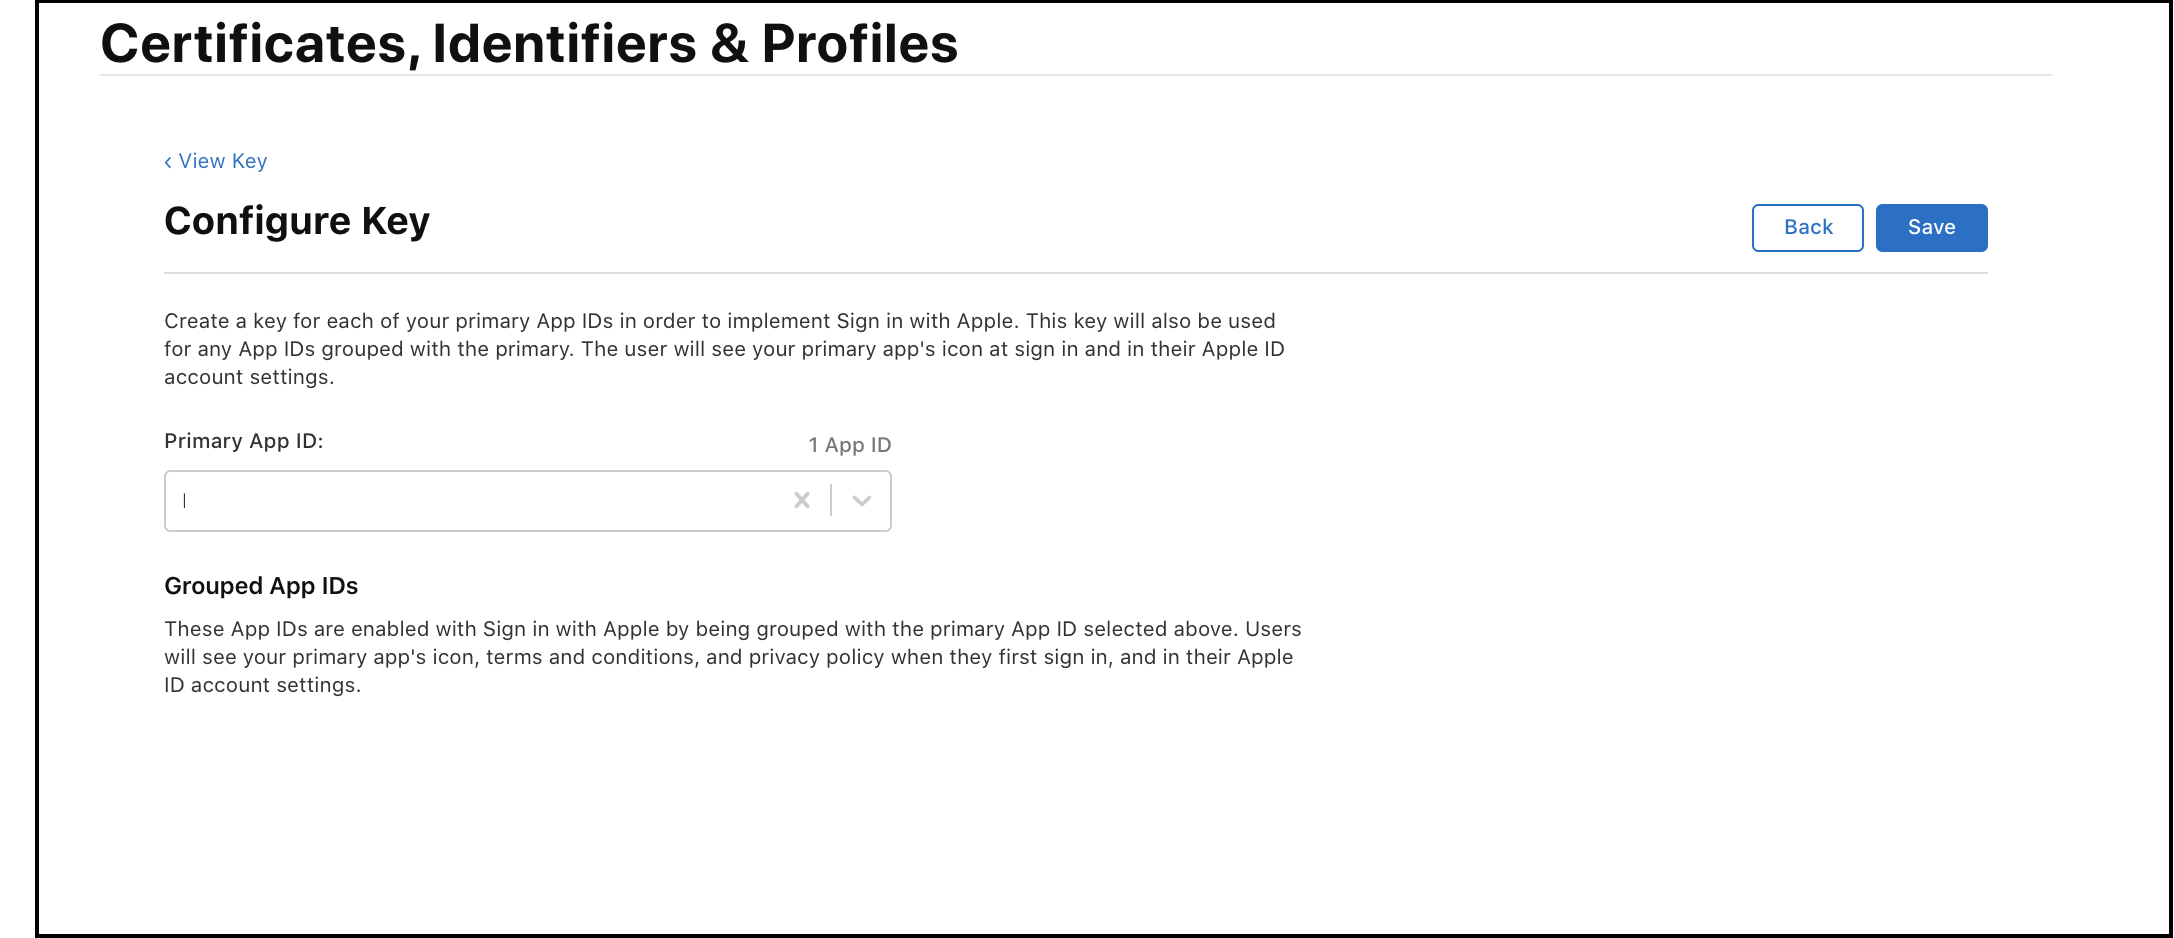
Select your Primary App ID. Primary App ID should be of format "<teamId>.<bundleId>". Team Id and Bundle Id were noted down in step 1.
-
Press Save to save the configurations.
-
On "Register a New Key" page, click on Continue.
-
Review the configuration. Click on Regsiter to create a new key.
-
Take note of Key ID and download the key file. This will be required while configuring Apple as Identity Provider via RainMaker Dashboard.
-
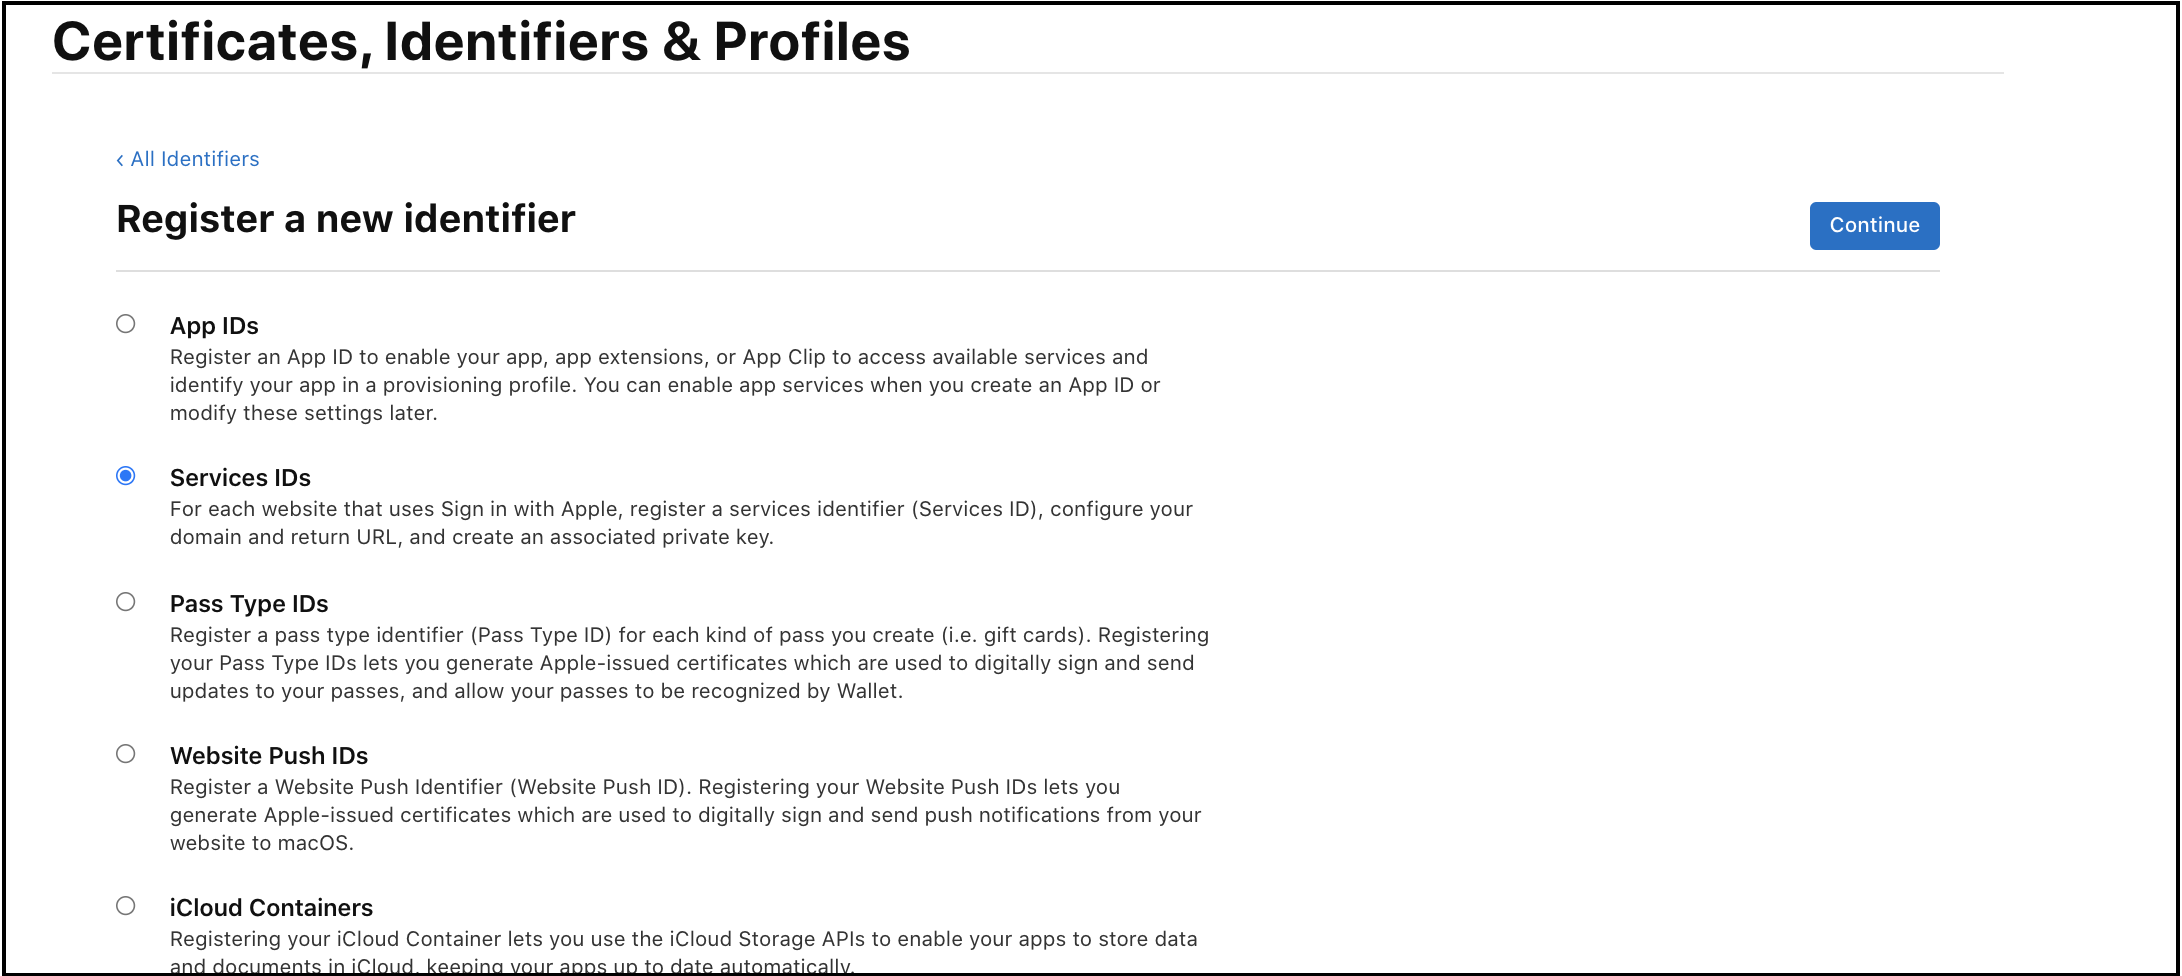
Click on Identifiers, then click on + button.

- Select Service IDs from the list then Continue.
-
On the Register a Services ID page, select the Sign in with Apple checkbox to enable the service, and then select Configure.
-
Provide an identifier and description for your service.

-
Take a note of identifier(Services ID). Services ID will be required while configuring Apple as Identity Provider via RainMaker Dashboard.
-
Click on Register to register Services ID.

-
After Registration of service ID, go back to identifiers. Click on the service ID that you have registered in the step above.
-
Enable 'Sign In With Apple' and click on the Configure button
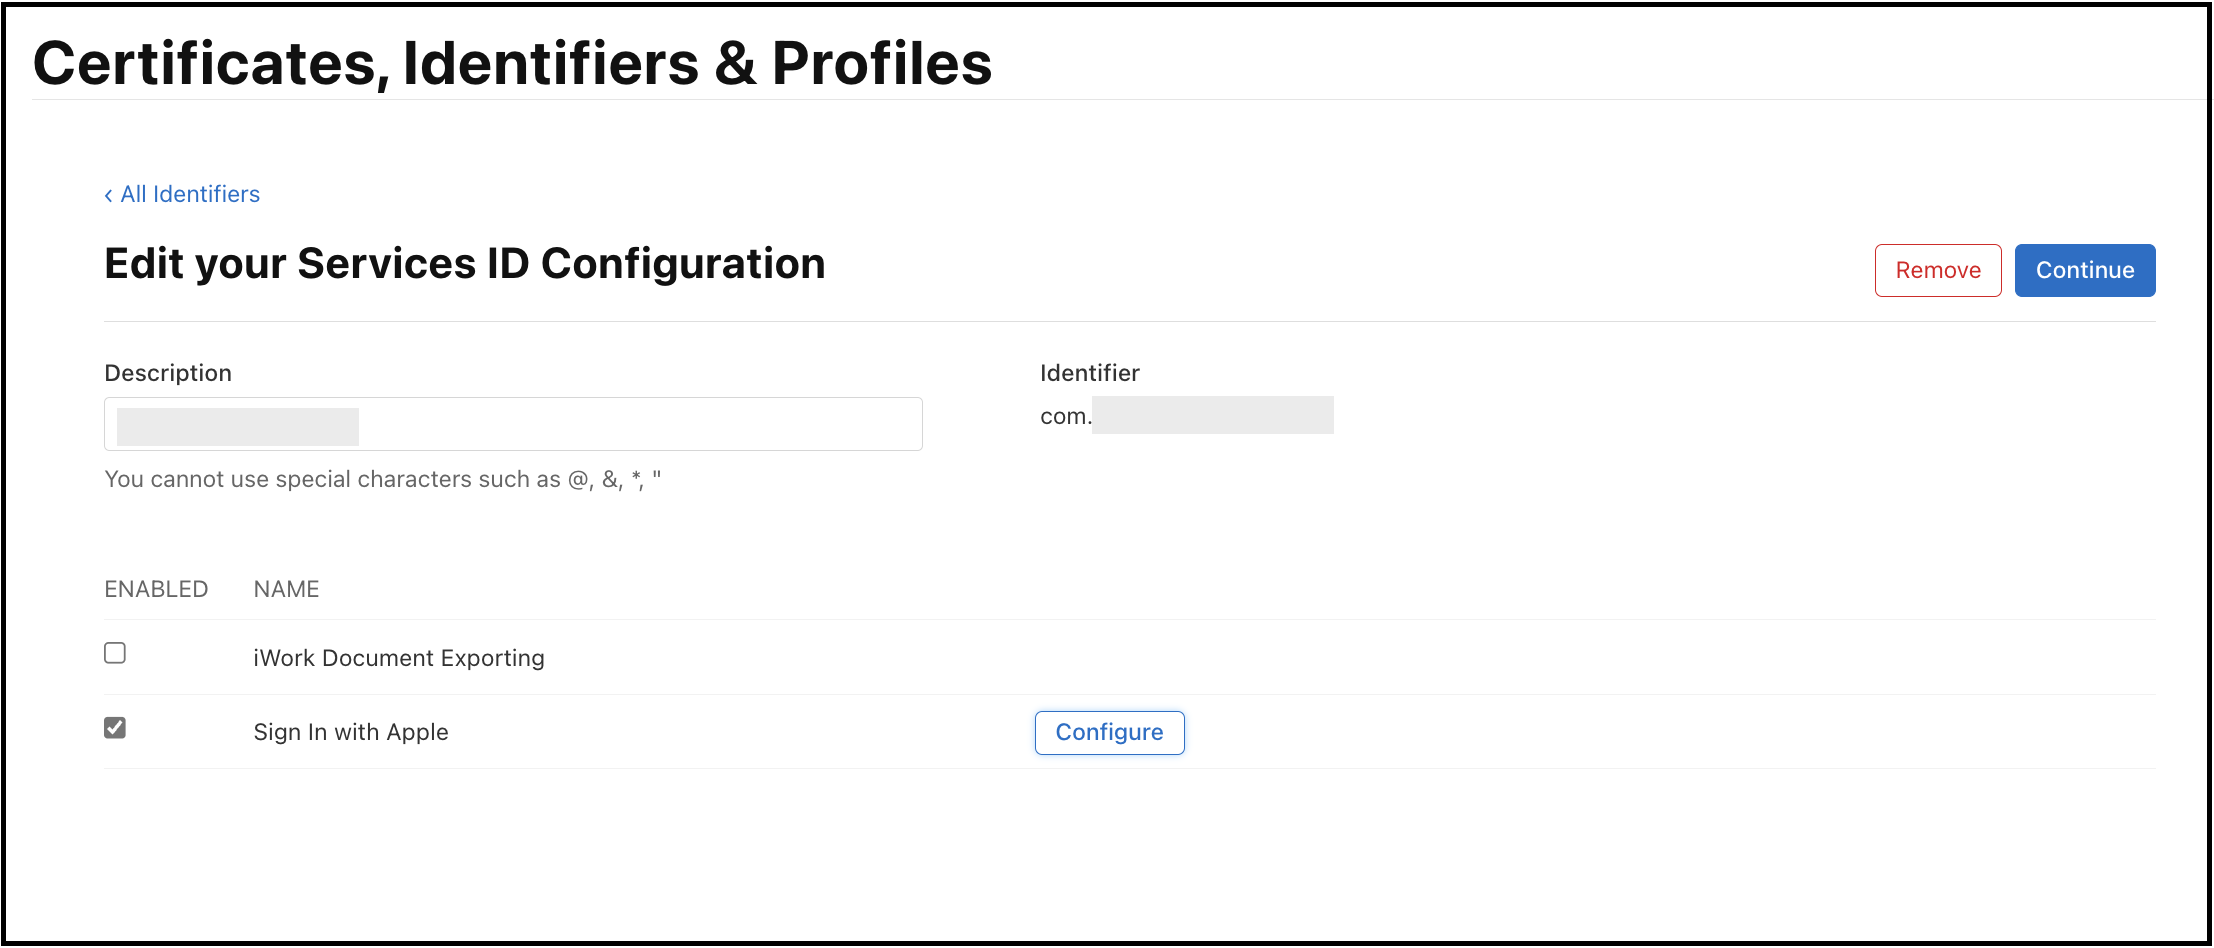
-
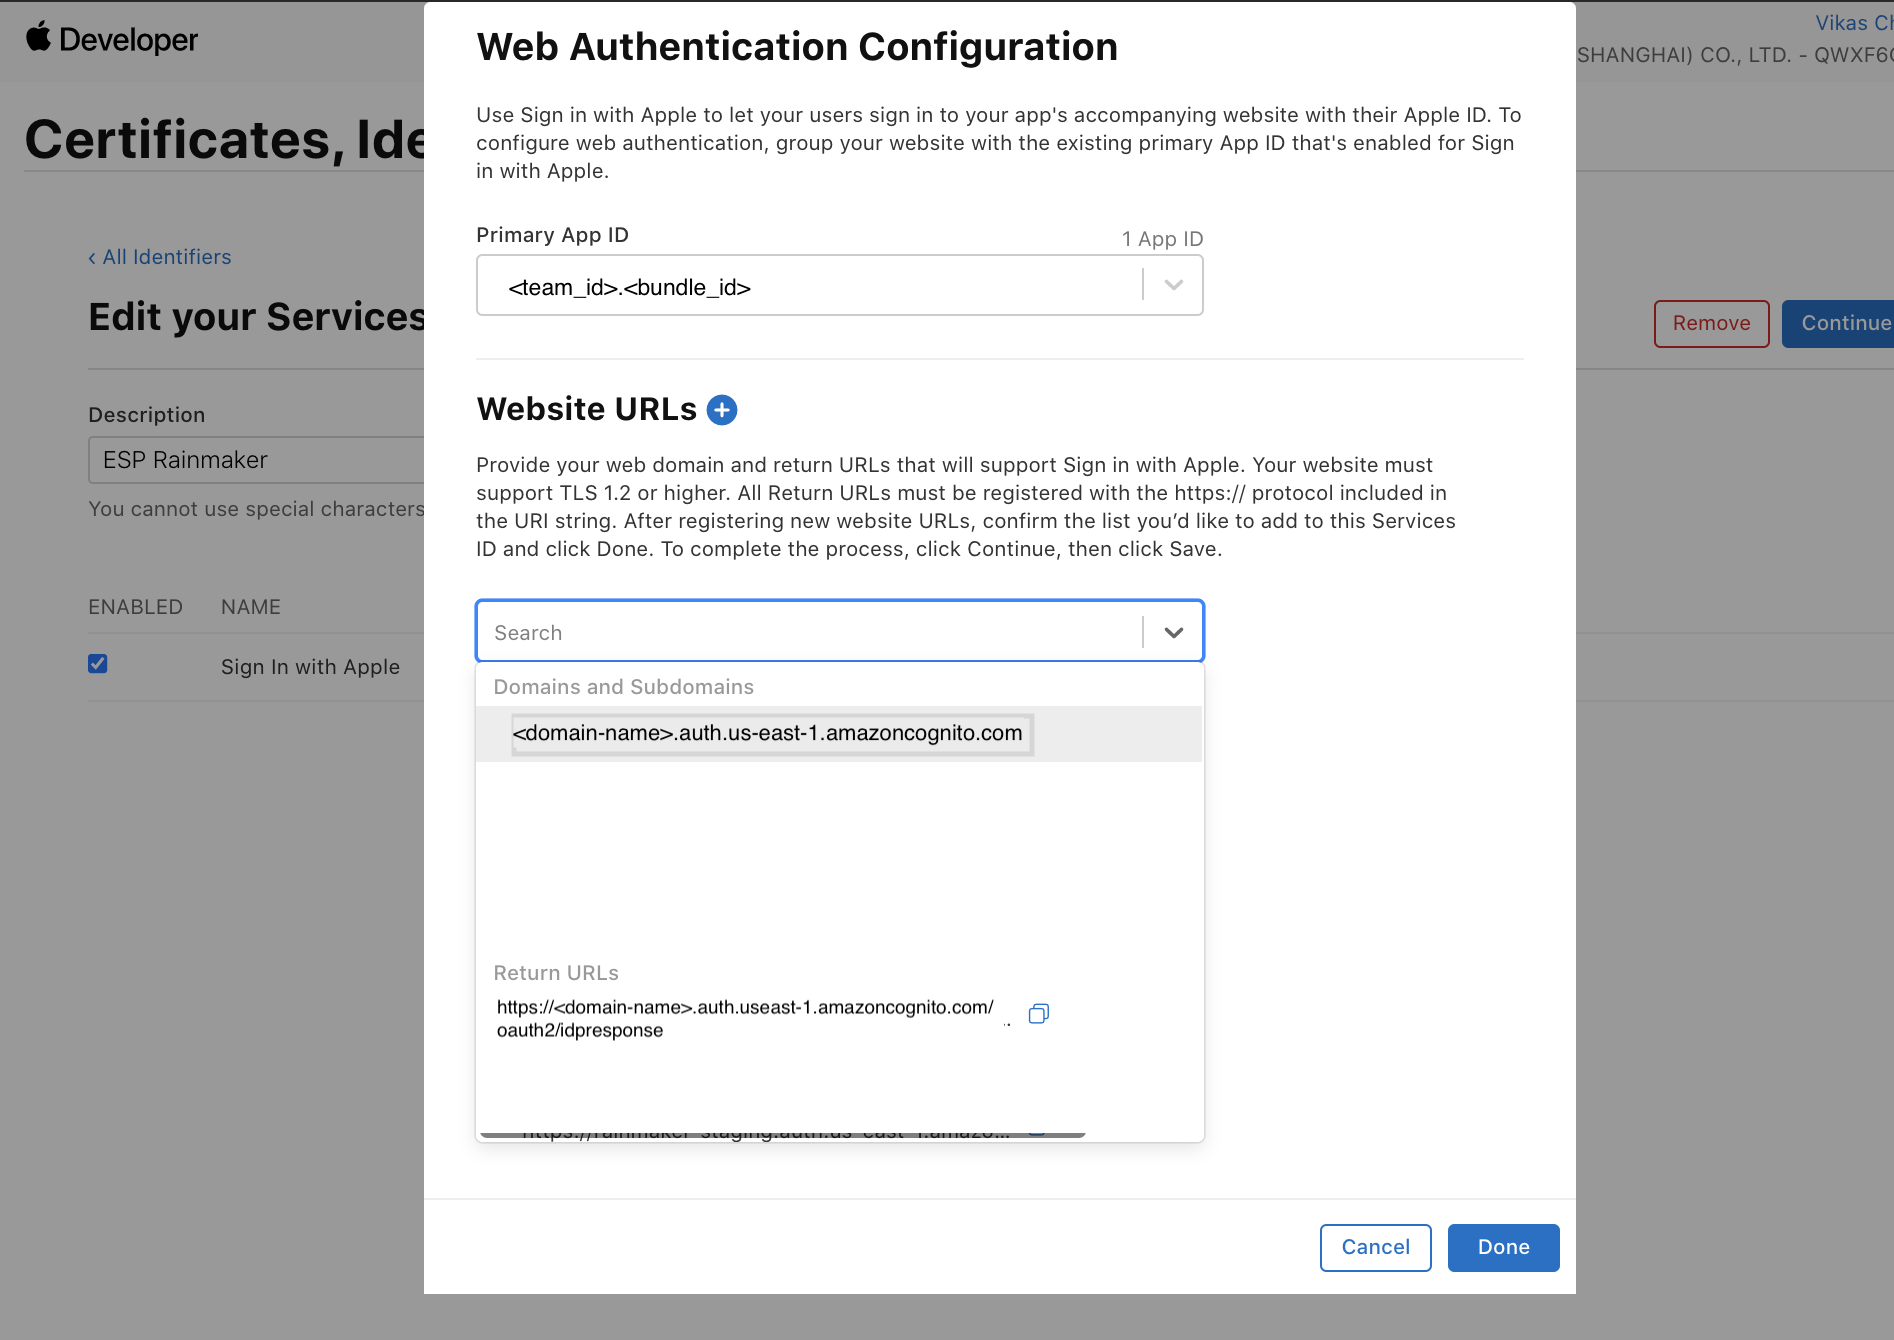
Configure your domain:
Standard RainMaker
- Enter your Amazon Cognito domain "https://your-company-domain.auth.aws-region.amazoncognito.com" as shown below.
OAuth only RainMaker
- Enter your HTTP Base URL (Without Stage)
-
and Return URLs:
Standard RainMaker
- Enter your Amazon Cognito domain - https://your-company-domain.auth.aws-region.amazoncognito.com/OAuth2/idpresponse as shown below.
OAuth only RainMaker
- Get your HTTP API Endpoint
- Redirect URI:
{HTTP API Endpoint}/cognitocallbackThe domain here should be the one created in AWS Cognito. The return URL should be "https://<domain>/OAuth2/idpresponse".
Configure Apple as Identity Provider via the RainMaker Dashboard
- Log in to RainMaker Dashboard with your admin account. Go to deployment settings.
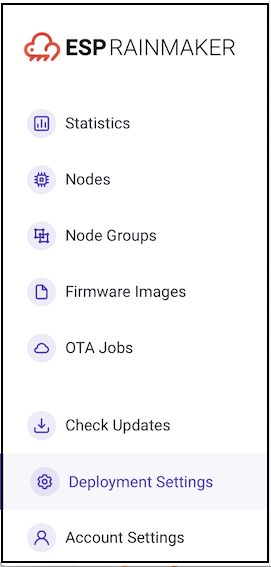
- Go to the Identity Providers tab.
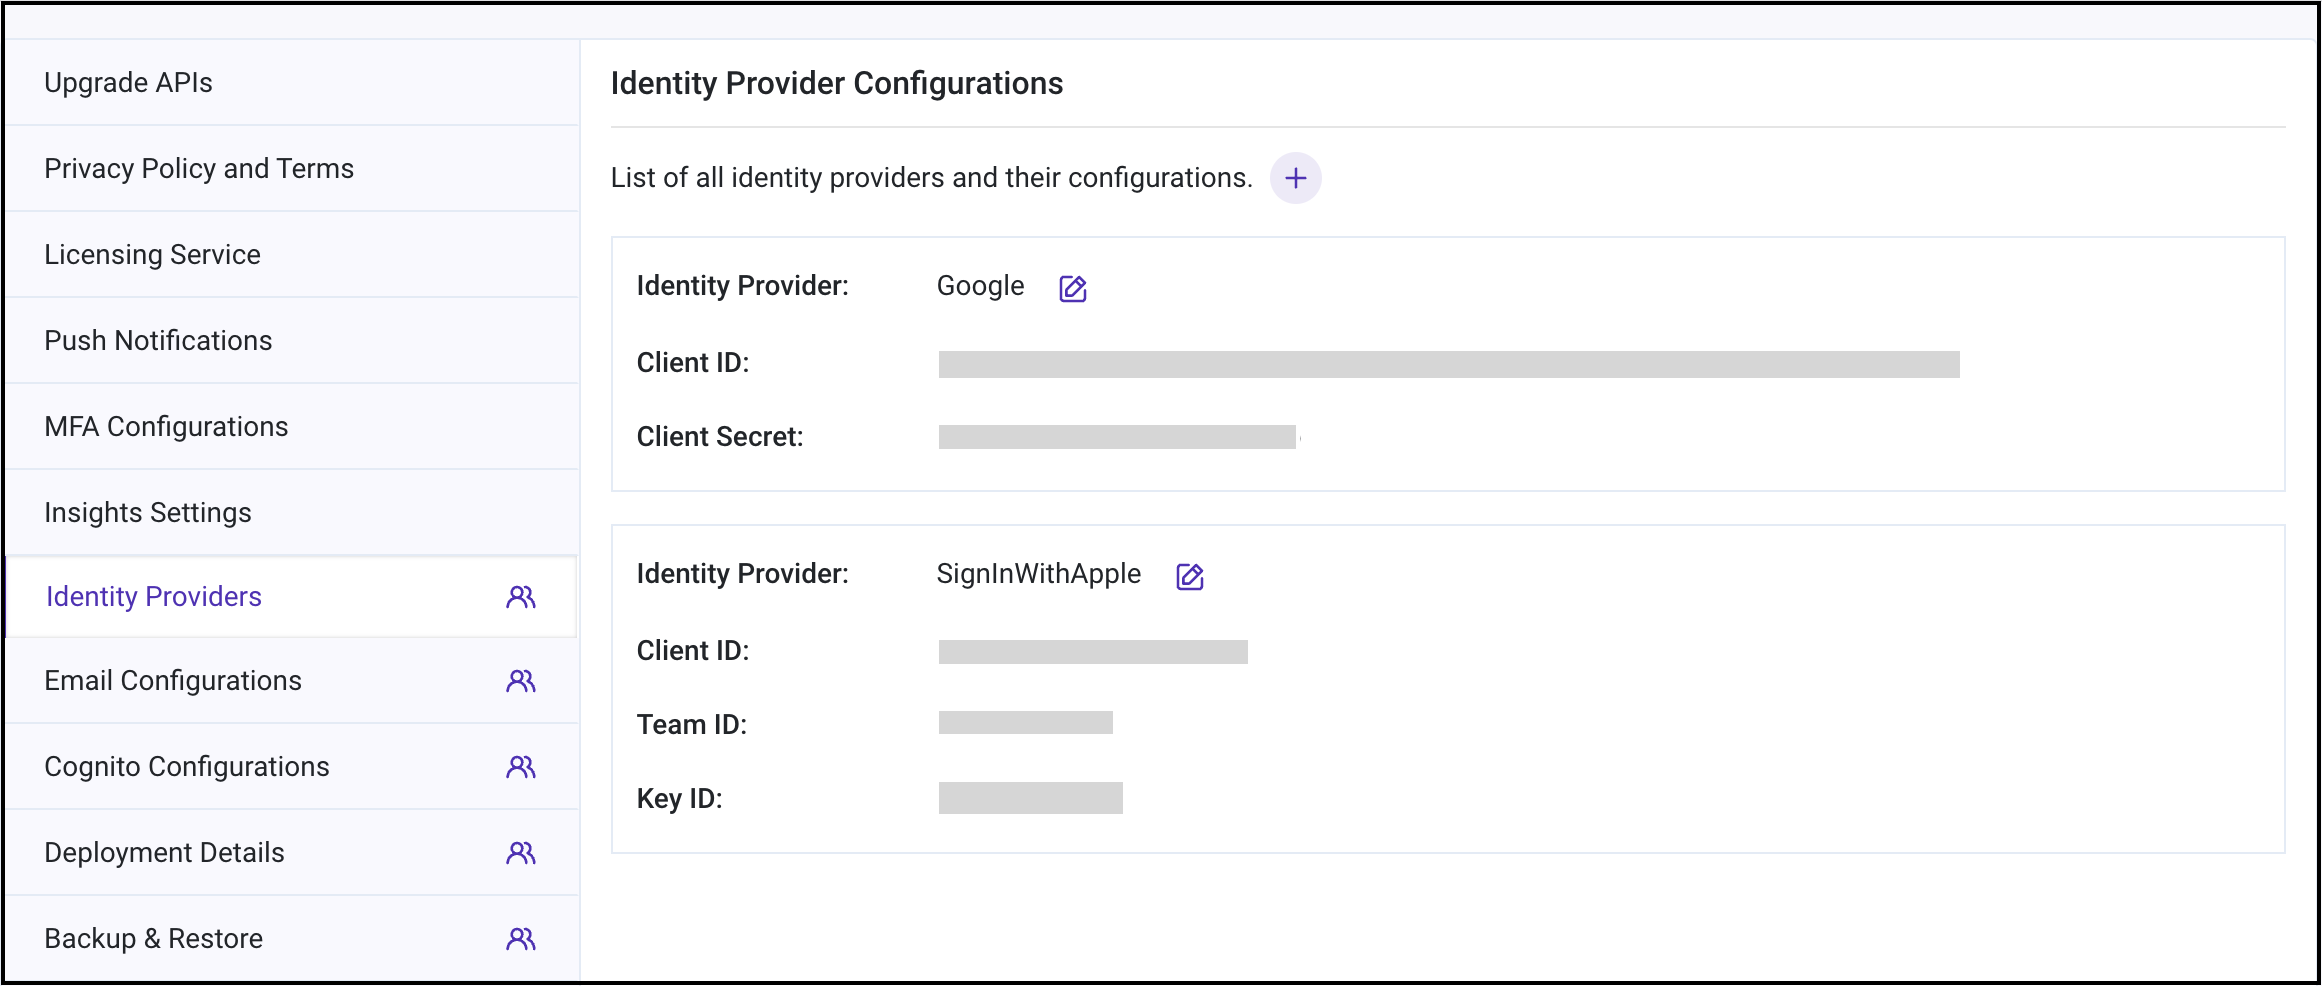
- Click on the '+' icon to add Identity providers configuration.
- Choose "SignInWithApple" from "Identity Provider" dropdown.
- Provide Client ID i.e, services ID noted in step 15 of "Configurations in Apple Developer Account" section.
- Enter "Apple" as Provider Name.
- Provide Key ID noted in step 1 and 10 of "Configurations in Apple Developer Account" section.
- Provide Team ID noted in the step 1, Creating App ID.
- Provide content of private key file downloaded in step 10 of "Configurations in Apple Developer Account" section).

Enable Apple as an Identity Provider
This is not relevant for OAuth only RainMaker
- Log in to RainMaker Dashboard with your admin account. Go to deployment settings.

- Go to the Identity Configurations tab.
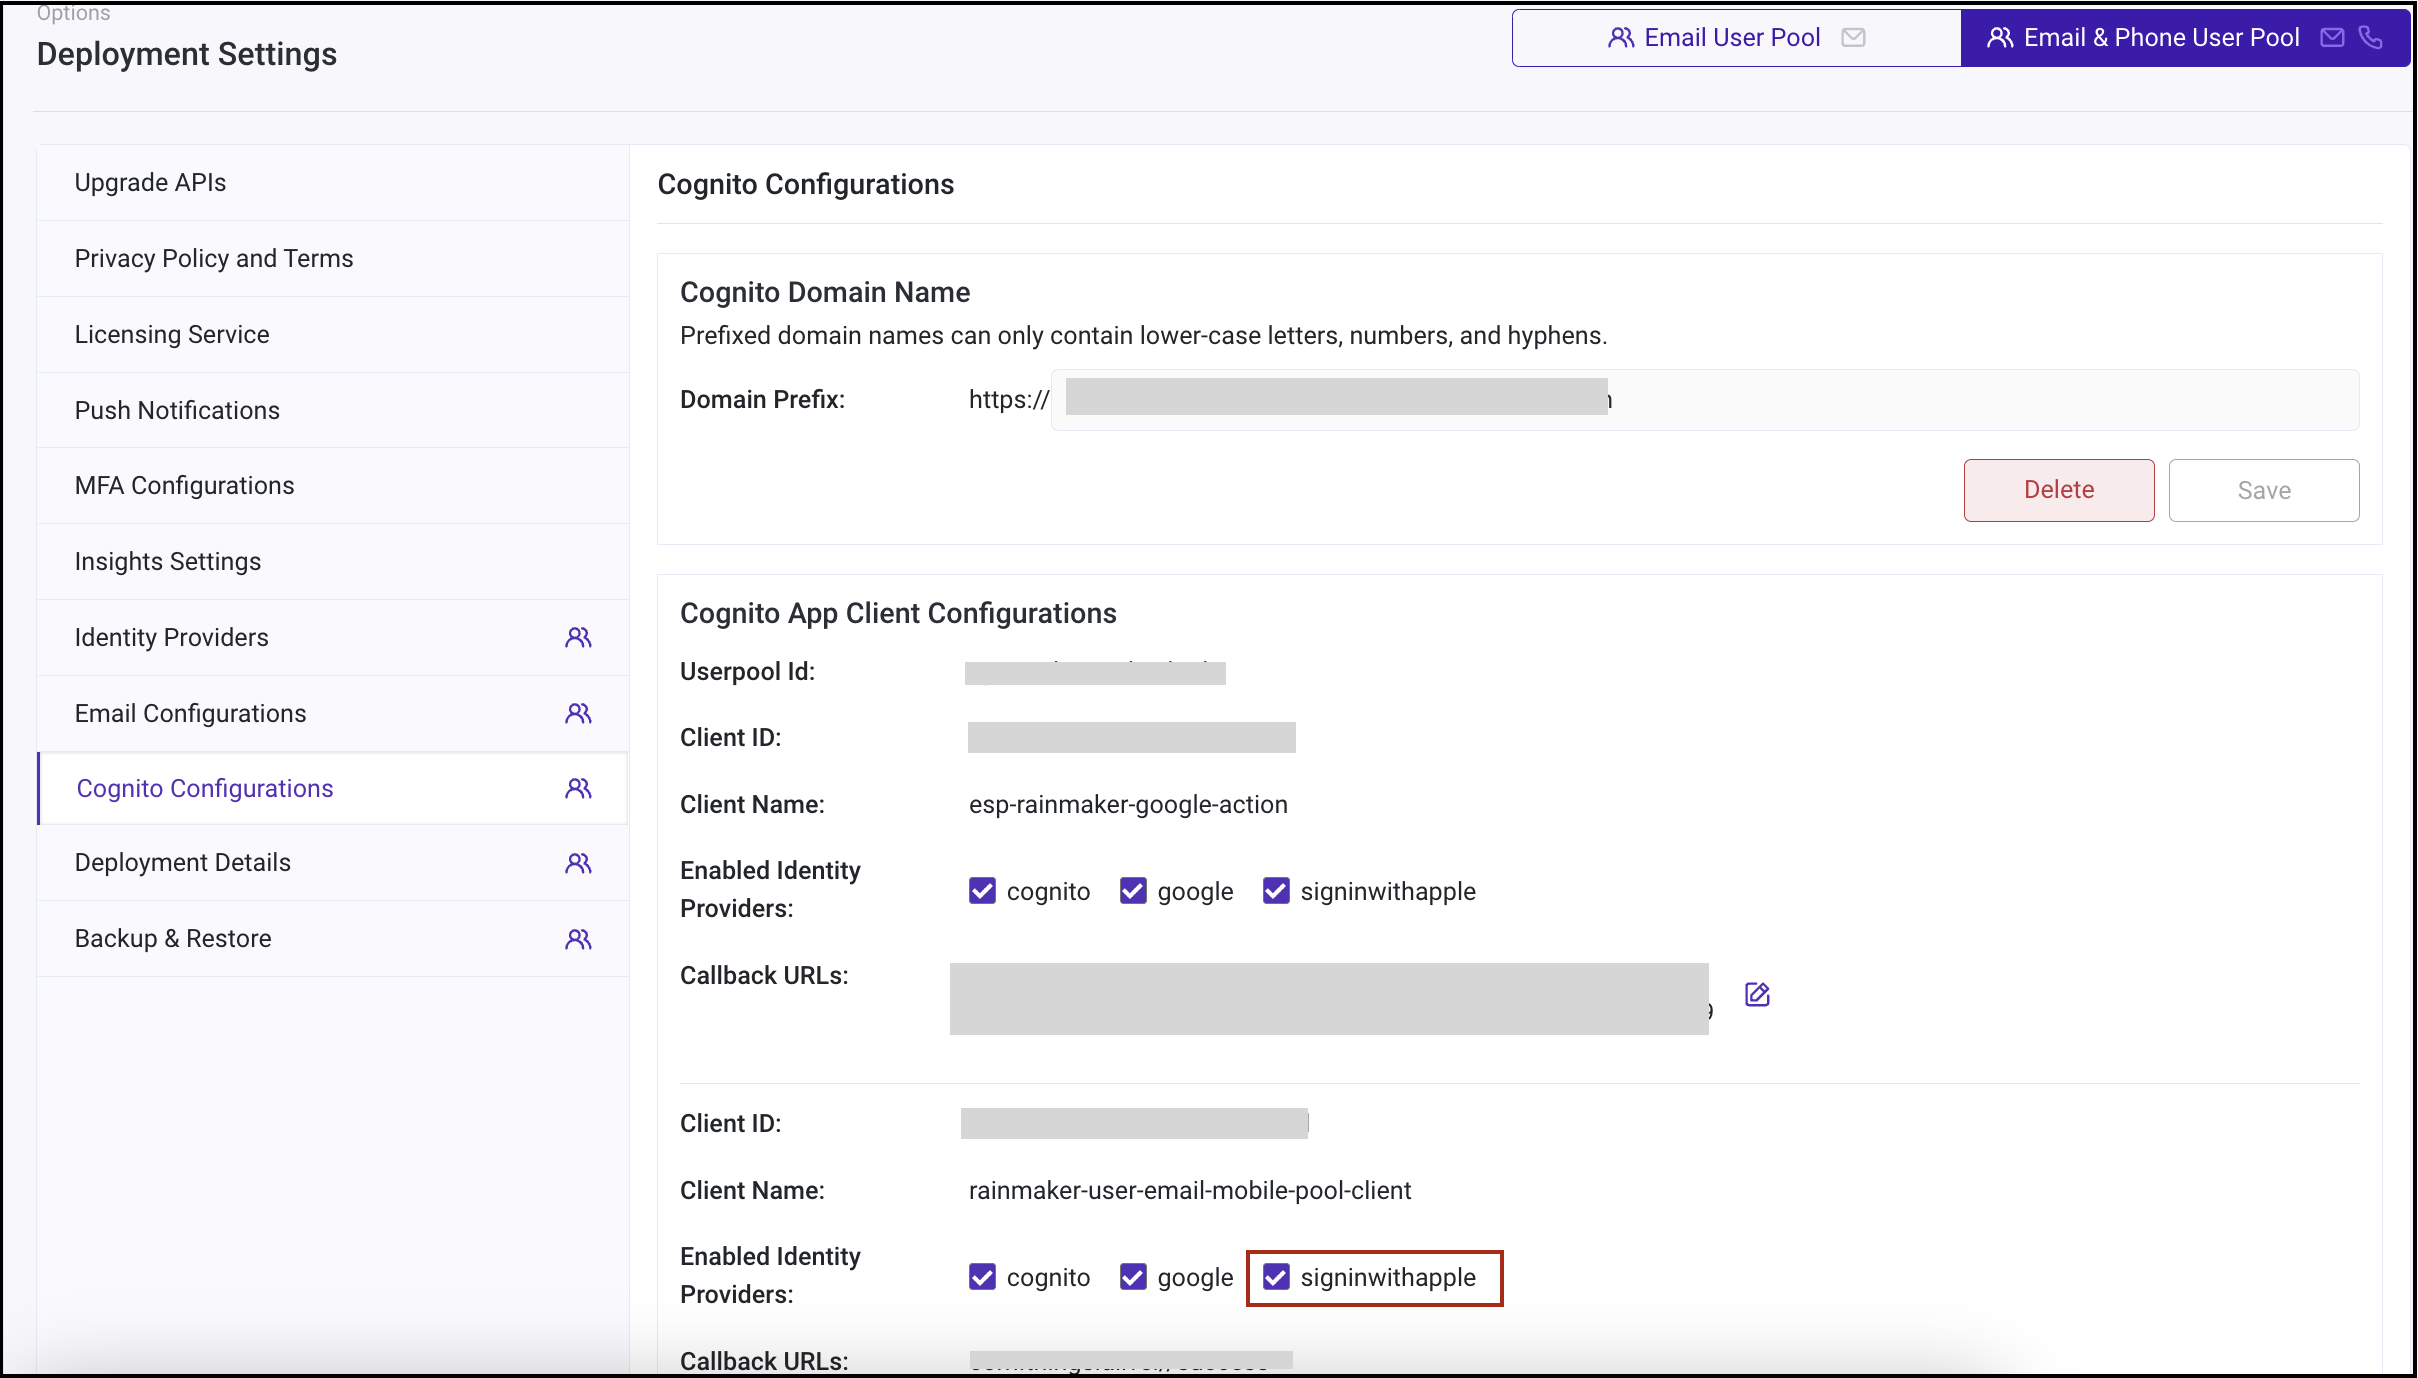
- Enable the 'signinwithapple' identity provider for clients as per your requirements. This will enable users to sign in using Apple to the respective clients.
Configuring callback URL(Redirect URIs)
Callback URL indicates where the user is to be redirected after a successful sign-in using third party authenticating services. After the user successfully signs-up using one of these third party authenticating services, the user will be redirected to one of these URLs.
If users are to be redirected to your phone app, you should form the callback URL for your app. To form the callback URLs(Redirect URLs) for iOS app, please check Getting Redirect URL for iOS app
Configure the callback URLs in RainMaker dashboard with steps given here: Configuring callback URL
Verifying Sign-in With Apple
For OAuth only RainMaker, refer these steps instead.
This section describes the steps to verify if the Sign-in with Apple is configured correctly.
- Login to AWS Console, Go to Cognito Service & click on user pools to get the list of all user pools.

-
Click on the "rainmaker-user-email-mobile-pool".

-
Go to App integration & scroll down to App Client Lists

-
Click on rainmaker-user-email-mobile-pool-client, here you will get the App client information

-
Scroll down and click on View Hosted UI.
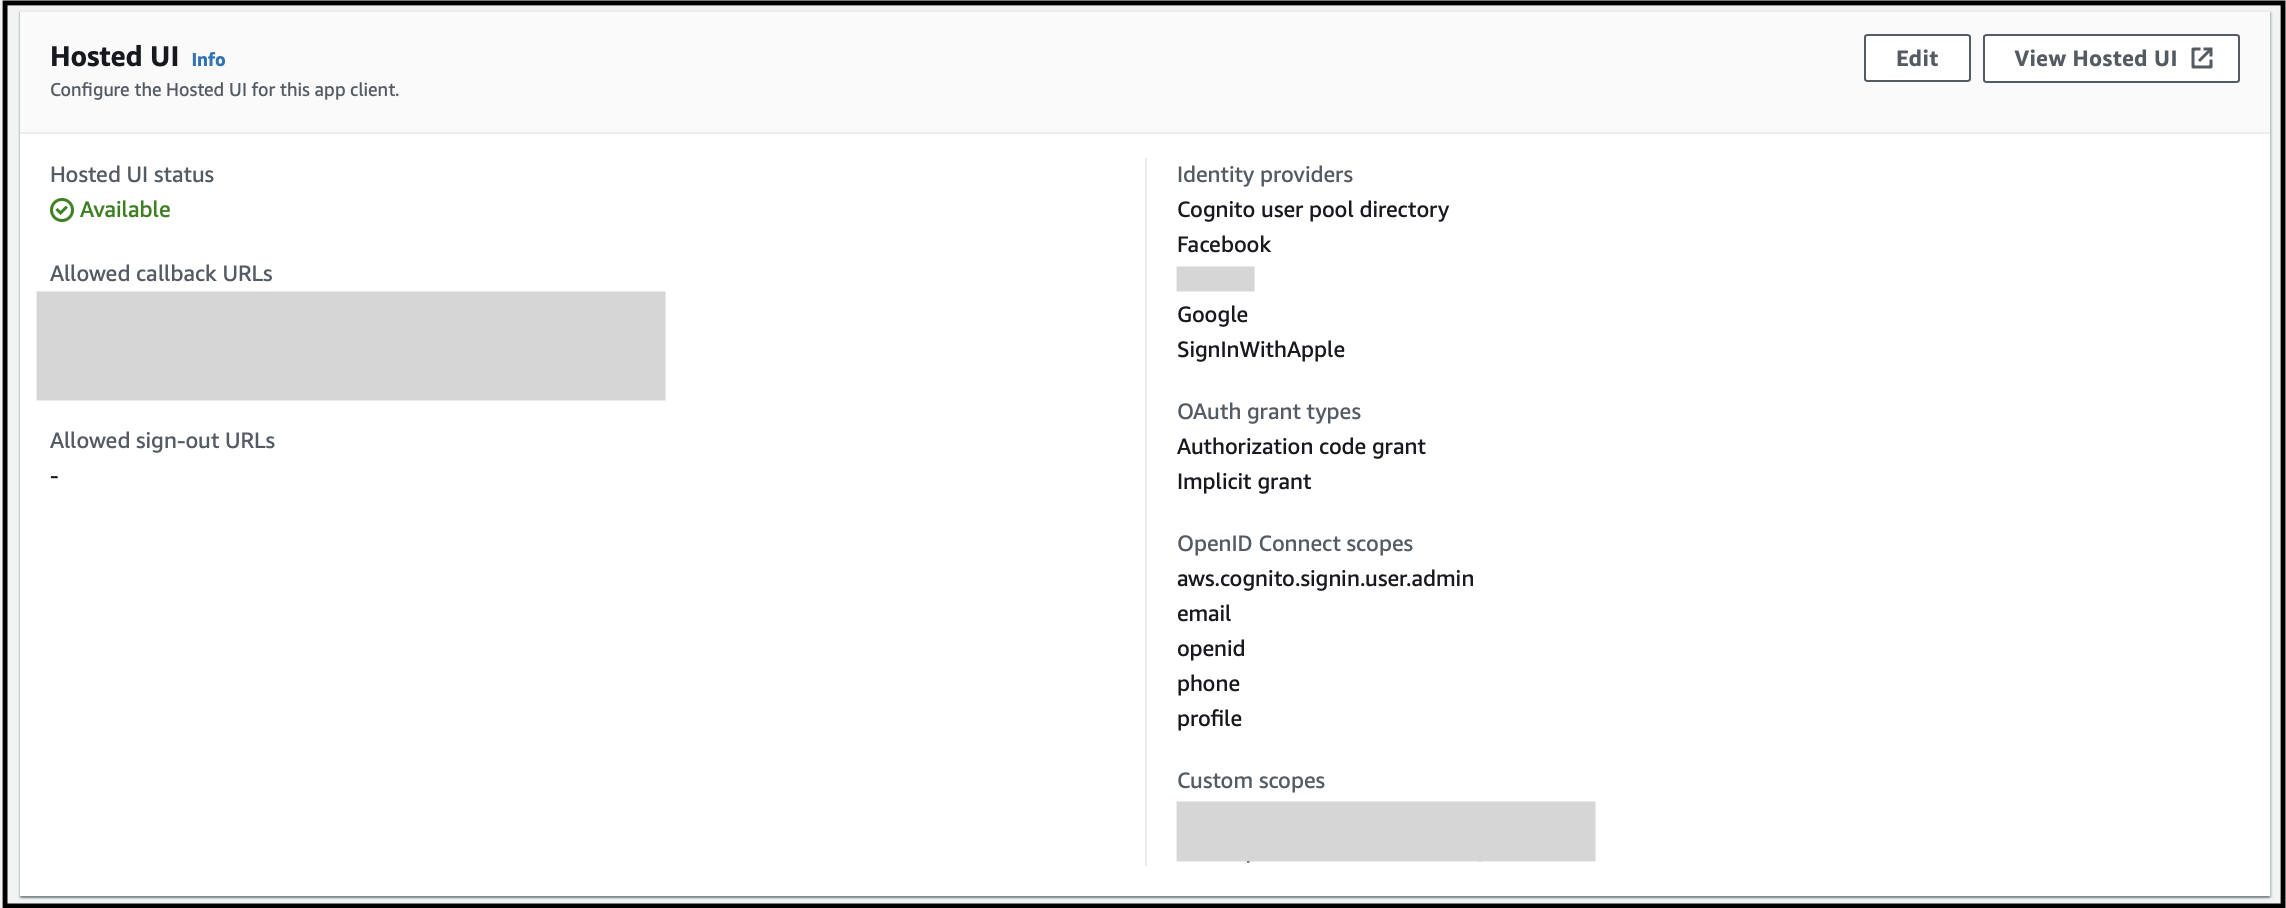
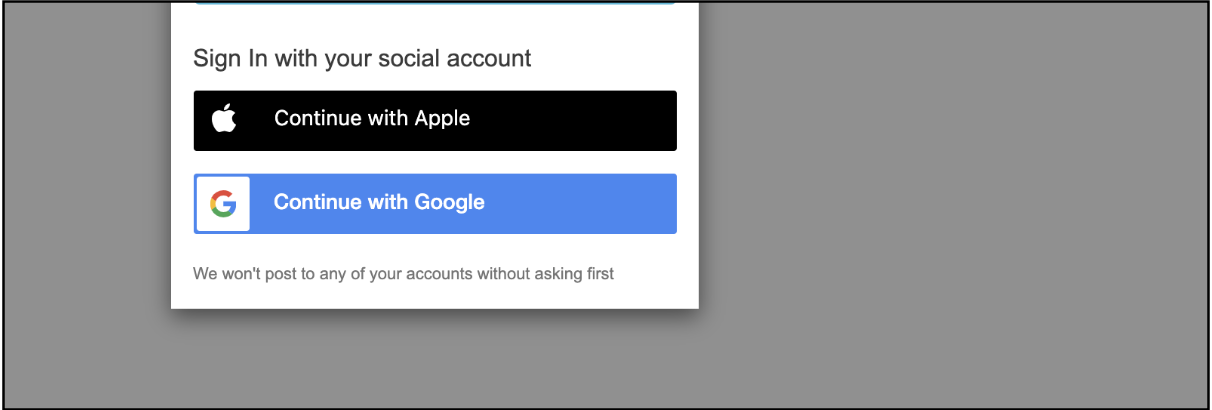
- In the launched Hosted UI, you will be shown multiple options as shown below:
-
Click on Continue with Apple.
-
Enter your Apple ID and the password.
-
After you click the Next button, you will be redirected to the callback URL configured in the Cognito App client settings and you will see an authorization code in the browser URL.
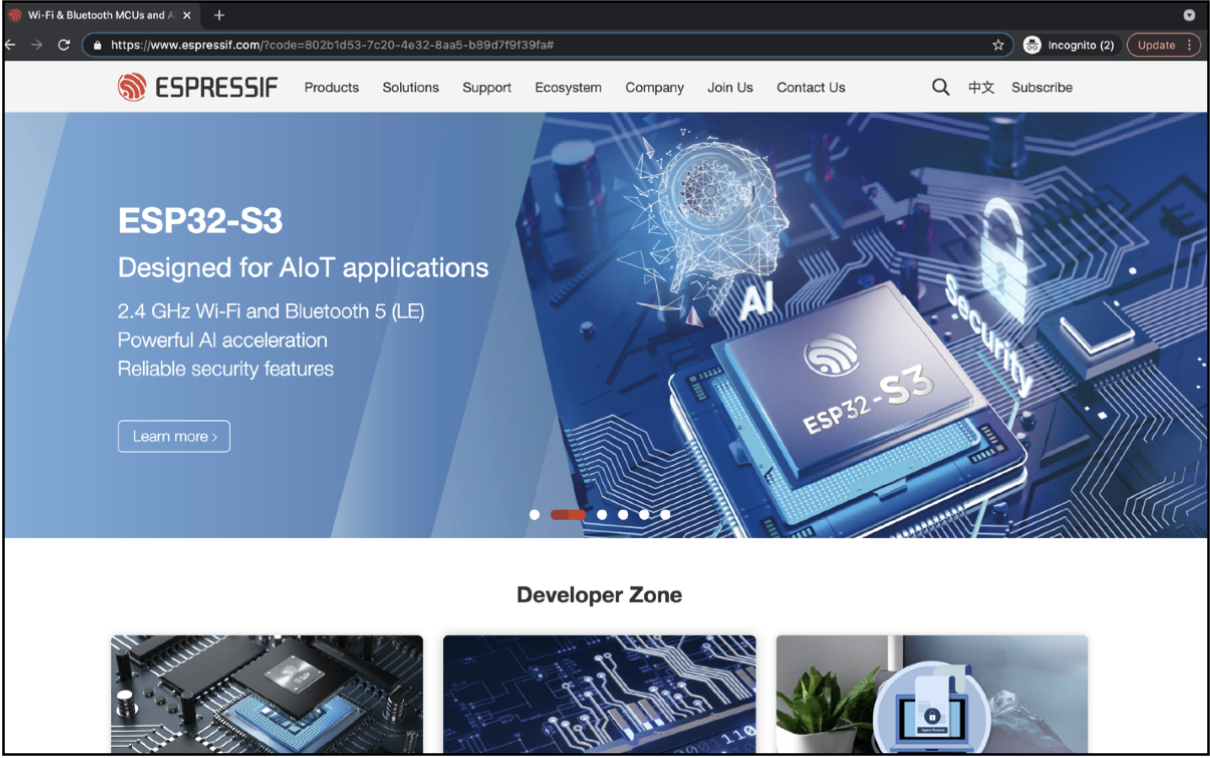
Note - In this example, we have configured Espressif's home page, so the redirection happened to this page.
Email Relay Service
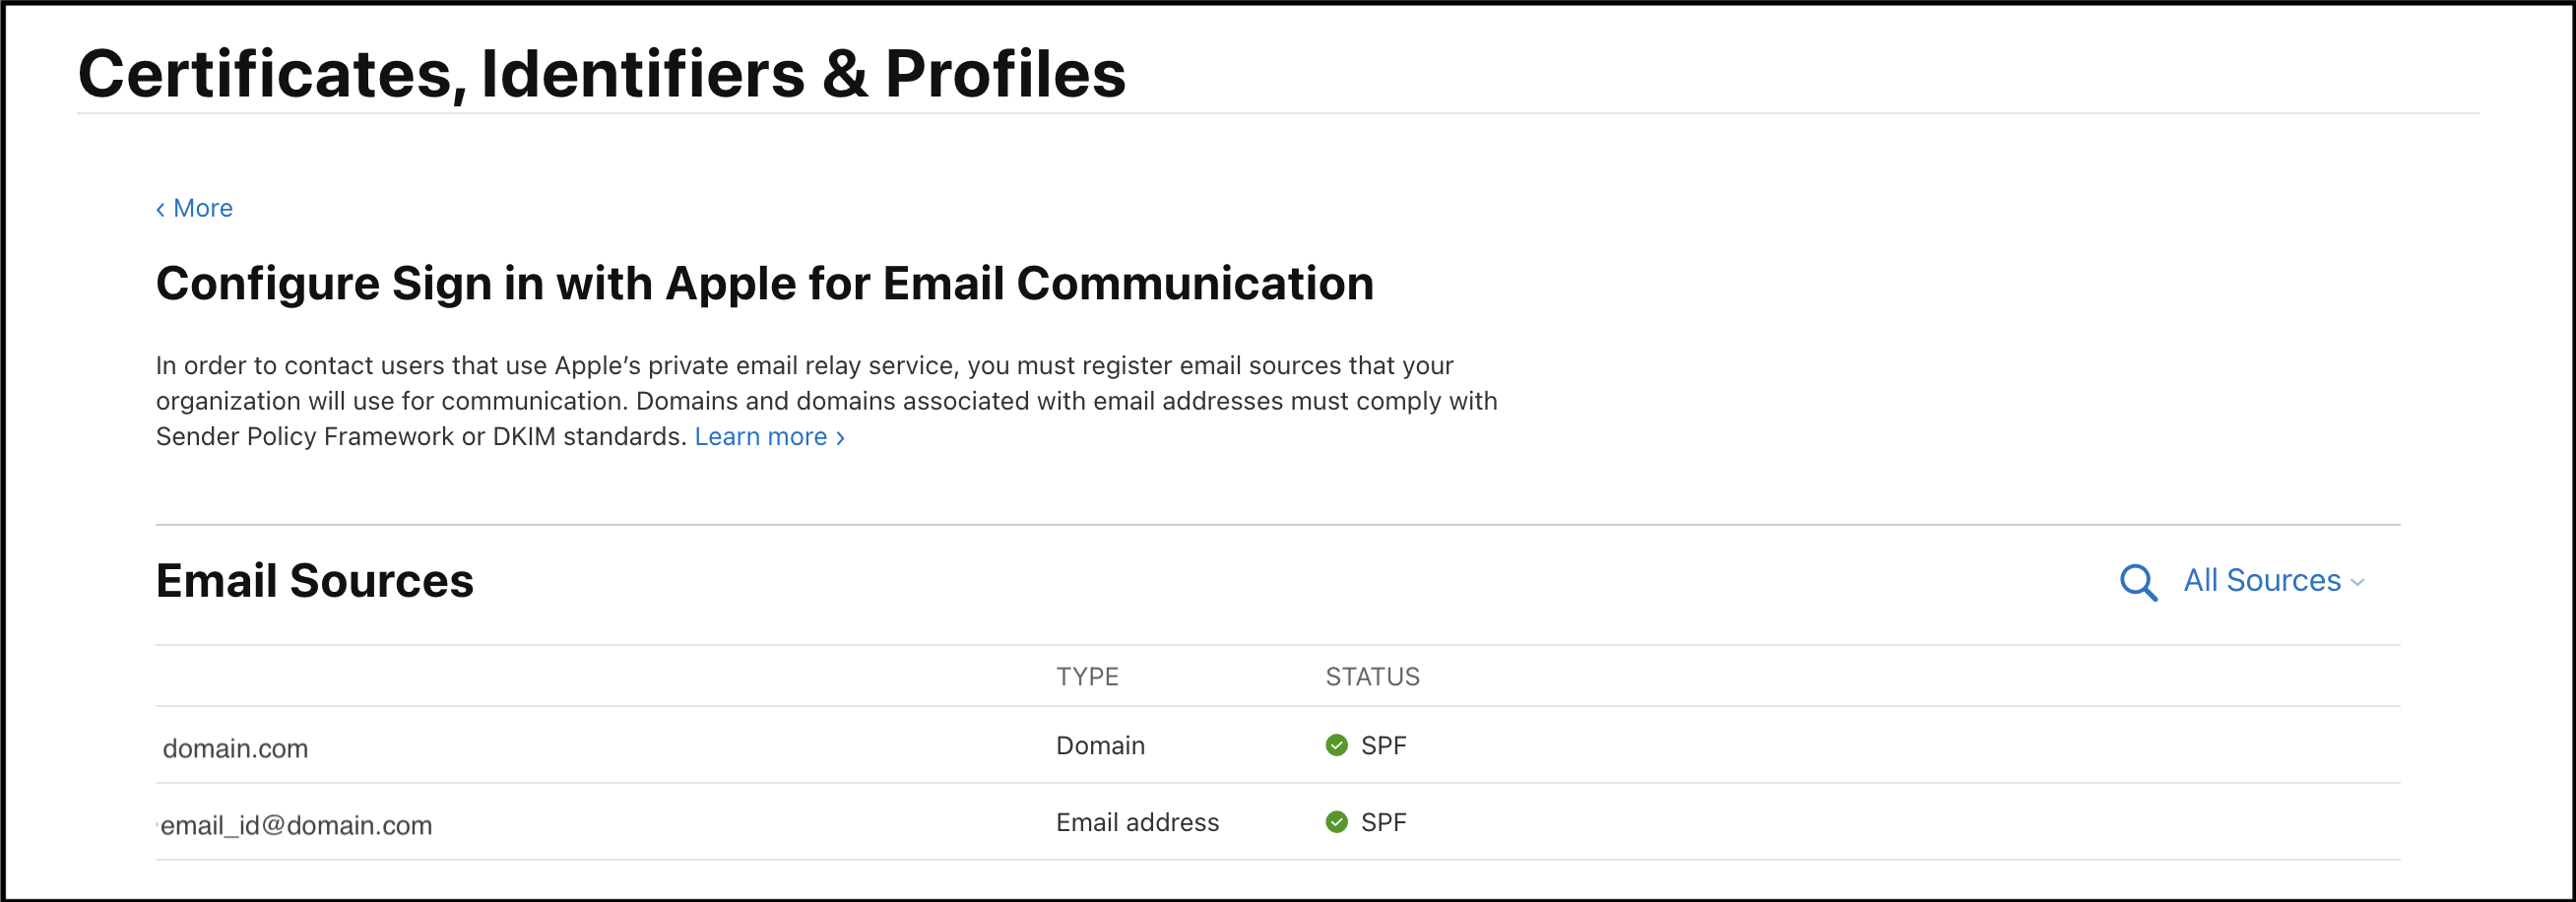
Apple's private email relay service is used by privacy-conscious users that keep their personal email address private when setting up an account. In order to send email messages through the relay service to these users, you will need to register your outbound email domains, subdomains, or email addresses. All registered domains must create Sender Policy Framework (SPF) DNS TXT records in order to transit Apple's private mail relay.
To check if your organization email domain has an SPF record:
- Go to https://dnschecker.org/spf-record-validation.php
- Enter you email domain and click on validate
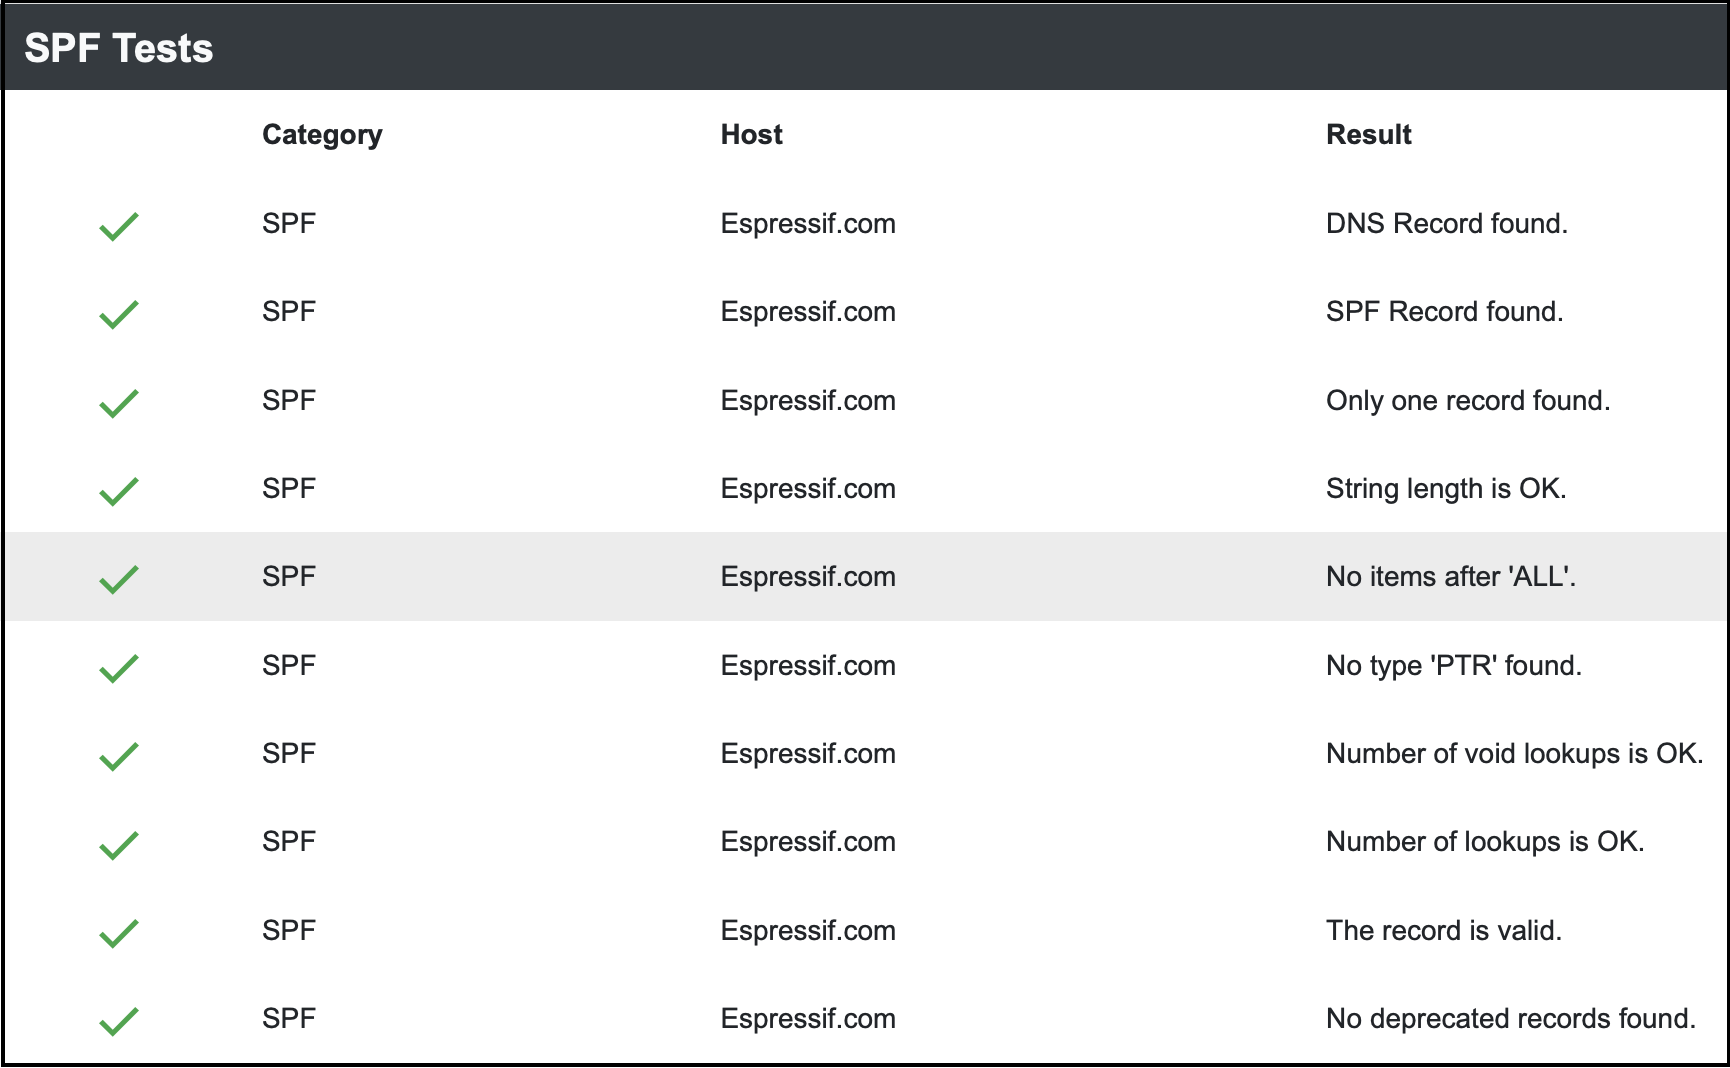
- You would see the output as below as you scroll down. This means that the SPF record exist for your email domain.
Steps to add a Domain:
- In Certificates, Identifiers & Profiles, select More from the sidebar, and click Configure Sign in with Apple for Email Communication.
- In the Email Sources section, click the Add button (+) in the upper-left corner.
- Enter a comma-delimited list of domains, subdomains and unique email addresses that will be used for email communication and click Next.
- Confirm your entered email sources and click Register.
- The below table will display if the registered email source passed an SPF check.
