RainMaker Deployment related issues
I have completed the deployment of RainMaker Services, but I did not receive any emails for the deployment details. What do I do?
Answer
Please check if the deployment details email are in the junk email box. If the junk email box doesn't contain the email for the deployment details, then further investigation is needed.
- Check if the following steps are followed - Configuring the Email sending Service in the RainMaker region/s
- Make sure if the required RainMaker components are deployed successfully, from the CloudFormation dashboard, as mentioned in deployment guide- Verifying RainMaker Deployment is completed.
- If all the required stacks are deployed successfully, then the password for super admin can be reset from the RainMaker dashboard.
Steps to reset password:
-
On the RainMaker dashboard login page, select the option "Forgot Password".
-
On the next page, you will be prompted to enter the associated Email ID. Enter the super-admin email ID. You will receive a verification code on your email address.
-
On the next page, Enter a preferred password and verification code.
-
You will be able to log in to RainMaker dashboard with new credentials.
Getting the RainMaker API URL (Base URL)
-
Login to RainMaker dashboard with admin credentials.
-
Go to the Deployment Settings tab.
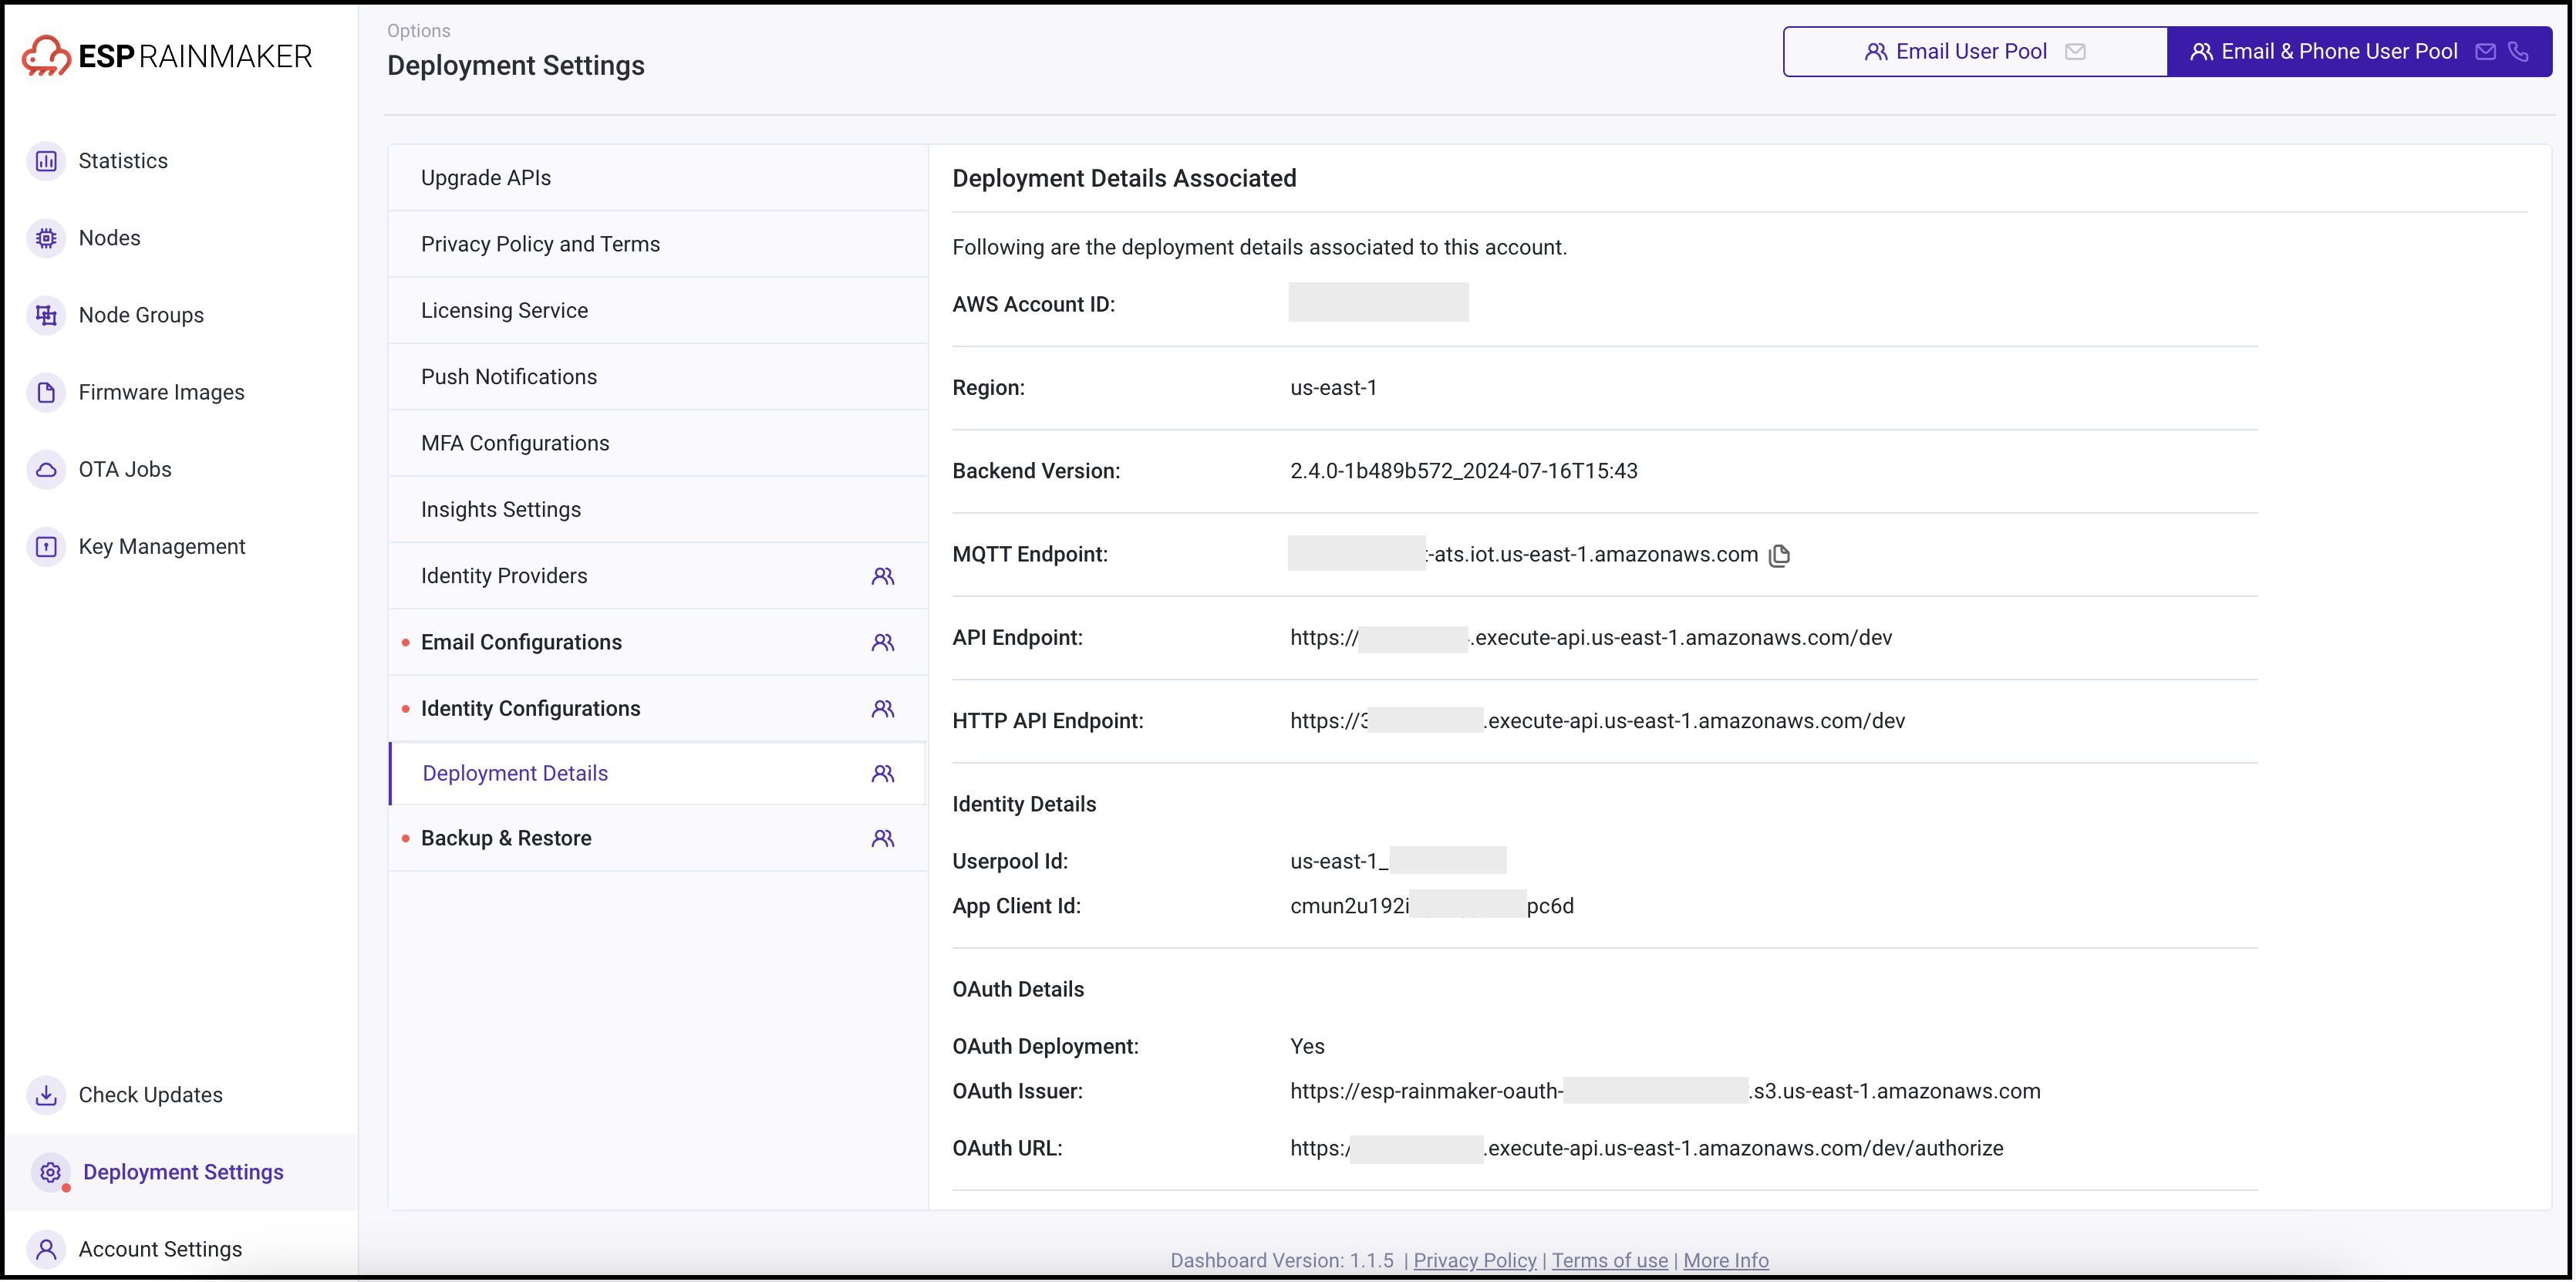
- For API gateway, there are two types supported:
- REST gateway - This is the legacy gateway used by default for all deployments.
- HTTP gateway - Newly introduced cost effective (~70% cheaper) gateway. (Note: This requires user migration to the new pool. For steps: User Pool Migration Guide)
ESP API Rate Limiter add-on is not available when you choose HTTP gateway. This might lead to intentional API request overload by malicious users. For OAuth only RainMaker, only HTTP gateway is supported.
-
You can choose API Endpoint of your choice
-
You may contact the ESP RainMaker support team (esp-rainmaker-support@espressif.com) for further doubts.
Deployment of "ESP-RainMaker-Core" is failing with below error, What should I do?
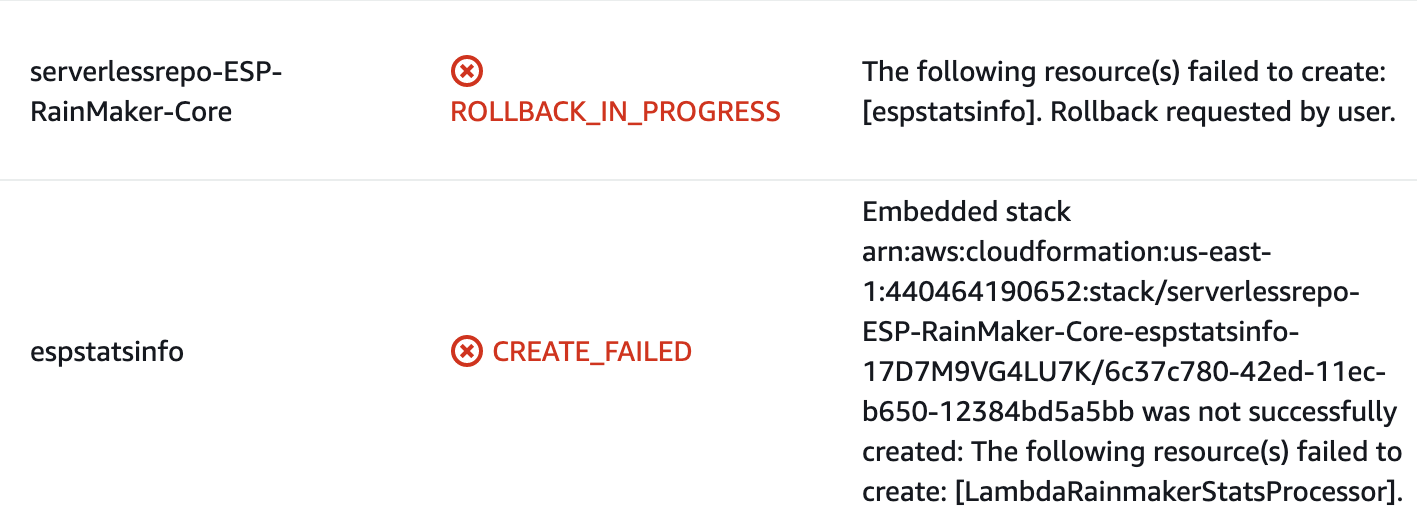
Answer
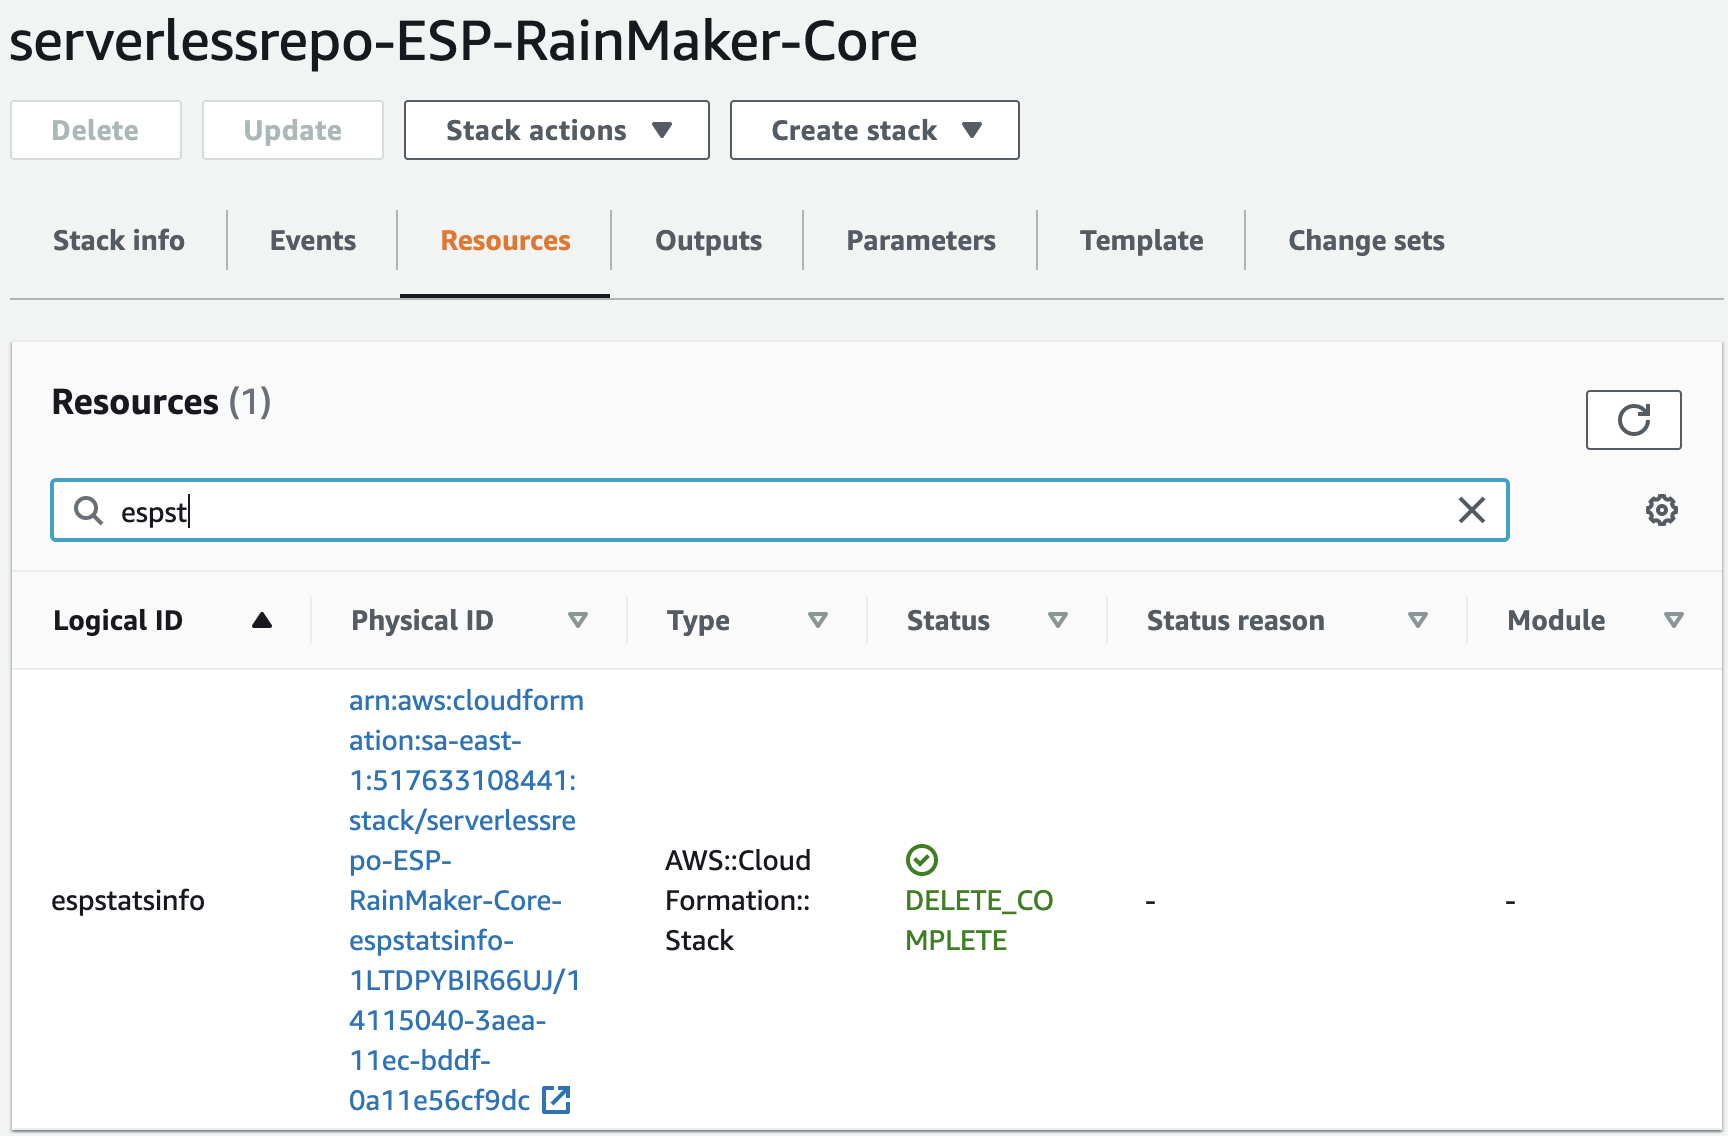
- Login to AWS console.
- From the AWS console, search for "CloudFormation" and click on "serverlessrepo-ESP-RainMaker-Core"
- Then goto resource tab and search for "espstatsinfo" and click on the stack link provided.
- Goto "Events" tab and search for "CREATE_FAILED"
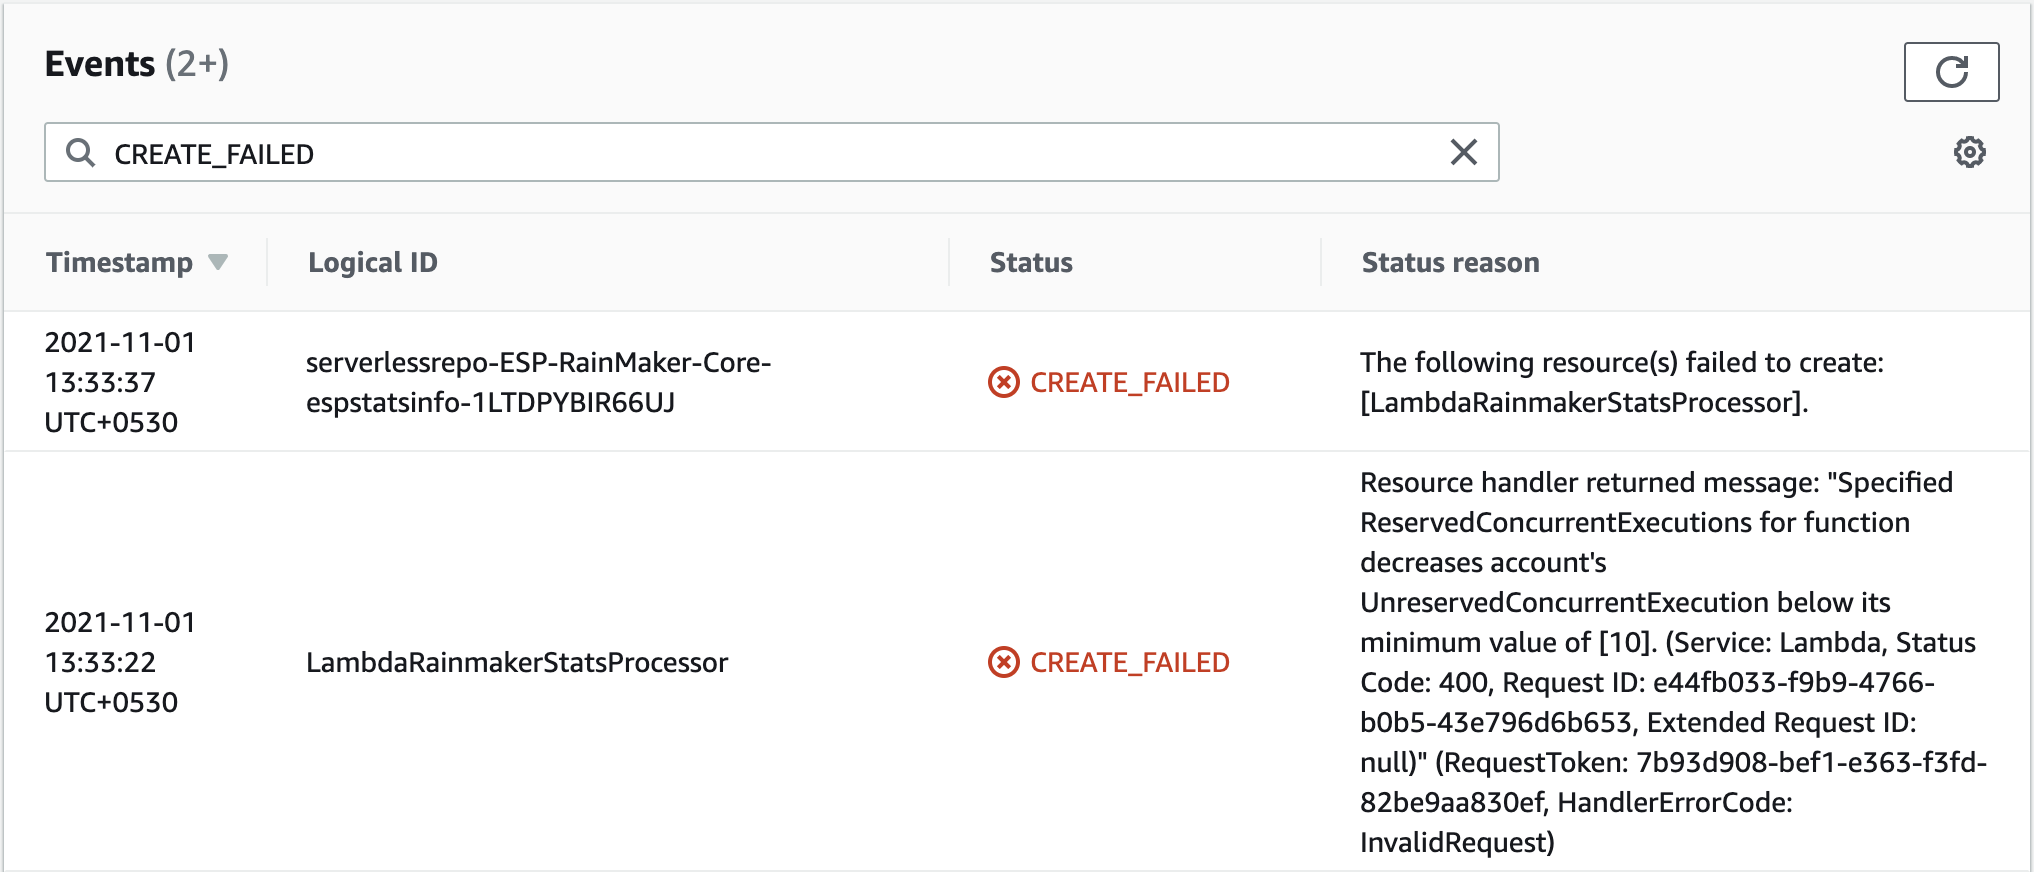
- If the error is shown as above, then the issue is related to lambda concurrency. For which you may need to raise a support ticket with AWS.
Below are the steps for raising a Support ticket
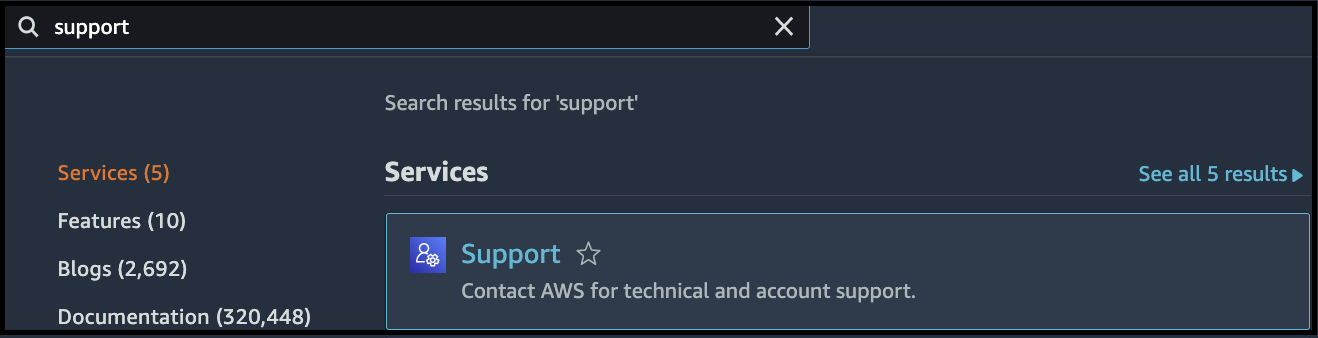
- Go to your AWS console and search for "Support"
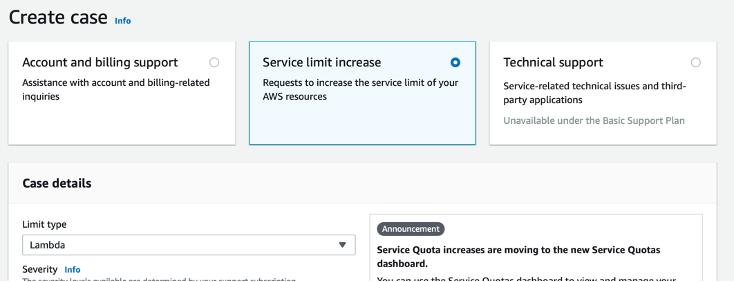
- Then click on "Create Case"
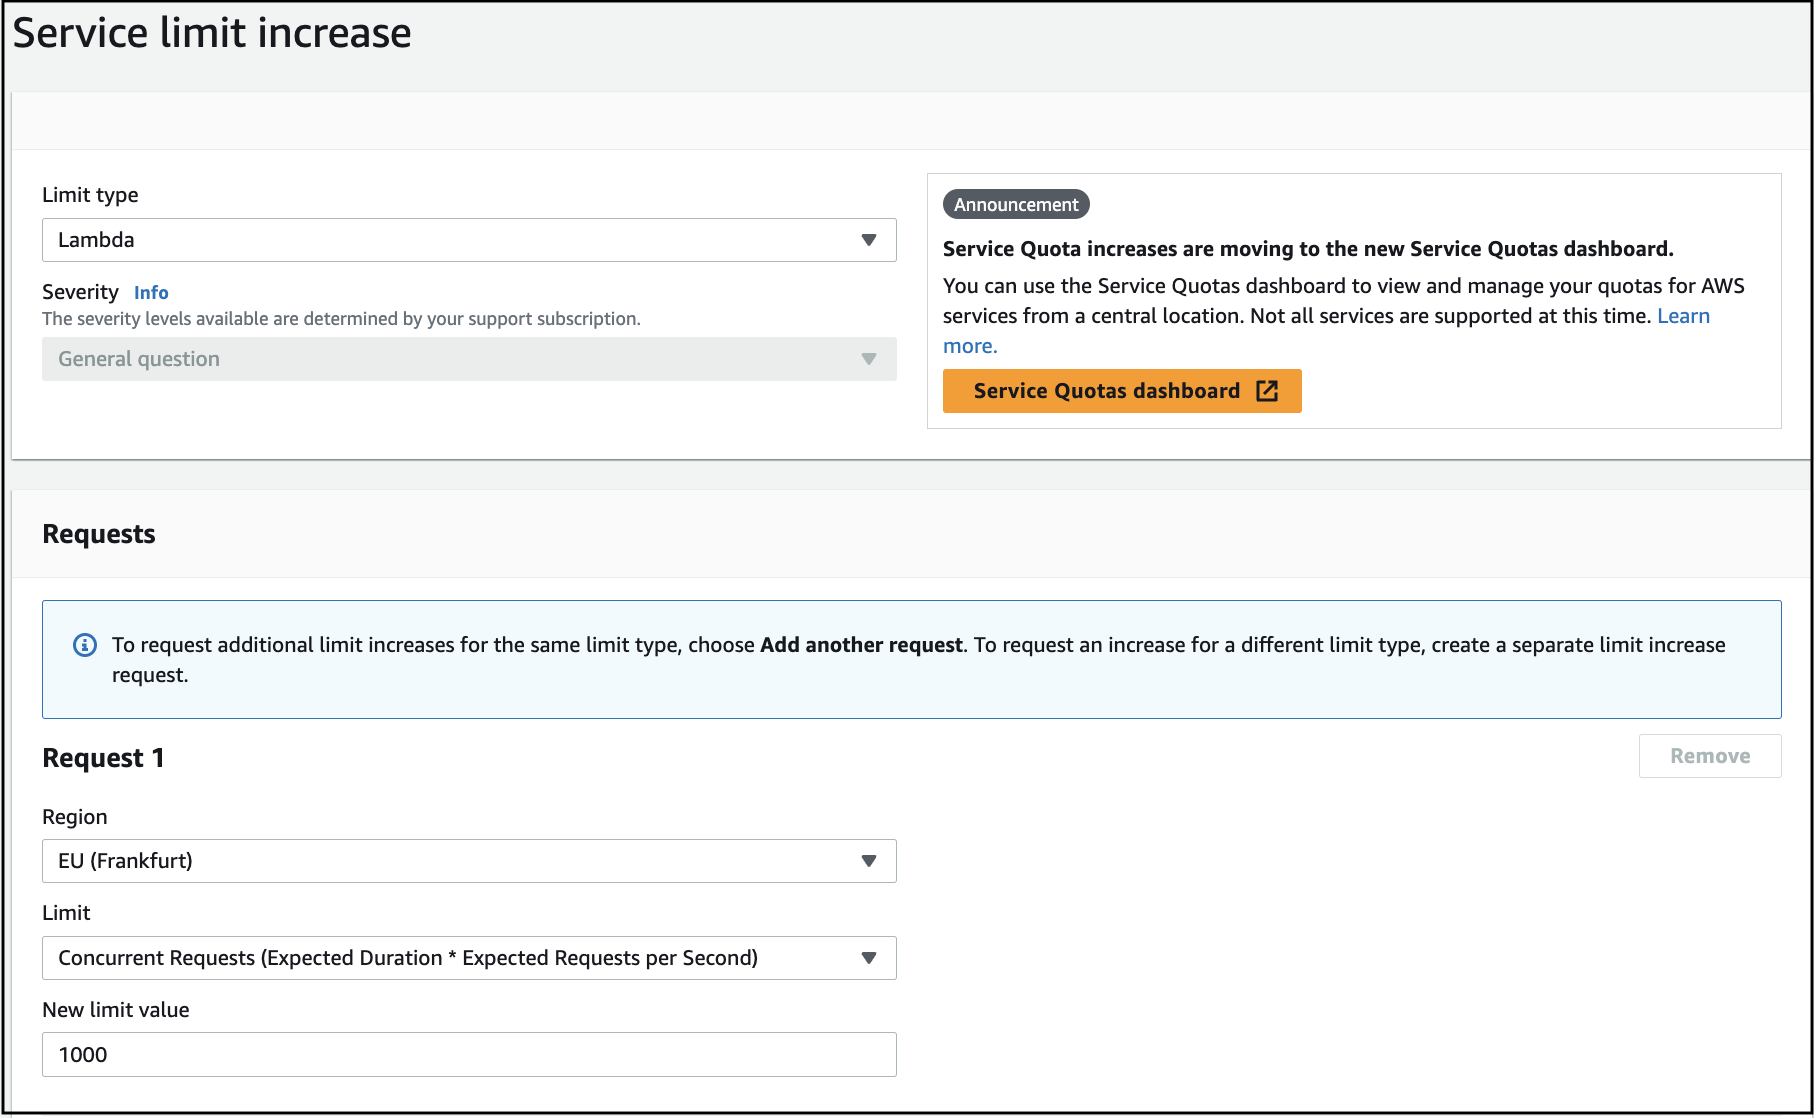
- Then select "Service limit increase' and then select Limit Type as "Lambda" as shown below:
- Then fill in the case details:
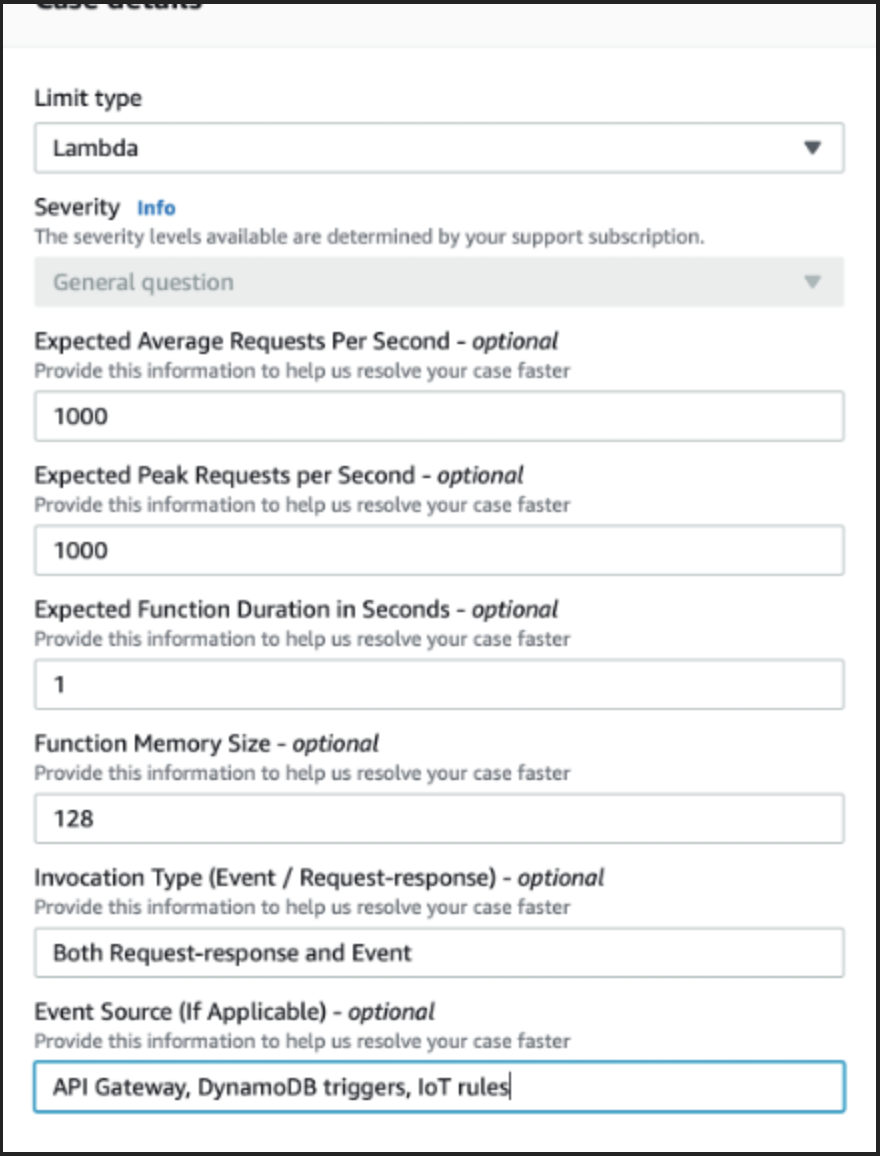 5. Add the request:
-
Select your deployment region
-
Limit: Concurrent Requests (Expected Duration * Expected Requests per Second)
-
New Limit Value: 1000
-
Add Case Description.
We are trying to deploy our product: https://rainmaker.espressif.com/ Since the current limit for concurrency is set to 10 we are not able to deploy our product. Can you please set the concurrency limit to 1000.
-
Submit the request.
I am not able to find the ESP-RainMaker-Base-API stack in the CloudFormation.
Answer
- We have disabled access to the ESP-RainMaker-Base-API after the initial deployment of RainMaker.
- If you are cleaning and redeploying the RainMaker, please contact the Espressif RainMaker team (esp-rainmaker-support@espressif.com) and request access to the ESP-RainMaker-Base-API stack.
- There is no need to upgrade the ESP-RainMaker-Base-API if you are only performing Rainmaker upgrades.
How to confirm if system is functional after the downtime for v3.1.0 upgrade.
Answer
- Login to Aws management console
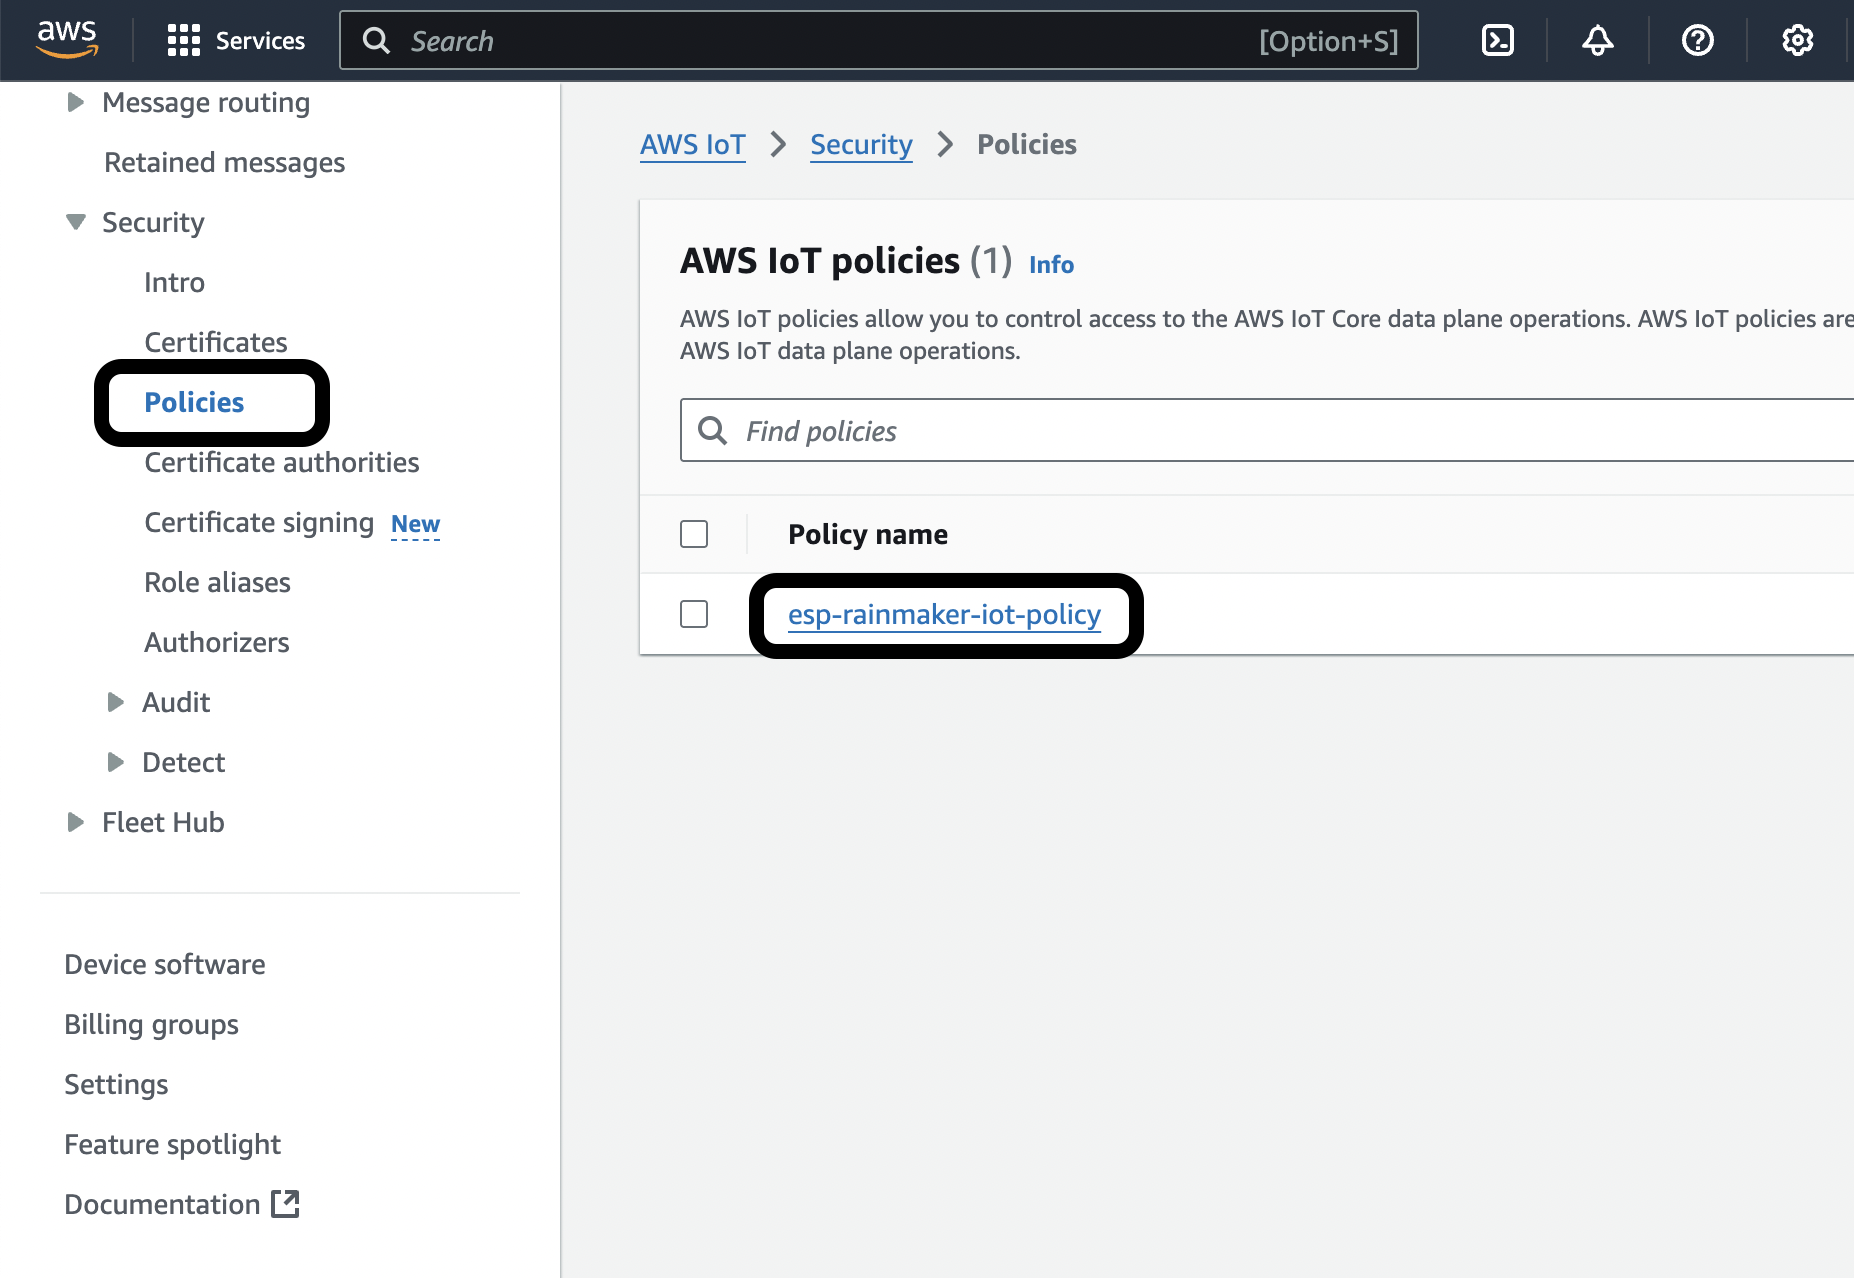
- Navigate to IoT Core AWS service
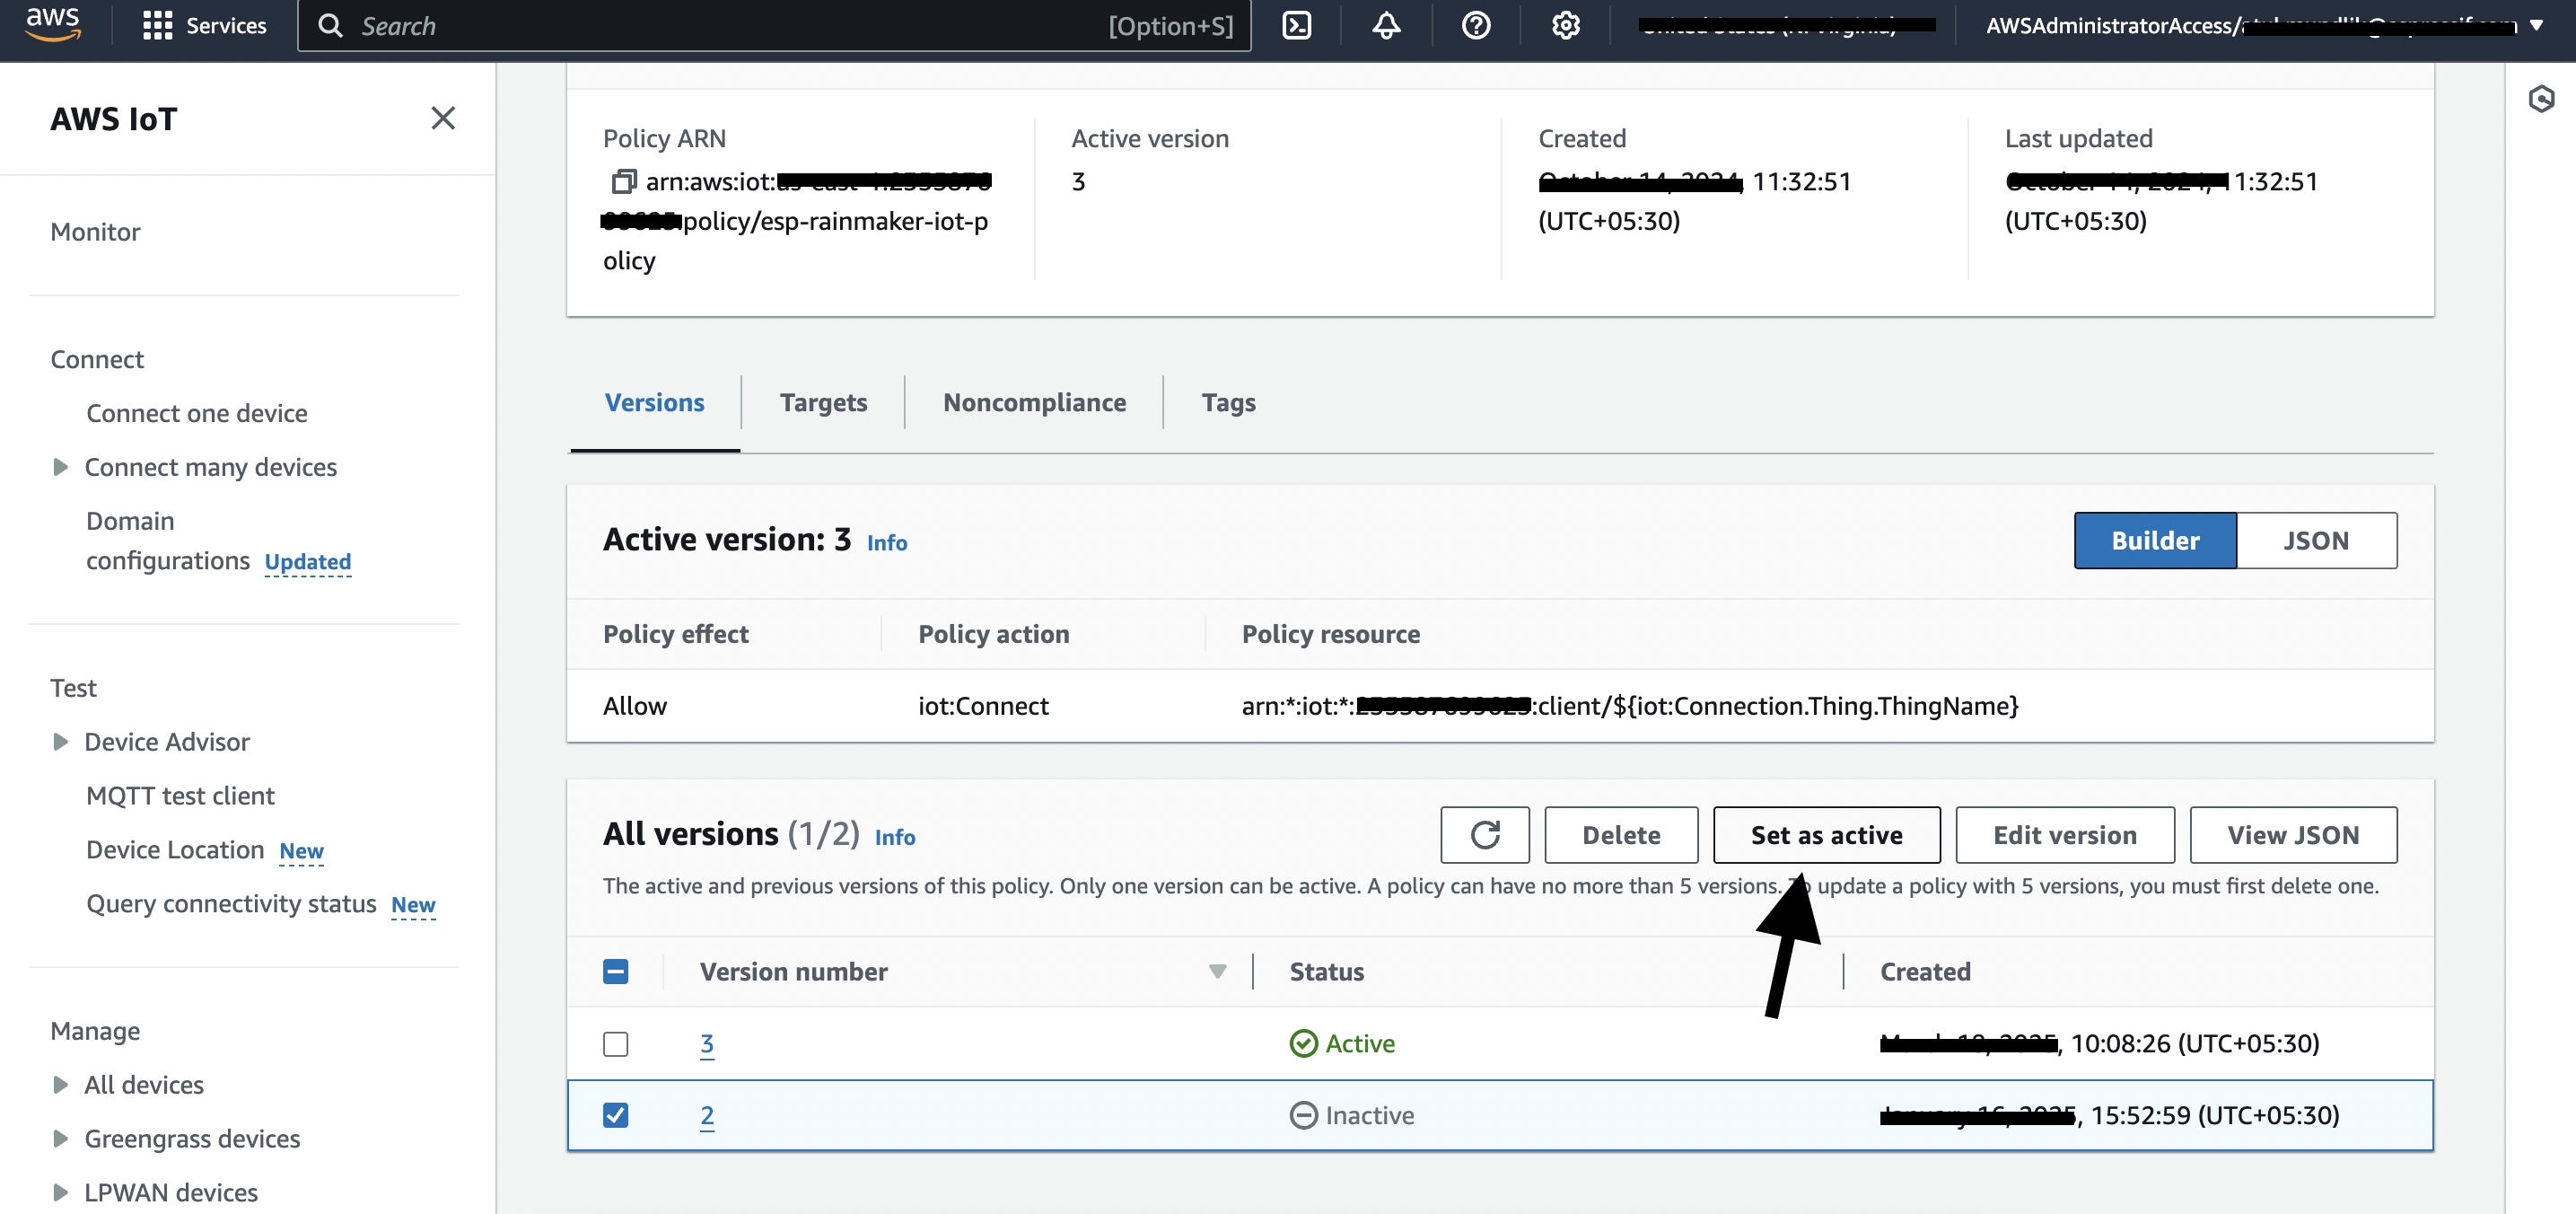
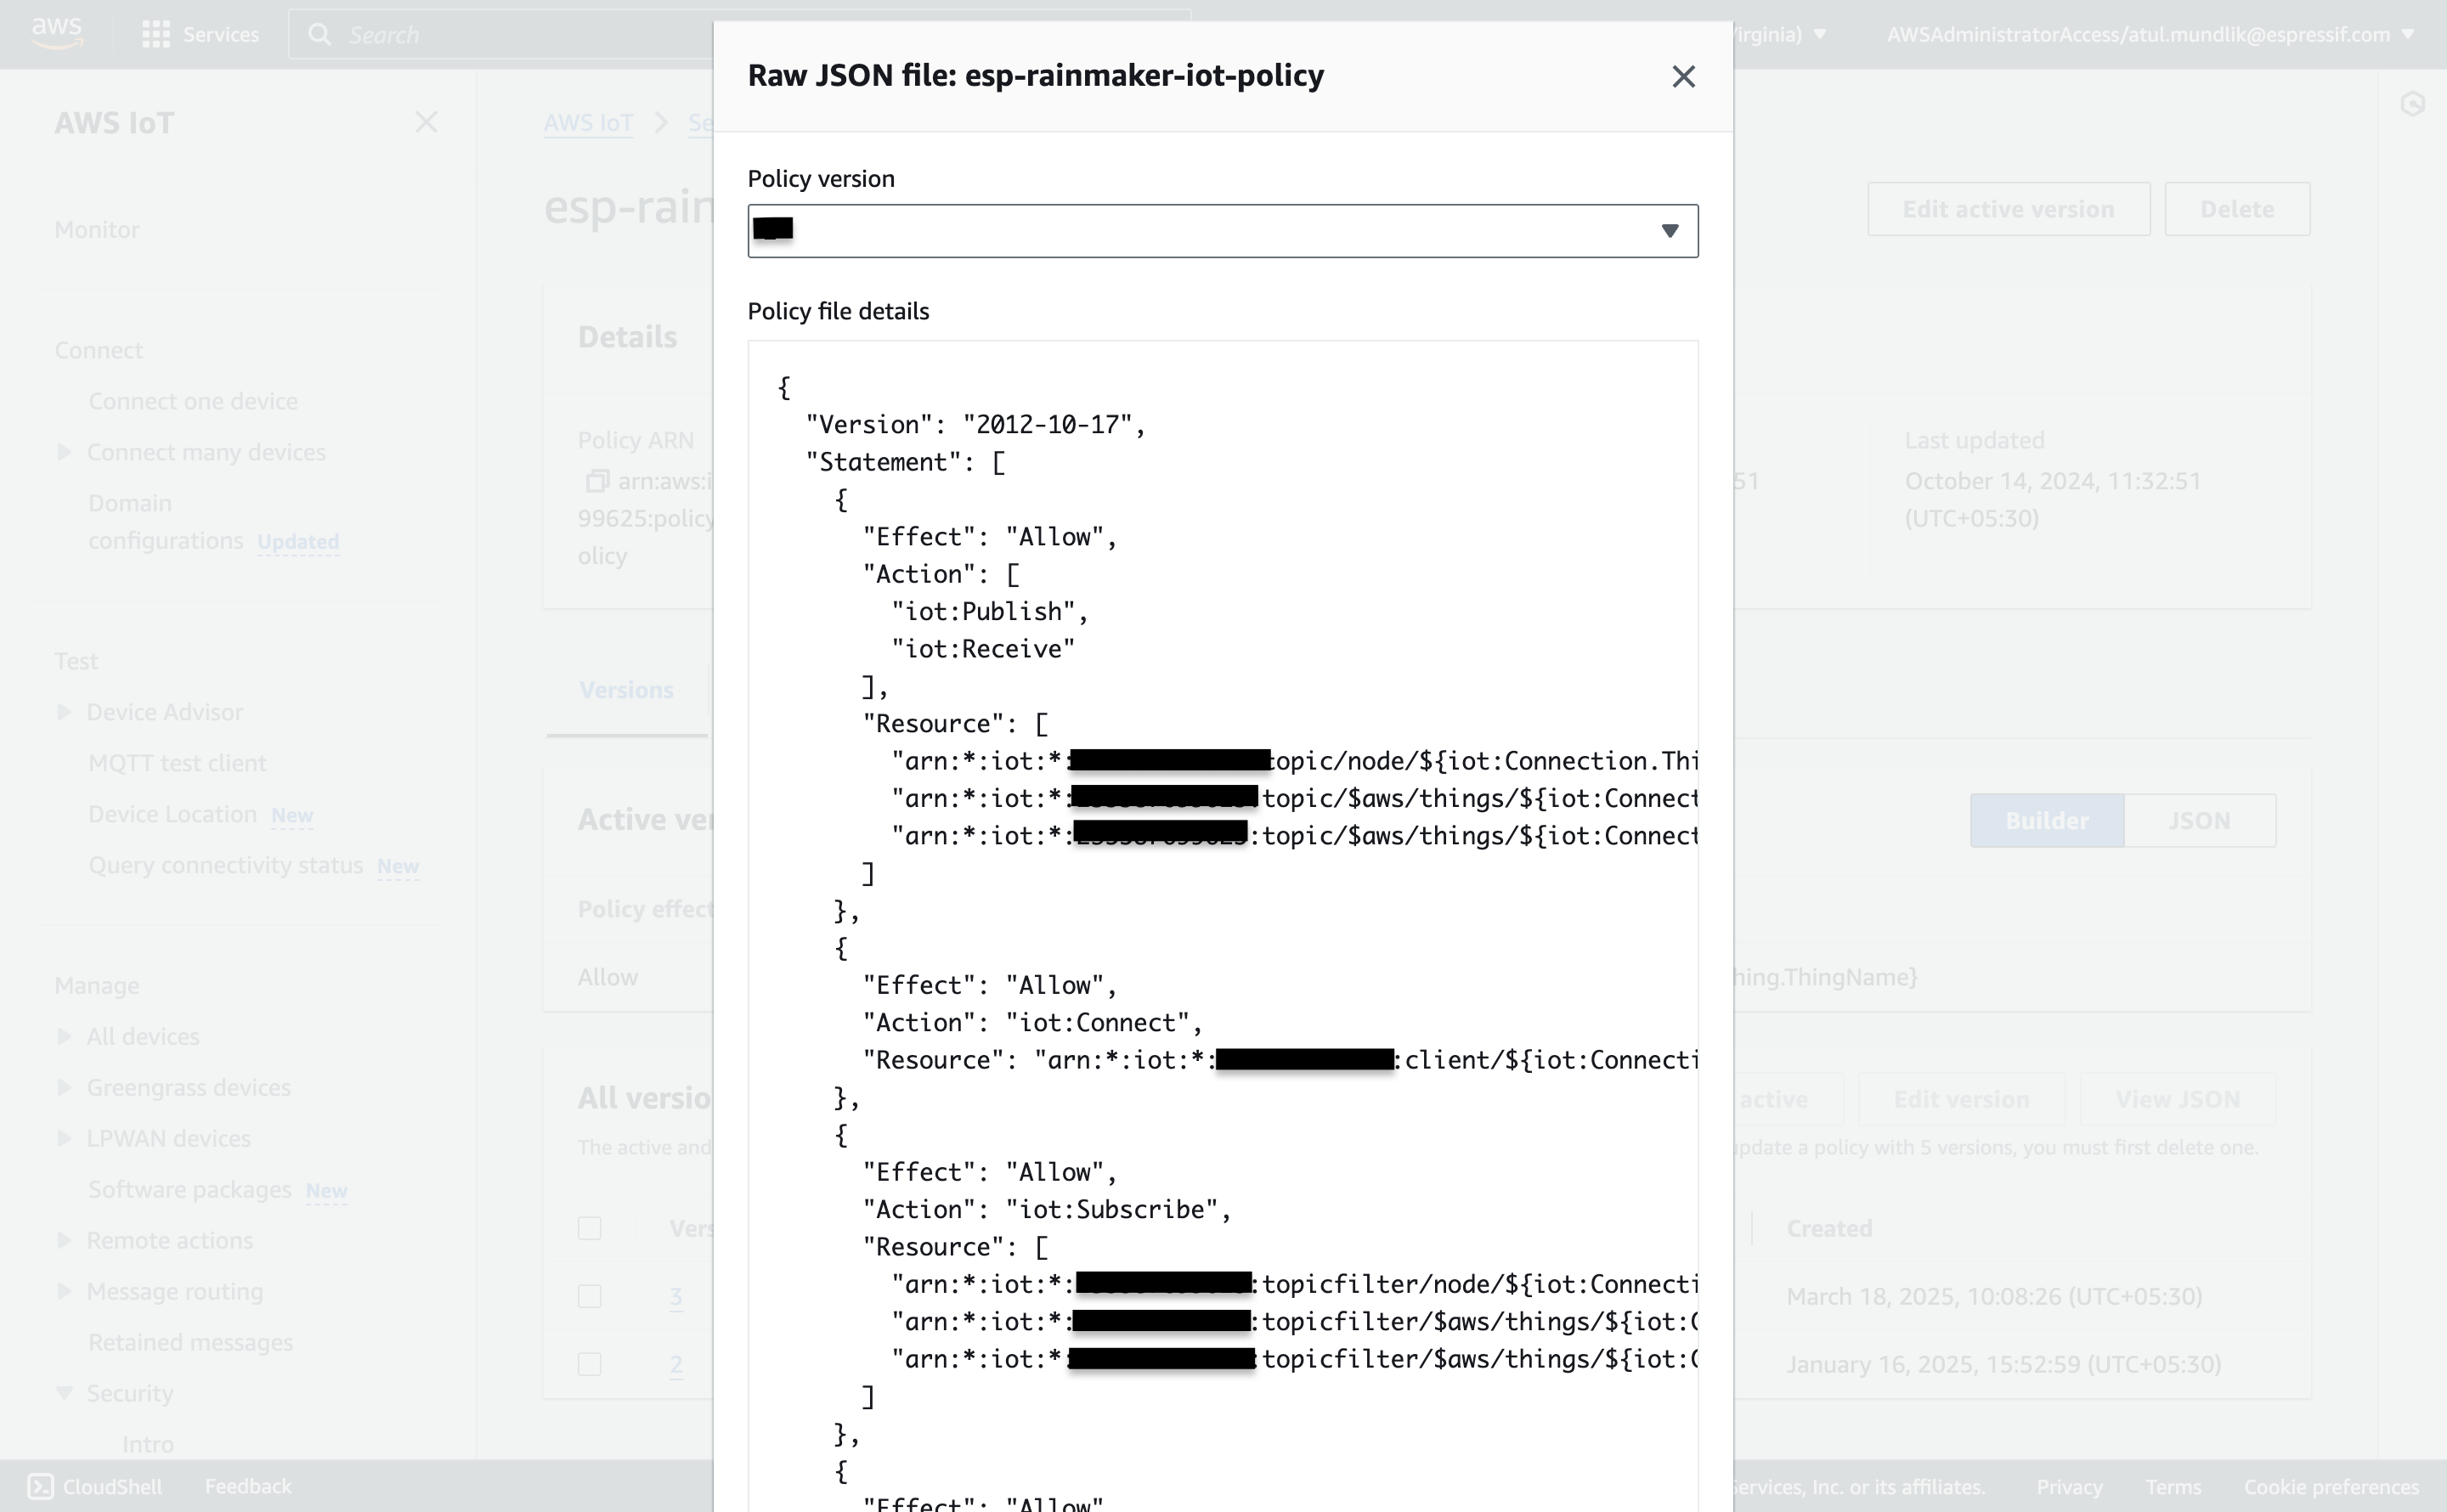
- From left hand menu, expand Security and click on Policies and then choose
esp-rainmaker-iot-policy
- If your
ActivePolicy looks something like
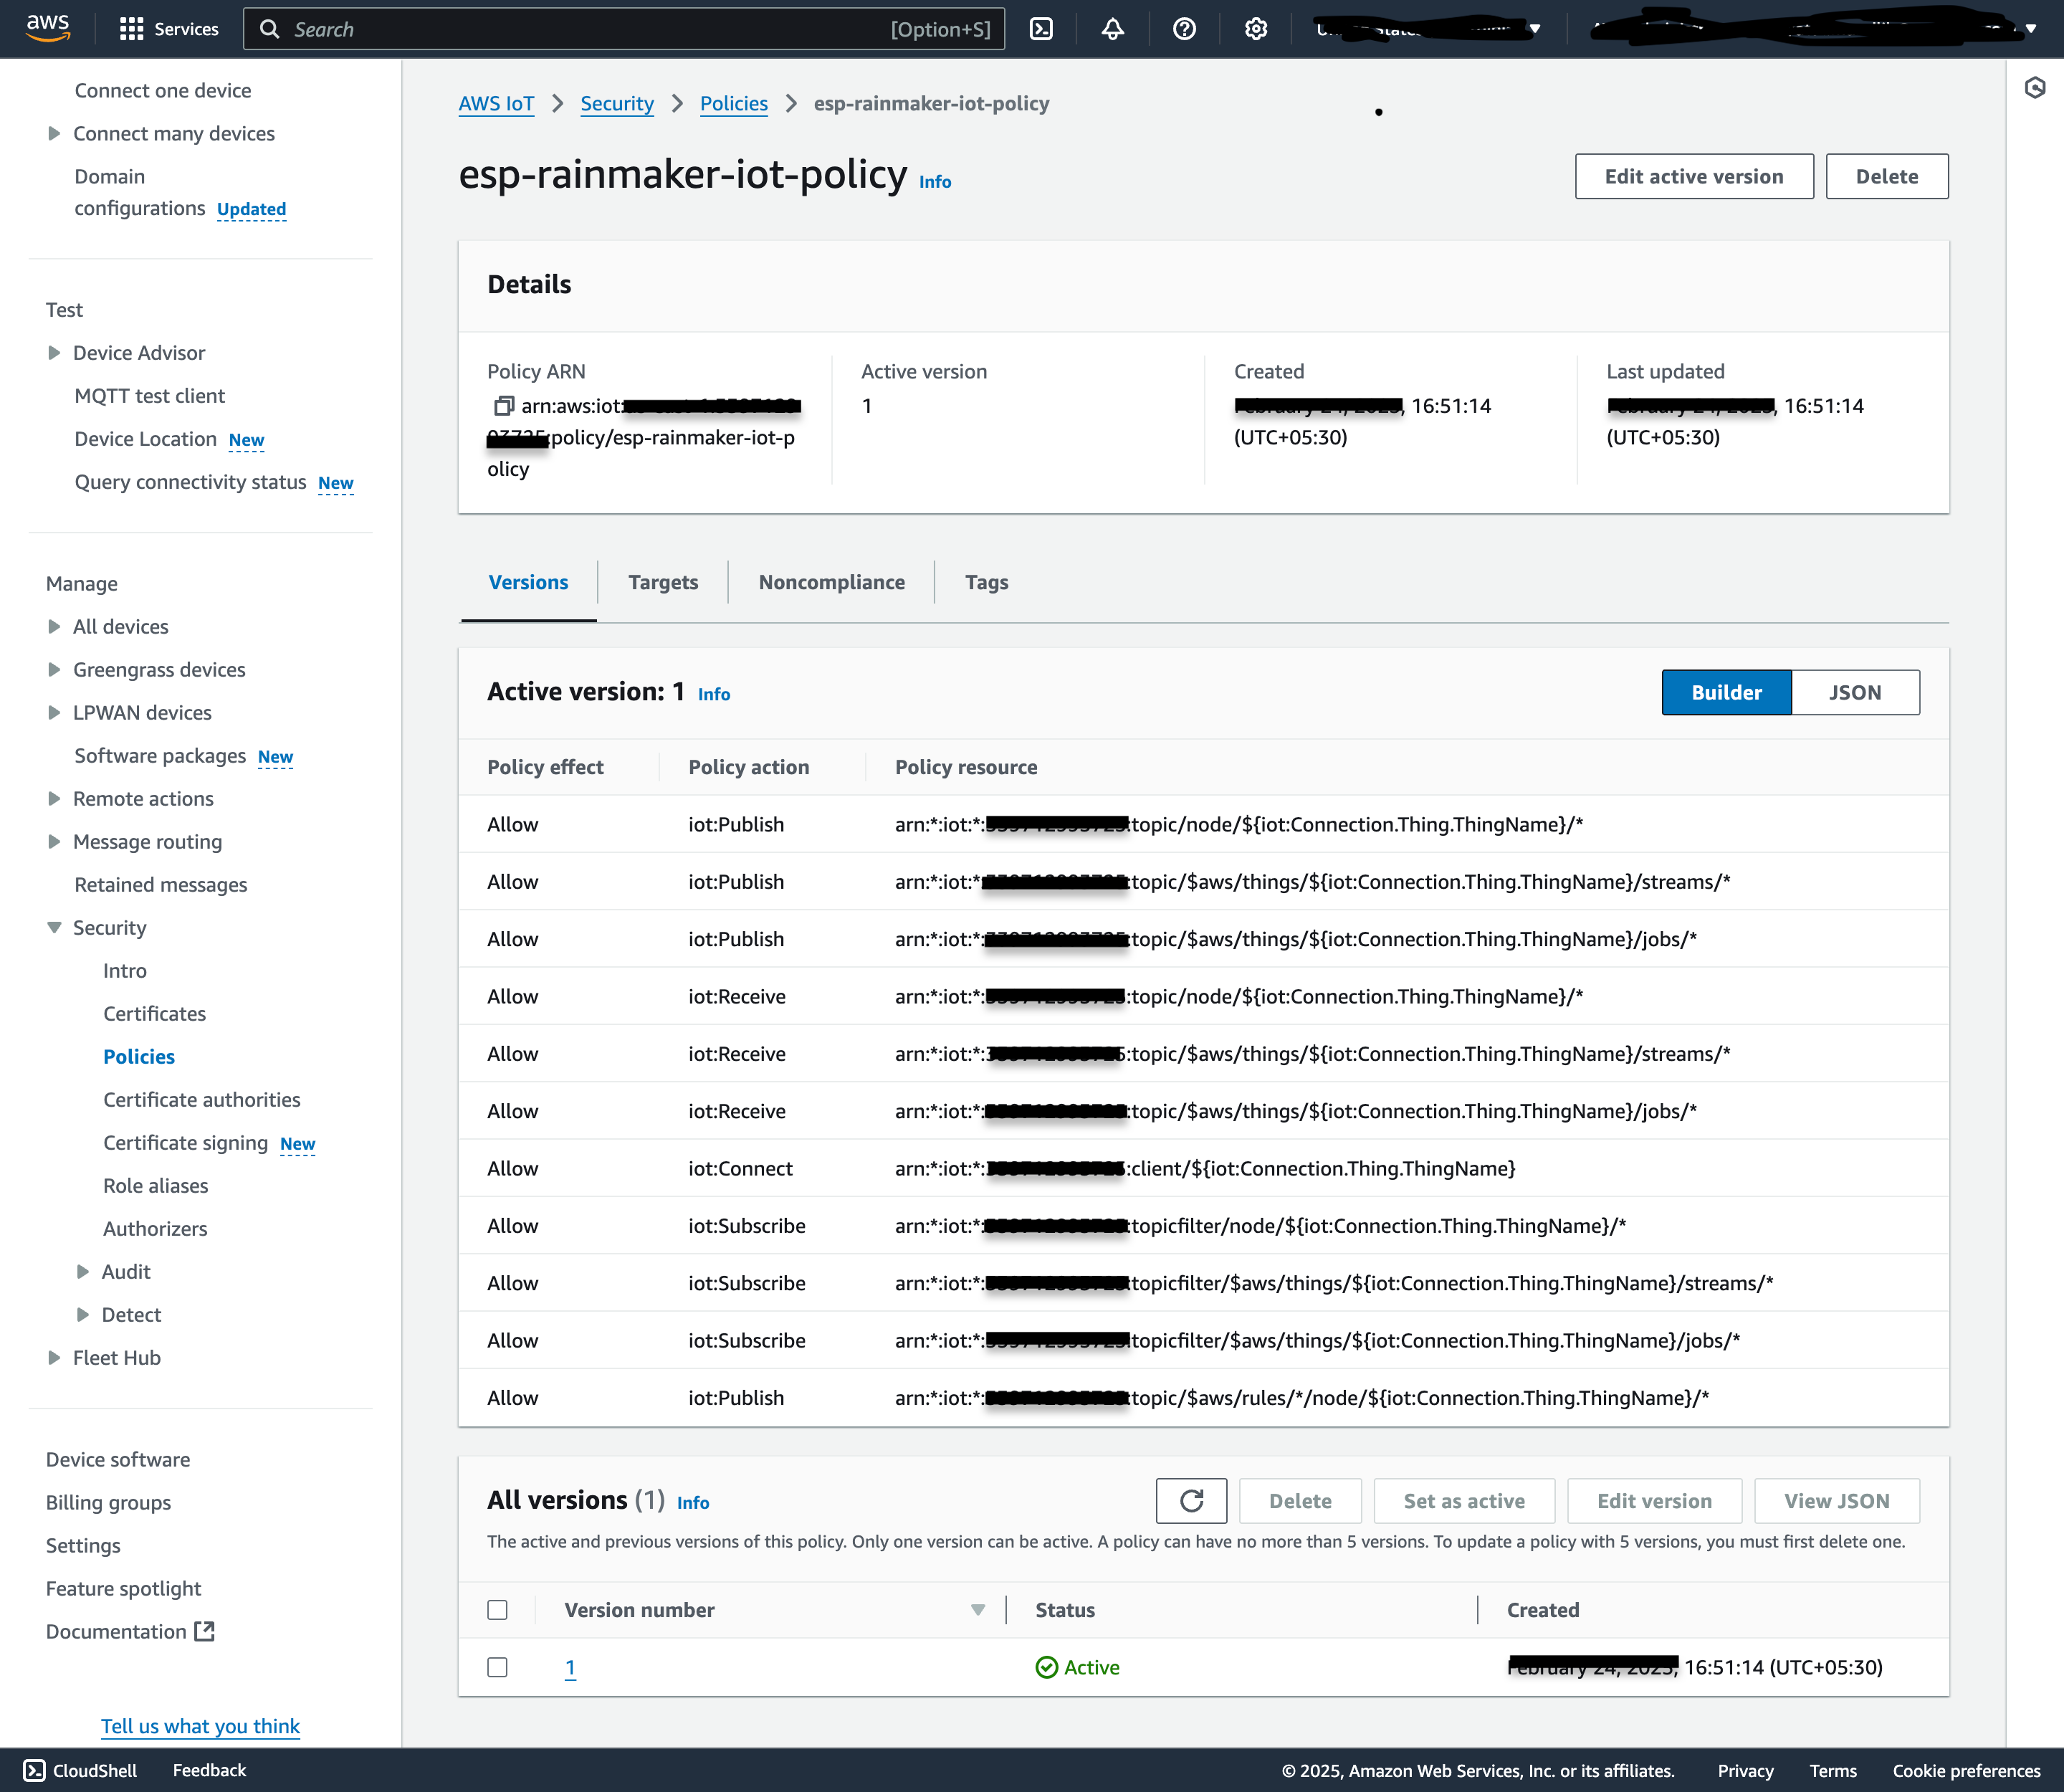
then it means that your System is Working As Expected, there is No MQTT downtime and your devices are connected.
- If your
ActivePolicy looks something like Connect only policy
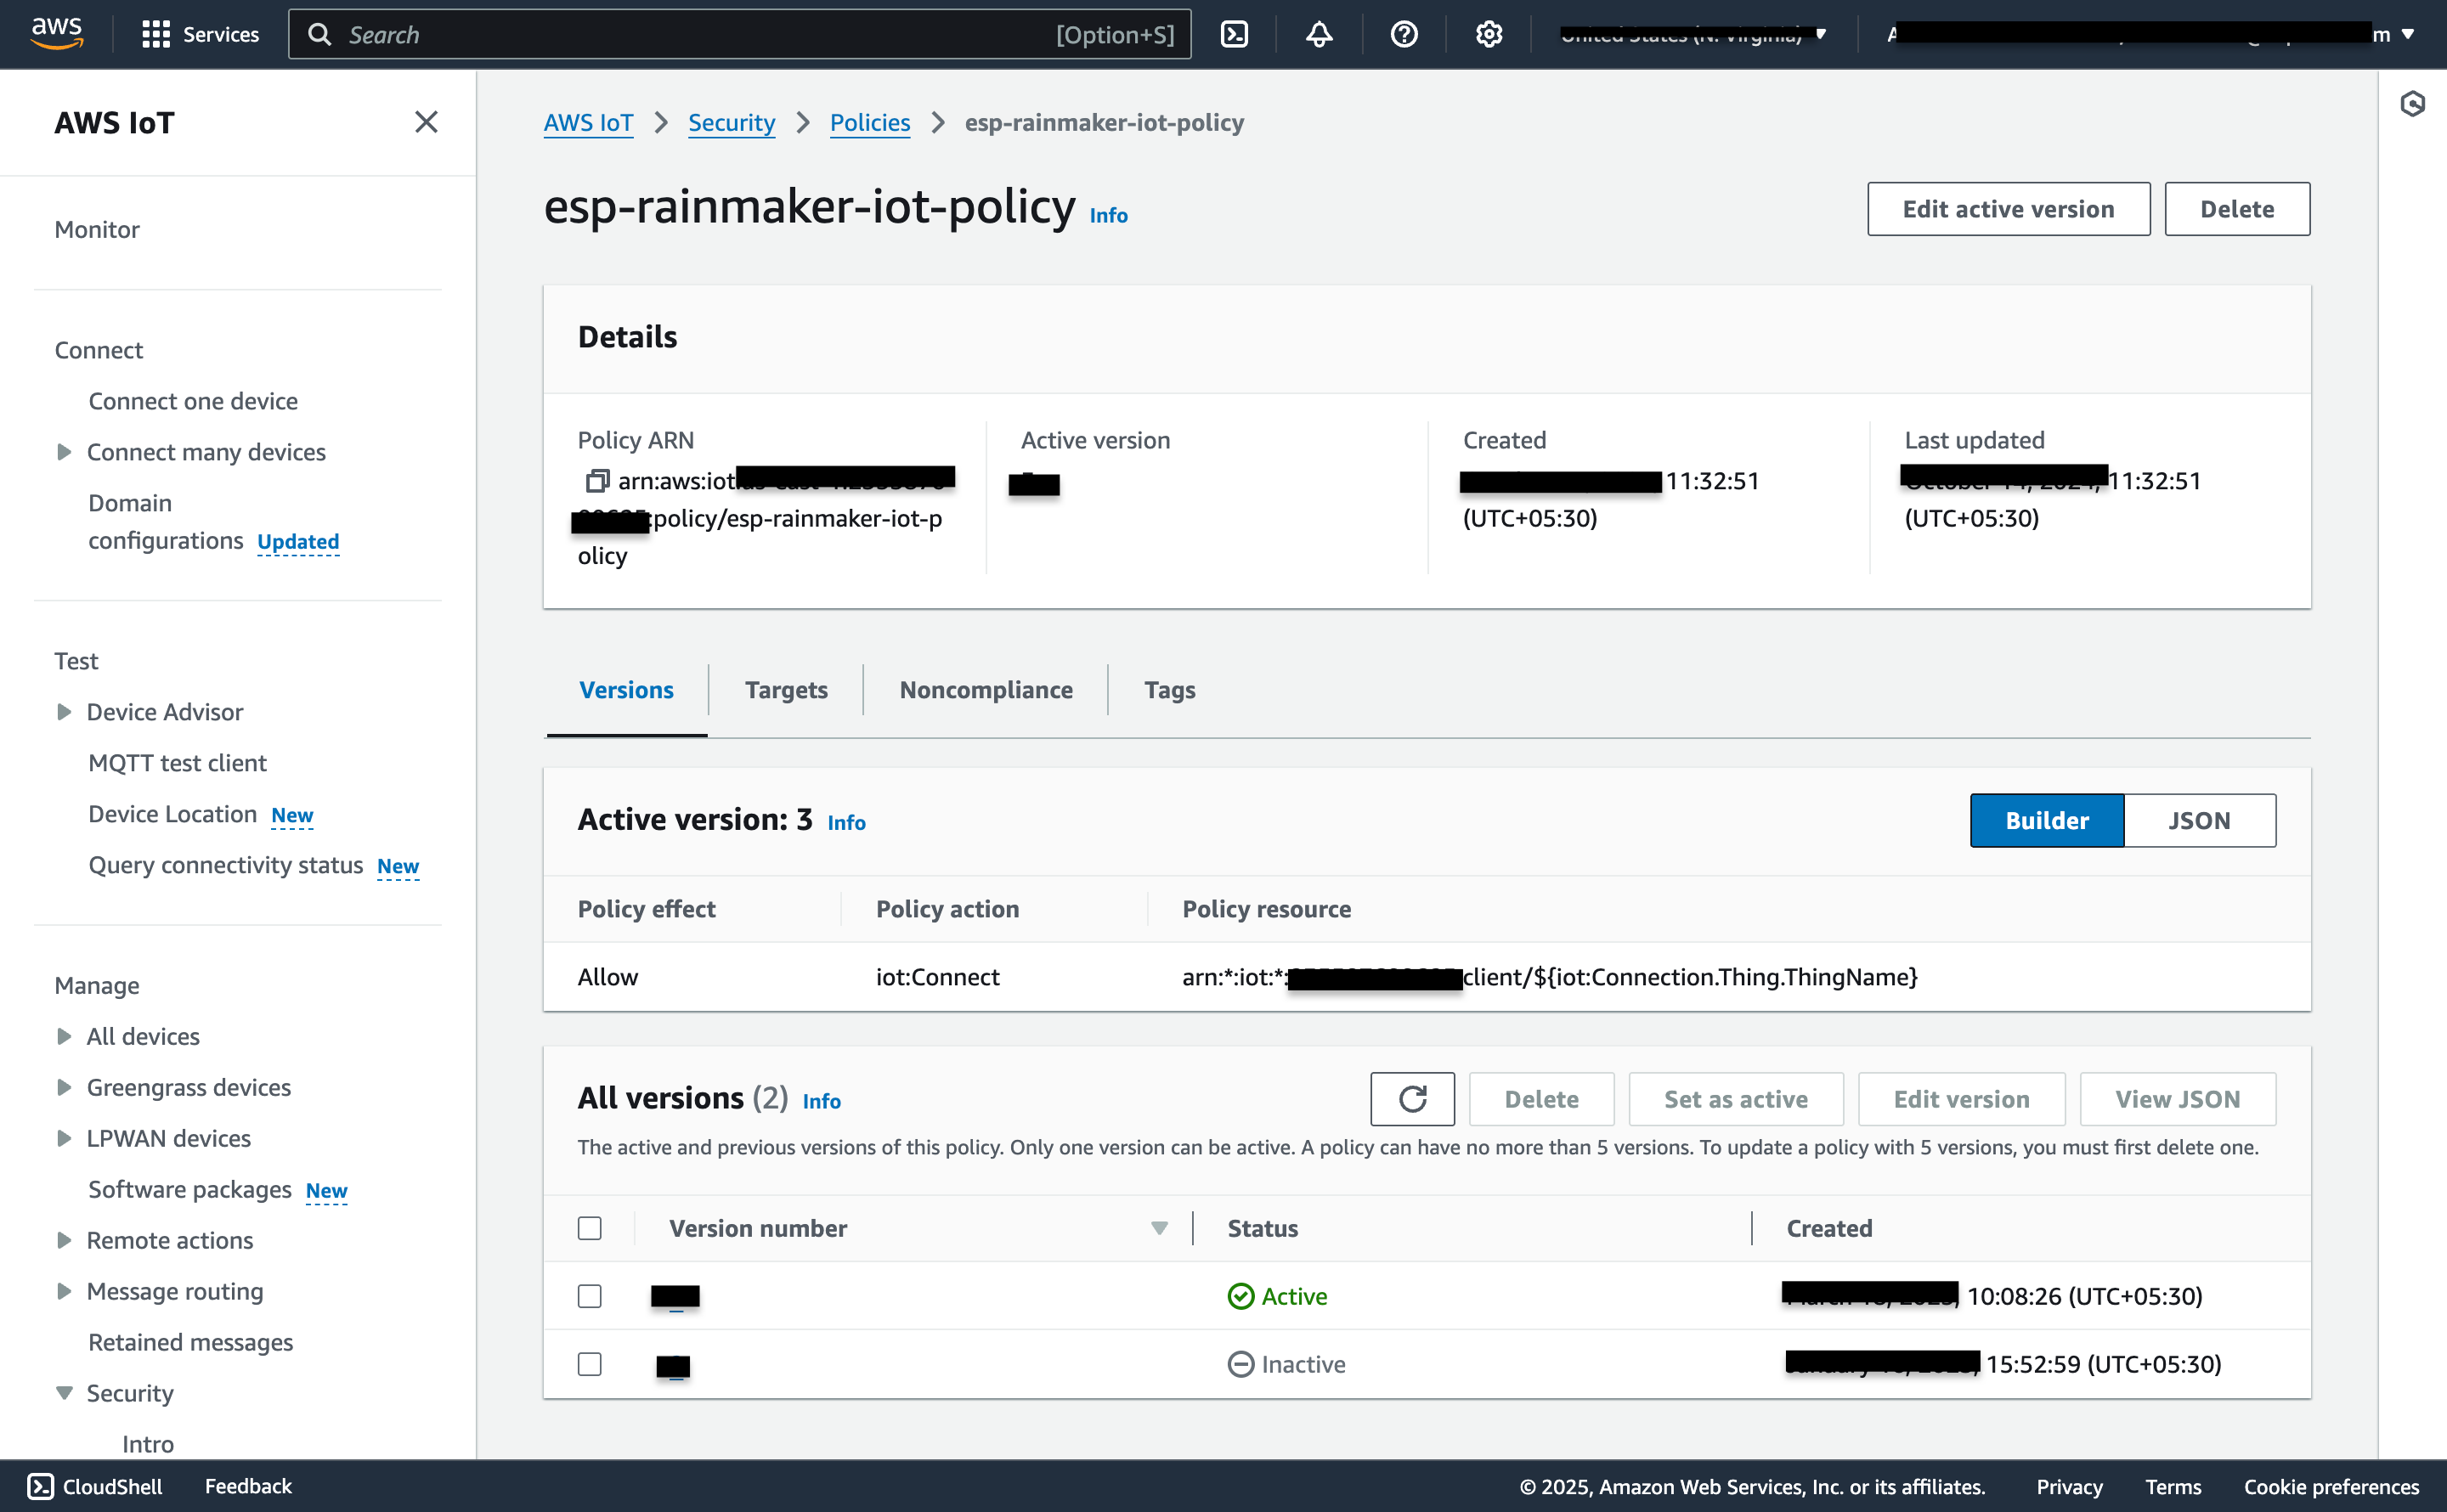
then check which other Inactive version which looks like
Select that Inactive version and click on Set as Active