Configurations
Configuring SES to Send Email
While creating a new user, RainMaker sends an email notification to the end-users, which contains the verification code. By default Amazon Cognito is used for sending the email notifications to the users. Cognito has limitations on the number of email notifications which can be sent per day.
So instead of this, the Amazon SES needs to be configured for sending the email notifications to the users. Message Customizations are supported too.
-
Login to the RainMaker dashboard with super-admin credentials.
-
Go to the Deployment Settings tab
-
Go to Email Configurations

-
Enter the email subject
-
Choose a from email address for sending emails
-
Enter your name for From Username
-
Enter email body in Template
-
Click on Set Email Template
-
You will get a success message as shown below:
Configuring the E-mail template for Verification messages
This is not relevant for OAuth only RainMaker
When the users sign-up, the Rainmaker platform sends them an Email which consist of a verification code. The users are expected to use this verification code to confirm their accounts, when they login using the Mobile Apps.
You can customise this Email template, from the Rainmaker Dashboard. You will need to have admin privileges for customising this E-mail message template,
Here are the steps to configure the E-mail template.
Login to the Rainmaker Dashboard using your Admin account credentials.
Click on deployment Settings
Click on the Email Configurations tab.
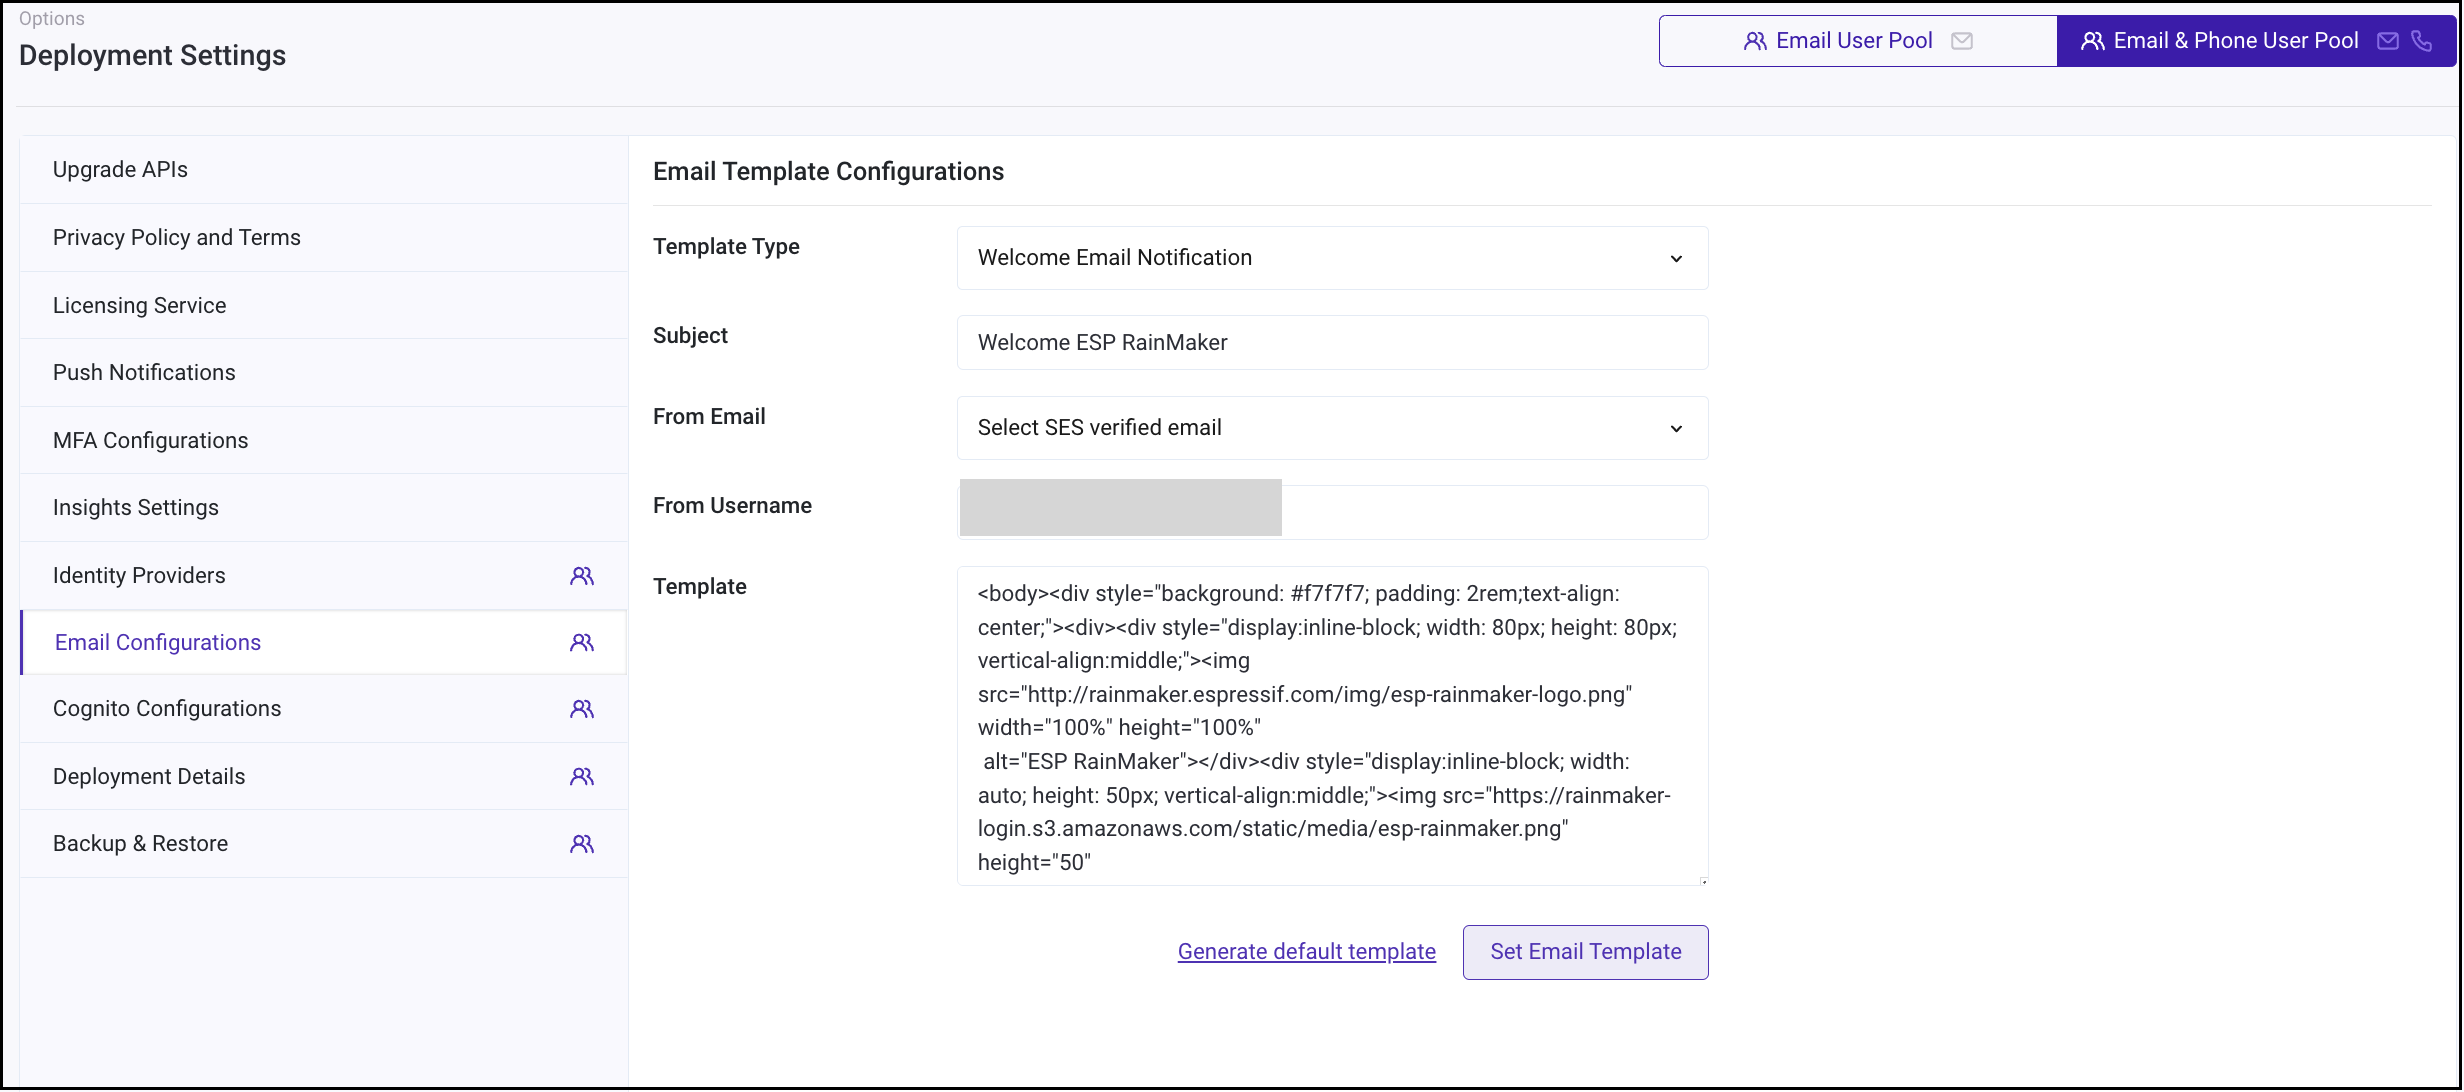
Keep the template type same - "Welcome Email Notification"
You can change the Subject of the Email.
You can change the Template, as per your requirement, this template can be simple text or it can be a valid HTML.
Please note that you will need to have the string - {####} in the template. This is a placeholder string, which is filled by the AWS service with the Verification code.
After your changes are done, click on "Set Email Template Button".
So when a new user is created, the Verification Email will have this Email template.
Configuring Cognito Domain
This is not relevant for OAuth only RainMaker
Cognito Domain is required for implementing sign-in using third party Identity providers (eg., Google, Apple) and for linking your Alexa, Google Voice Assistants account with your RainMaker account.
The Cognito Domain is used to form the URL of sign-in and sign-up webpages, that are used for third party identity providers and voice Assistant integrations.
To configure the Cognito domain name,
-
Login to RainMaker dashboard with super-admin credentials.
-
Go to Deployment Settings tab
-
Go to Identity Configurations tab.
-
Enter the value for the cognito domain name as shown below:
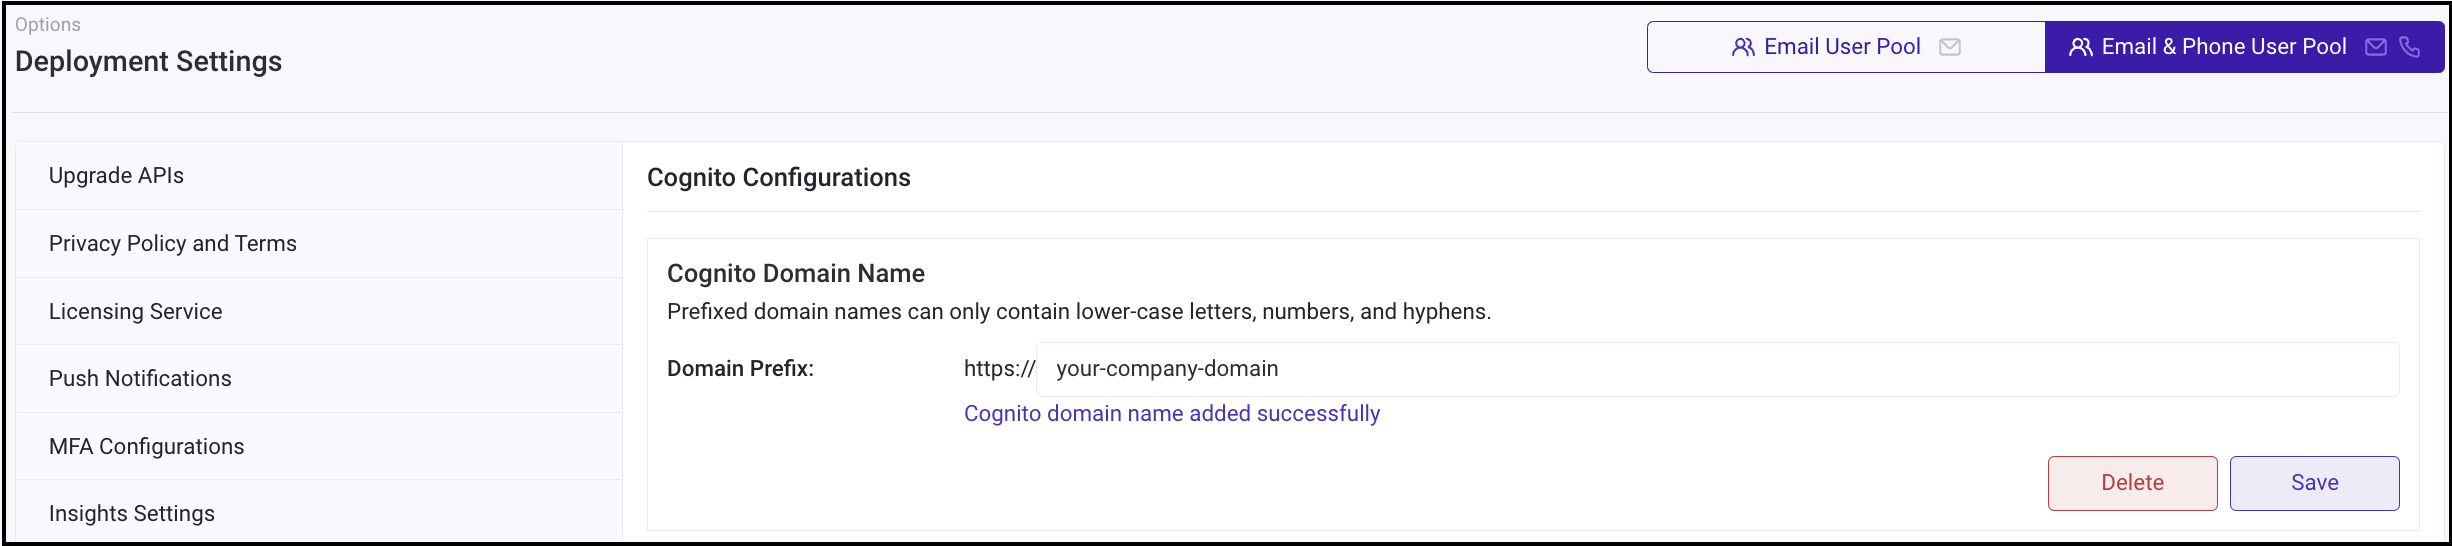
Note: Cognito Domain names can only contain lower-case letters, numbers, and hyphens.
Configuring Callback URL (Optional)
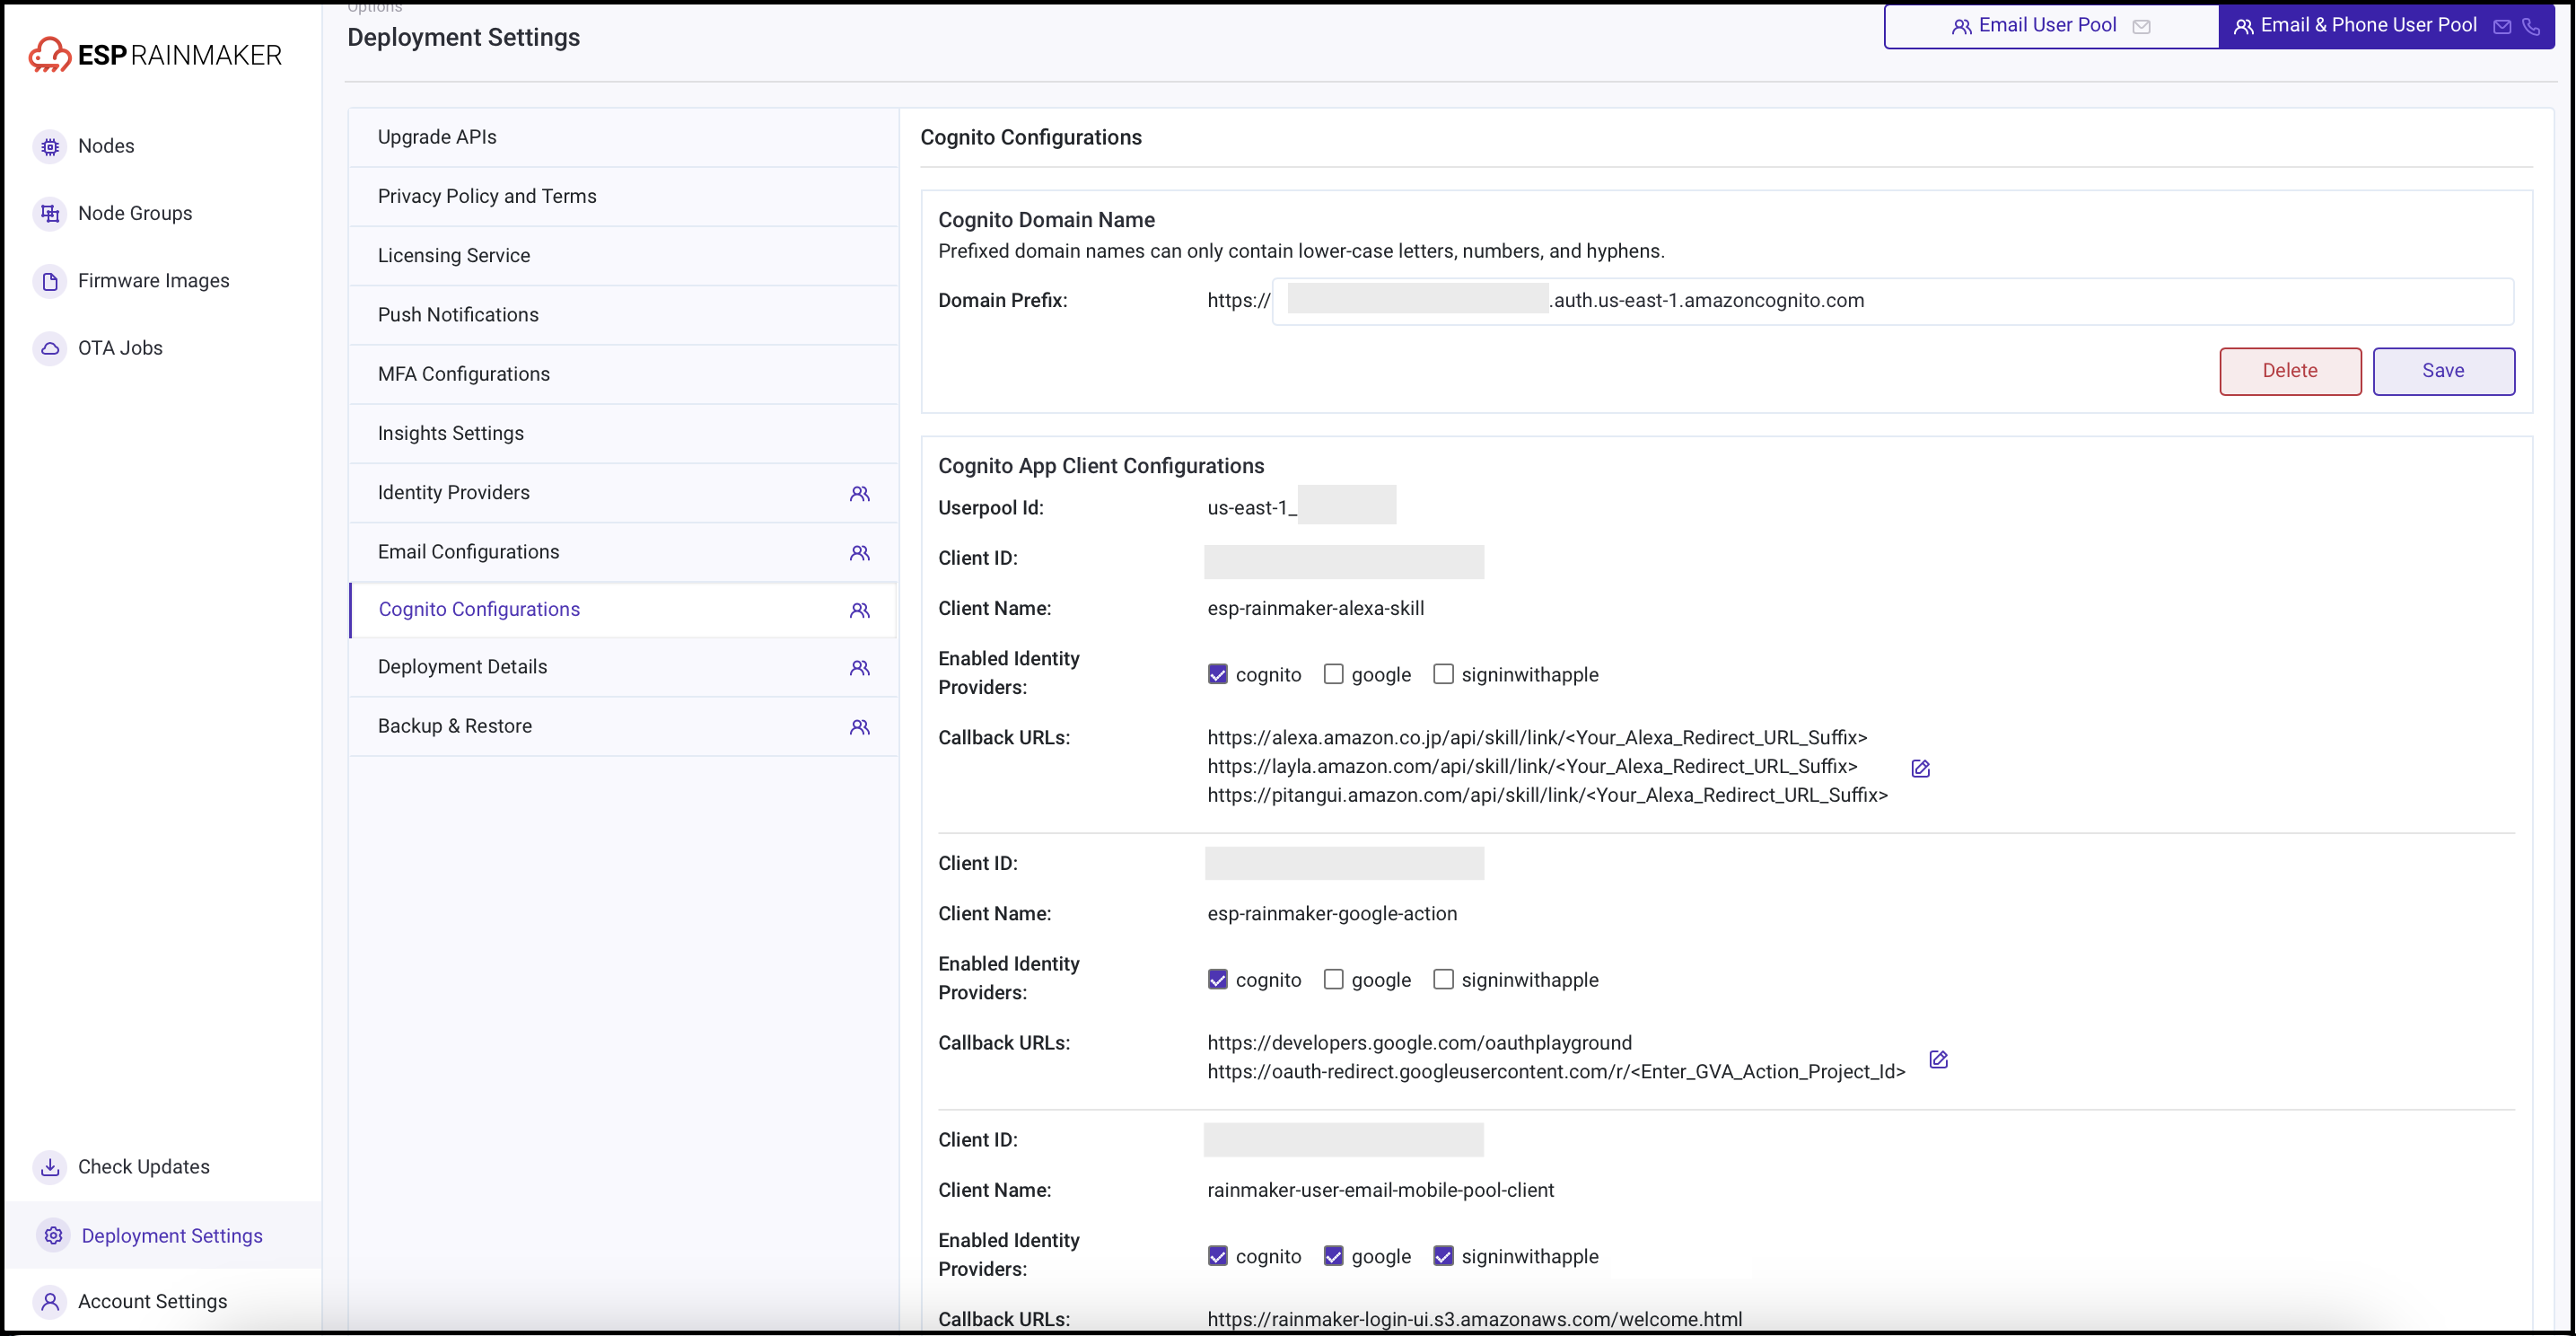
The callback URLs are needed while using the third party authenticating services and linking your account in Alexa/Google Voice Assistants with your account in RainMaker. After successful sign-in users are redireted to one of the URLs specified in callback URLs.
Steps to configure the Callback URLs are given below:
-
Login to RainMaker dashboard with super-admin credentials.
-
Go to Deployment Settings tab.
-
Go to Identity Configurations tab.
-
Enter your callback URLs as shown below. Multiple callback URLs can be specified by entering a comma after each URL.
Configuring third party identity providers integrations
Users can sign in using third party identity providers. You can create developer account with third party identitiy providers and register your app. You will need the app credentials, received while registering the app to configure third party Identity providers. Supported Identity Providers are Google and SignInWithApple.
The custom domain name configured in step configuring custom domain name, will be used while registering app with Third party Identity Providers.
Configuring Google Identity Provider:
The detailed steps for Google sign-in integration can be found here - Google Sign-in
Configuring SignInWithApple Identity Provider:
The detailed steps for Apple sign-in integration can be found here - Apple sign in integration
Configuring Custom Cognito Domain ( Optional )
This is not relevant for OAuth only RainMaker
Configuring MFA ( Optional )
Admin users can setup Multi-factor authentication (MFA) for higher security. This will send a verification code to the admin's phone number at each login. Increase the SNS sending limit if not done already before going further.
-
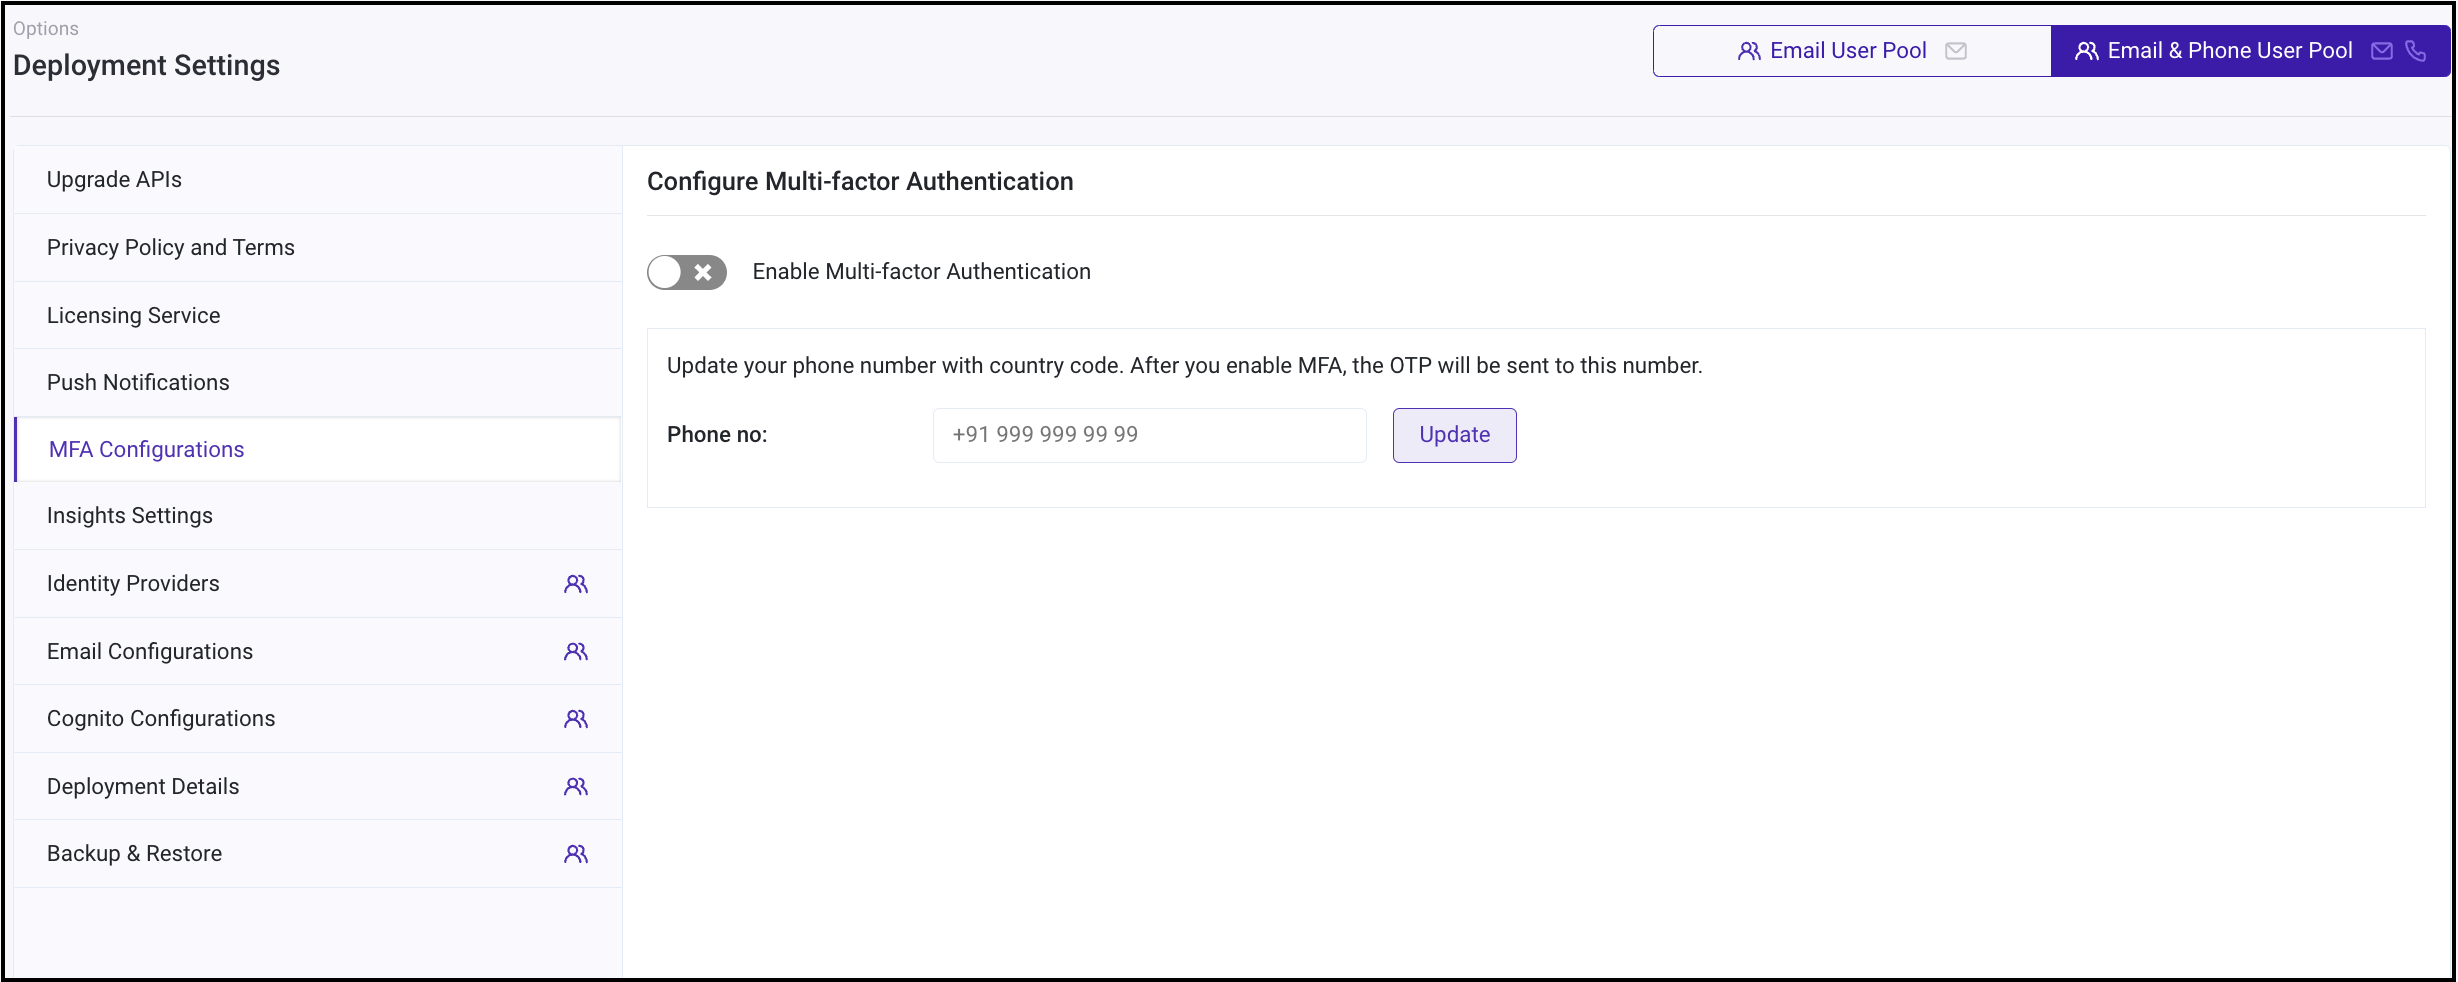
Log in to Rainmaker Dashboard with your admin account. Go to deployment settings, then go to the MFA Configurations tab.
-
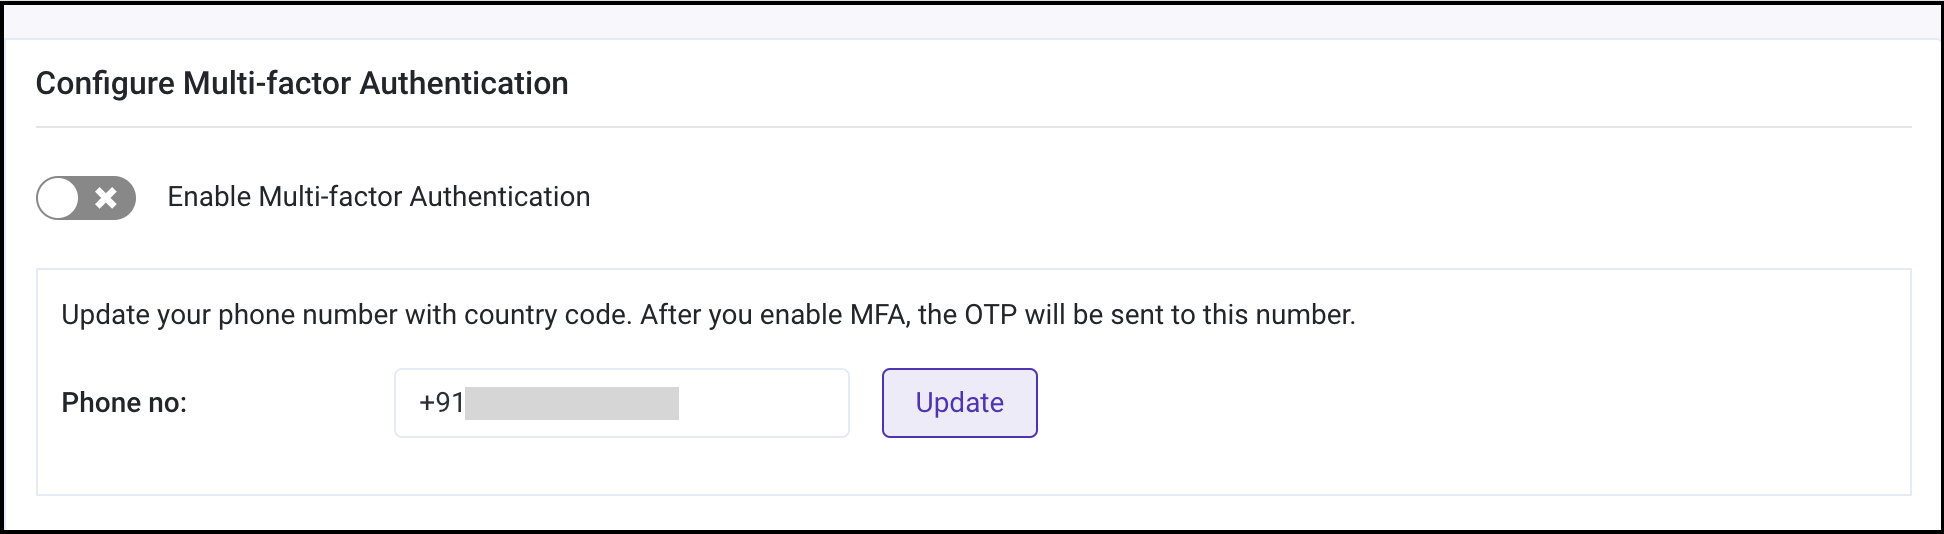
To add or update phone number on which you wish to receive the verification code, enter the number along with the country code. Click on Update.
Note - You may skip step 2 and 3 if you have already added the phone number.
-
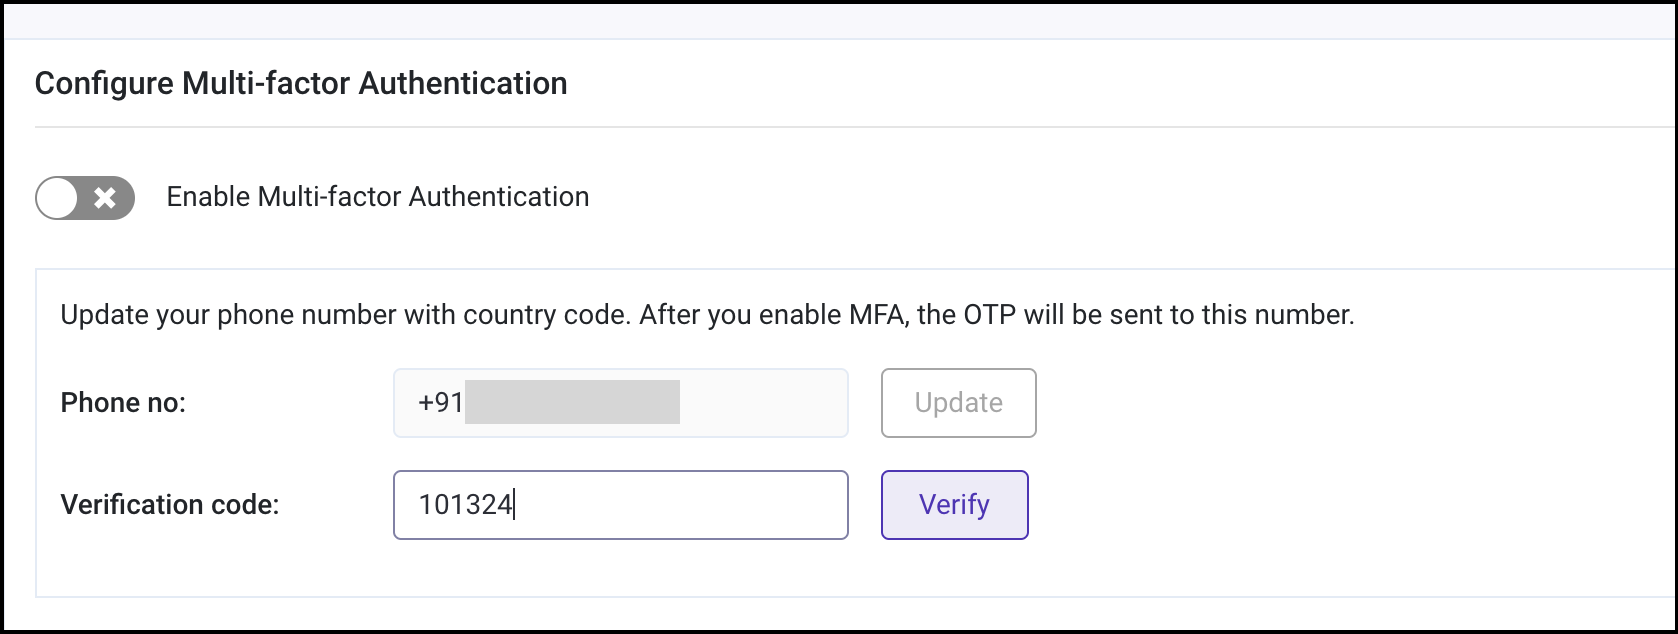
Verify the phone number by entering the verification code sent to the updated phone number.
-
Your phone number is now updated. You can enable MFA using the toggle.
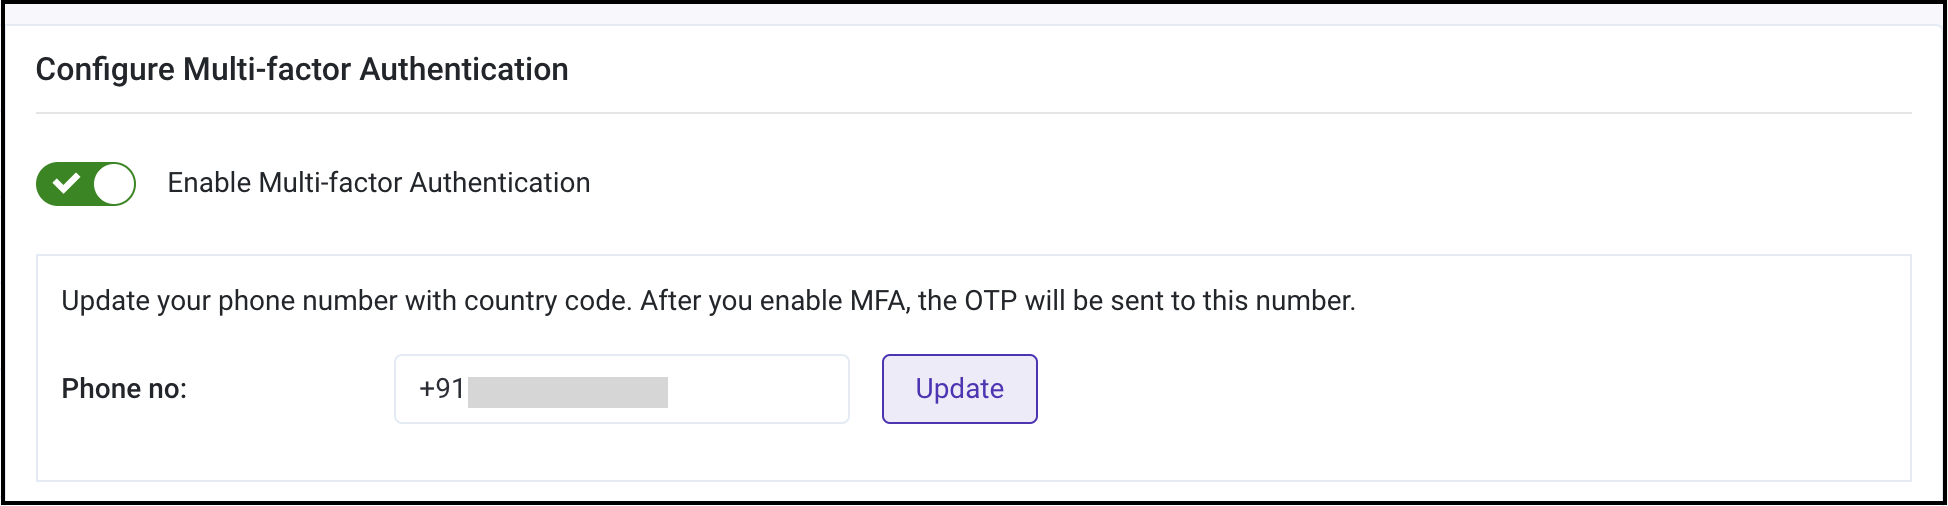
Note - You can also disable MFA any time using the same toggle.
-
MFA settings updated successfully.
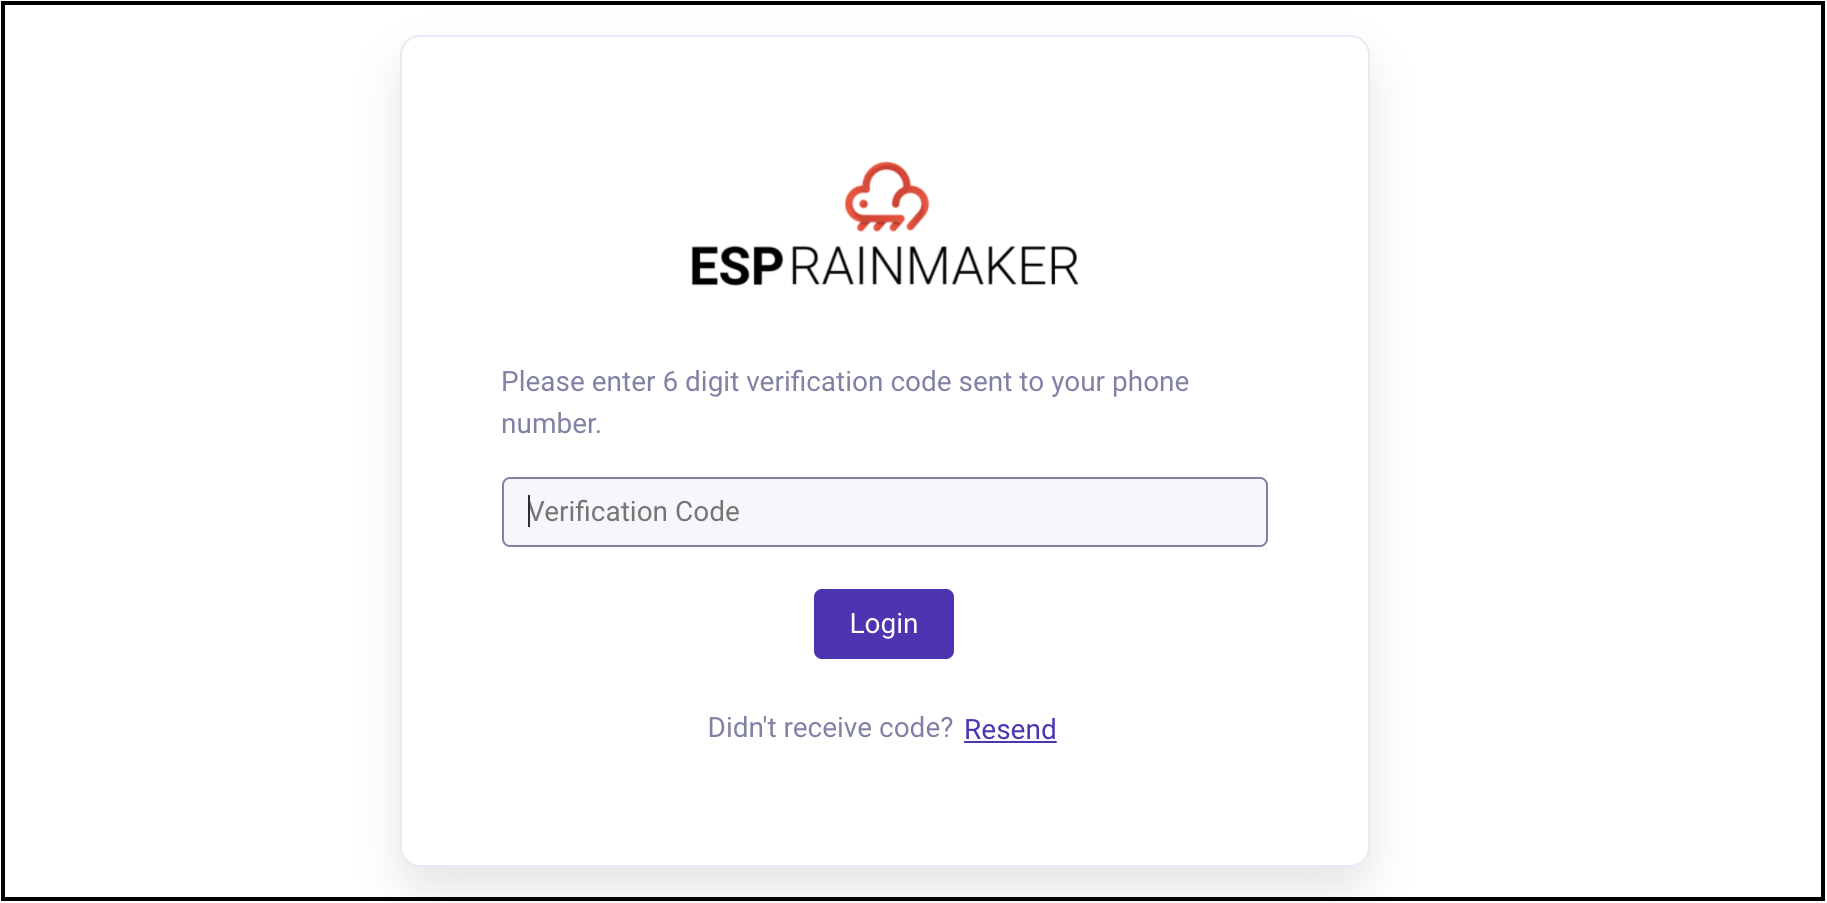
Note - The settings will reflect from the next login onwards. If enabled, an MFA prompt will appear after the initial password authentication:
Configuring the DNS names ( Optional )
When the Rainmaker backend and the frontend stacks are deployed successfully, you can access the API end points and the Dashboard using the URLs generated, after deploying the Rainmaker stacks.
Alternatively, you can configure to use the domain names which are specific to your organisation, by configuring the Route 53 service.
Creating a hosted Zone in Route53
The first step is to create a hosted zone which will be associated with your domain registrar.
The detailed steps for creating a hasted zone are in the below link
https://docs.aws.amazon.com/Route53/latest/DeveloperGuide/CreatingHostedZone.html
Mapping the hosted zone to the DNS registrar
You might be using the services from some other service provider ( e.g. GoDaddy) for Domain name mapping for your organisation.
In this case, you will need to map the hosted zone created in Route 53 to the DNS provider which your organisation is currently using.
The detailed steps for this configuration are mentioned below
https://docs.aws.amazon.com/Route53/latest/DeveloperGuide/migrate-dns-domain-in-use.html
If you are using GoDaddy as your DNS provider you can refer to the below link
https://dzone.com/articles/how-to-migrate-dns-from-godaddy-to-aws-route53
Mapping the API Gateway endpoint with the DNS name
Once the mapping between the hosted zone and your current DNS provider is done, you will need to configure the API Gateway endpoint to Route53 hosted zone. Follow Get Base Url steps to fetch the API Gateway endpoint.
The details about mapping the API Gateway endpoint with the DNS name are in the below link -
https://docs.aws.amazon.com/Route53/latest/DeveloperGuide/routing-to-api-gateway.html
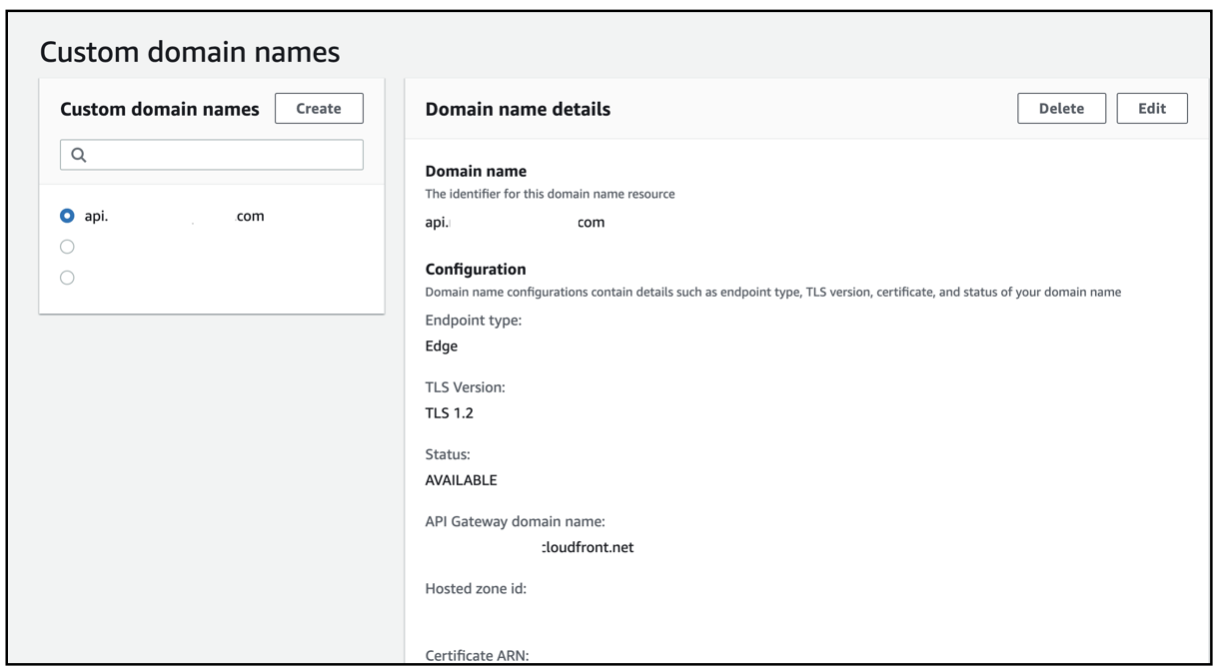
Please note, we will need to choose the API endpoint type as "Edge".
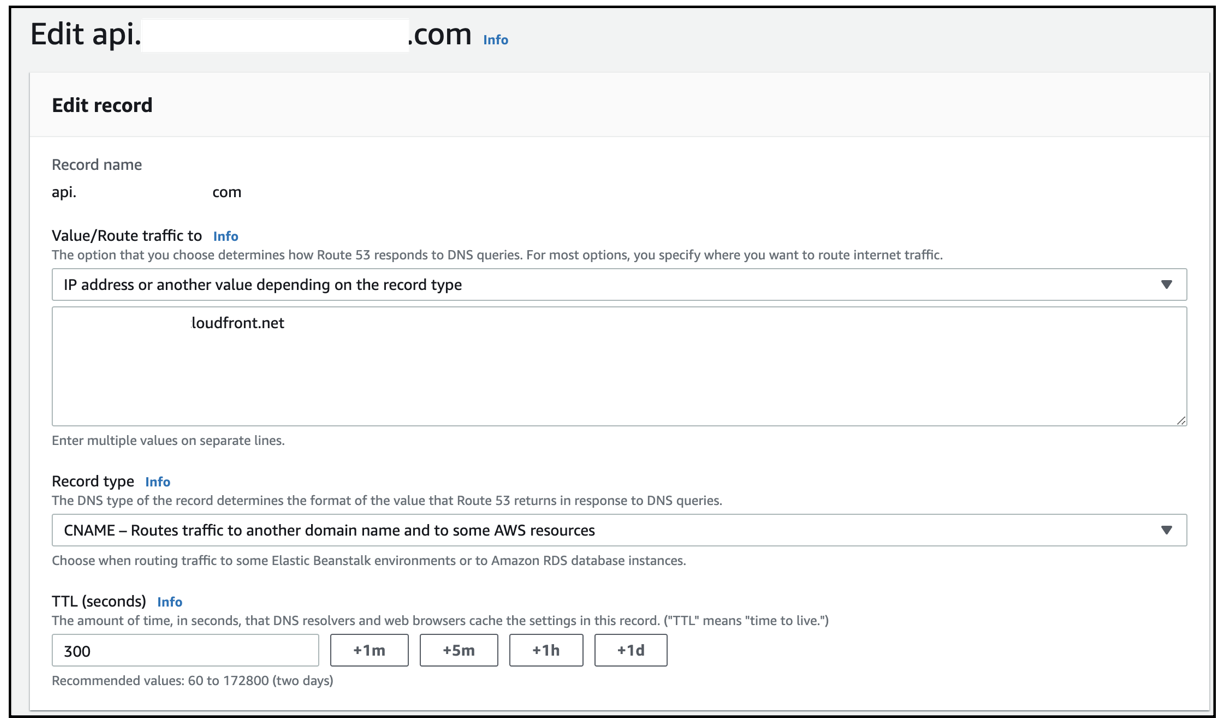
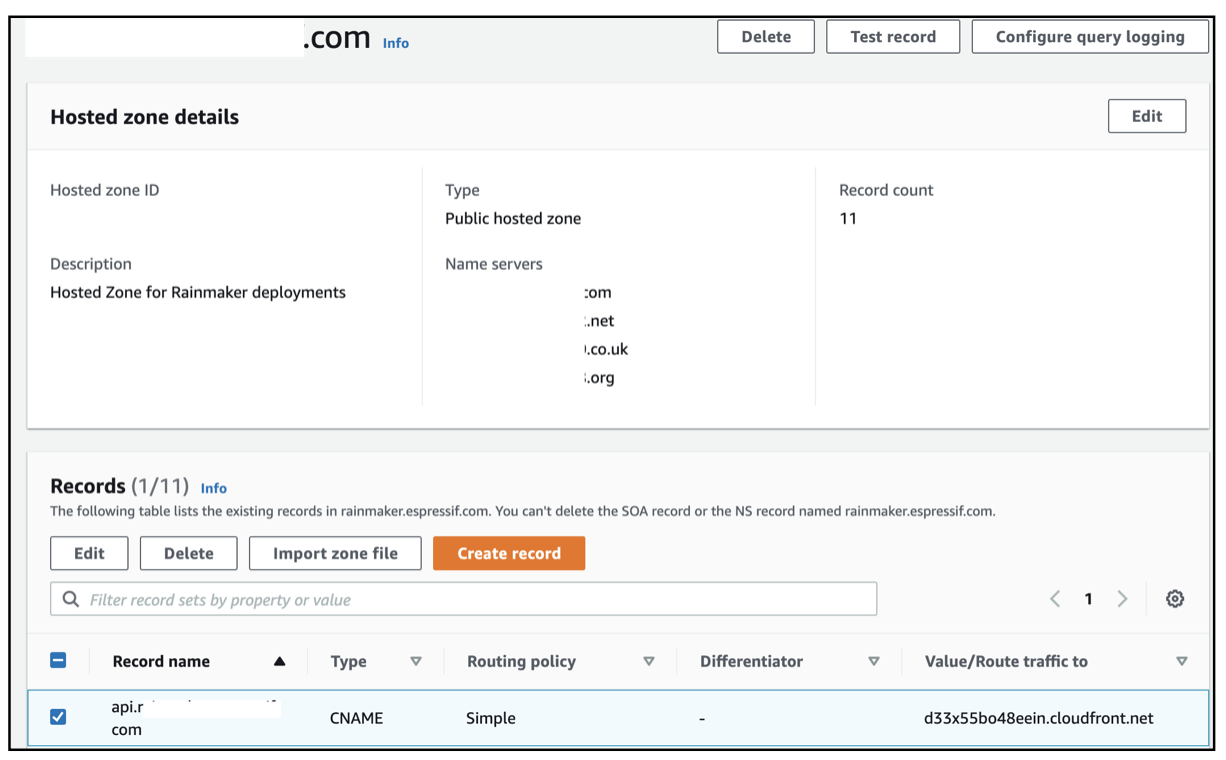
After the configuration is done, the API Gateway, Custom Domain names configuration will look as below -
The Route 53 configuration for API Gateway will look as below
Configuring the Domain name mapping for the Rainmaker Dashboard
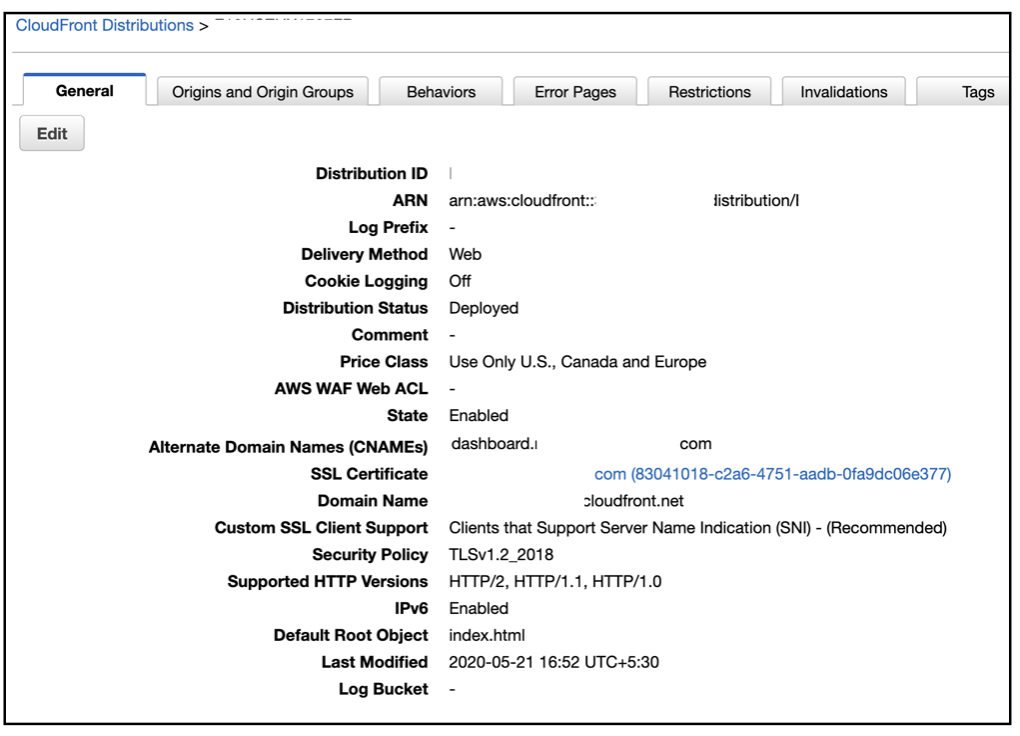
When the Rainmaker frontend stack is deployed, the required UI components are deployed and a CloudFront distribution is created.
This sets up the Content Delivery Network for Caching the UI and provides SSL connectivity for the UI dashboard.
You can create your organisation specific domain name for this, so that the Admin users will be able to access the Dashboard using the domain name.
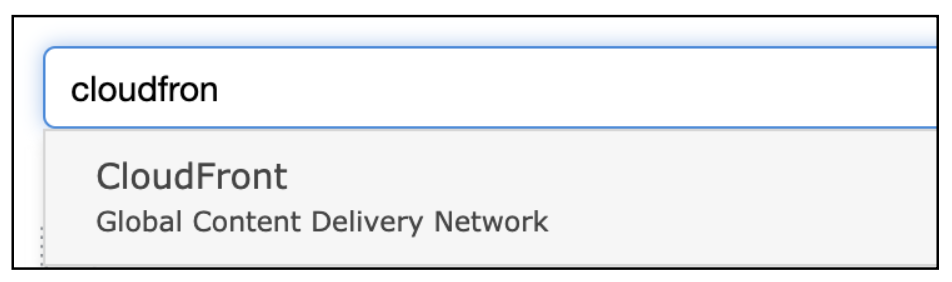
To check your CloudFront distribution, search for the CloudFront service from the AWS console
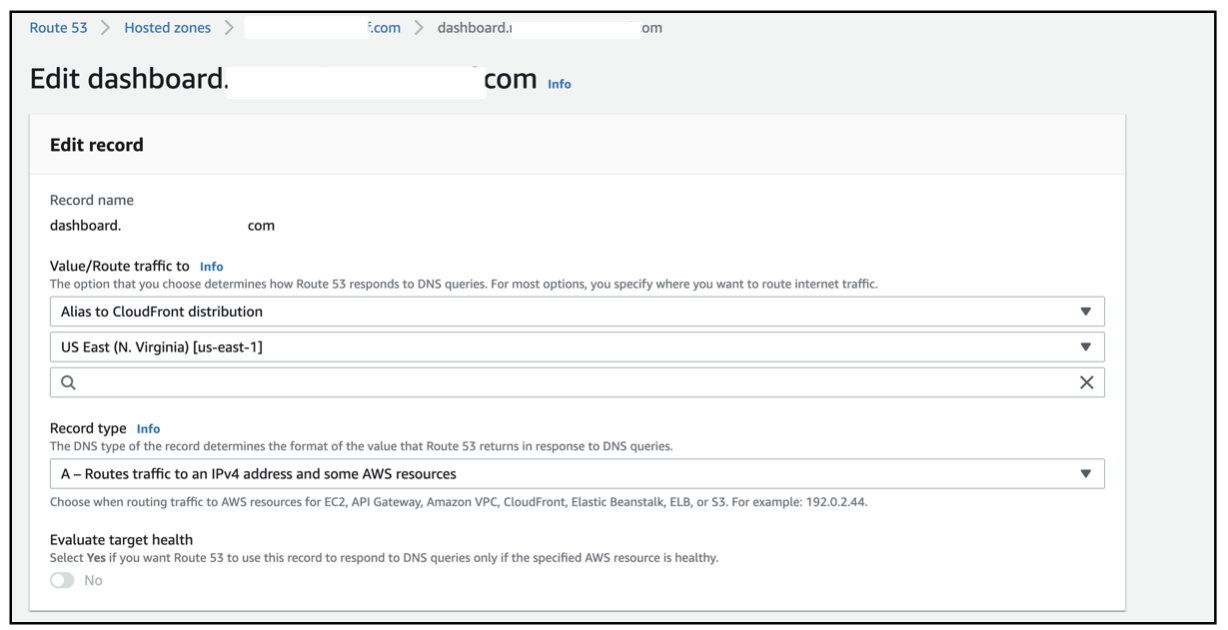
The steps to configure the Route53 DNS mapping for CloudFront distribution are in the below link
https://docs.aws.amazon.com/Route53/latest/DeveloperGuide/routing-to-cloudfront-distribution.html
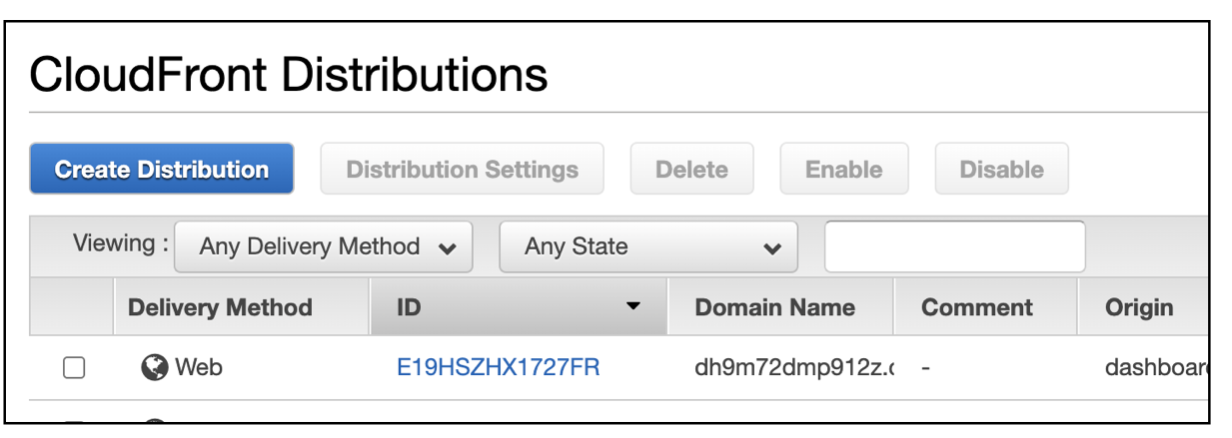
After the CloudFront distribution is configured with the DNS mapping the CloudFront screen will look as below -
The Route53 screen for creating CloudFront distribution will look as below -
Configuring the Location-based Triggers for Weather API Configurations
Create Open-Weather Account:
- Begin the process by signing up for an account at https://home.openweathermap.org/users/sign_up.
- After signing up, check your email for a verification message and follow the instructions to confirm your email address.
- Once your email is verified, you will receive an email containing the API Key, which will become active within the next couple of hours.
Steps for configurating Weather based automation in RainMaker
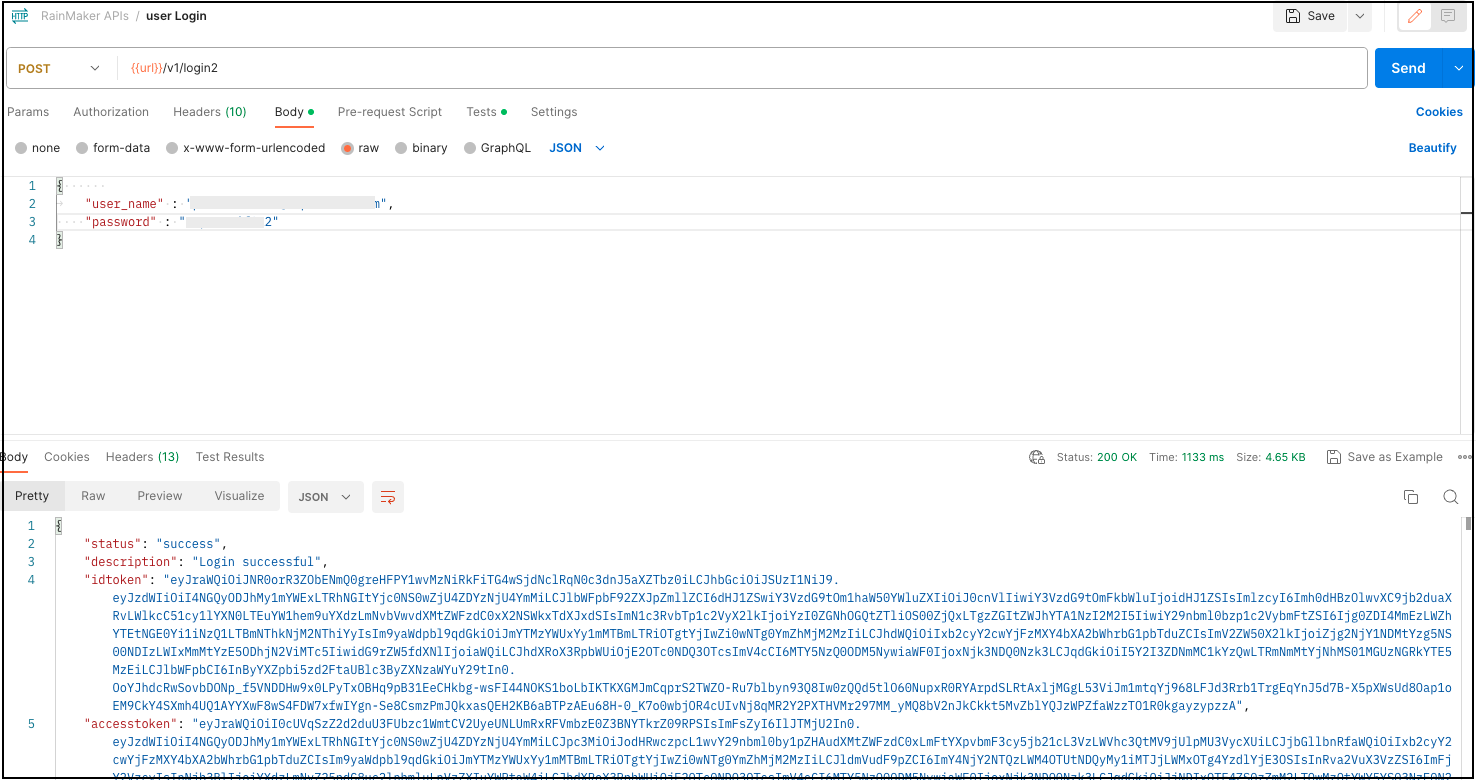
- In Postman, login to Rainmaker using super-admin credentials.
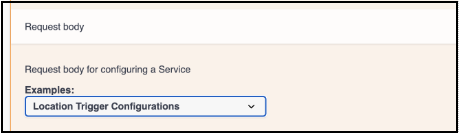
- Access and configure the deployment settings for location triggers by clicking on the following Swagger link: https://swaggerapis.rainmaker.espressif.com/?urls.primaryName=RainMaker%20Superadmin%20APIs#/Deployment%20Setting/cofigureServiceConfiguration
Under the Request body, click on drop down menu & select the location trigger Configurations to see the sample JSON request
-
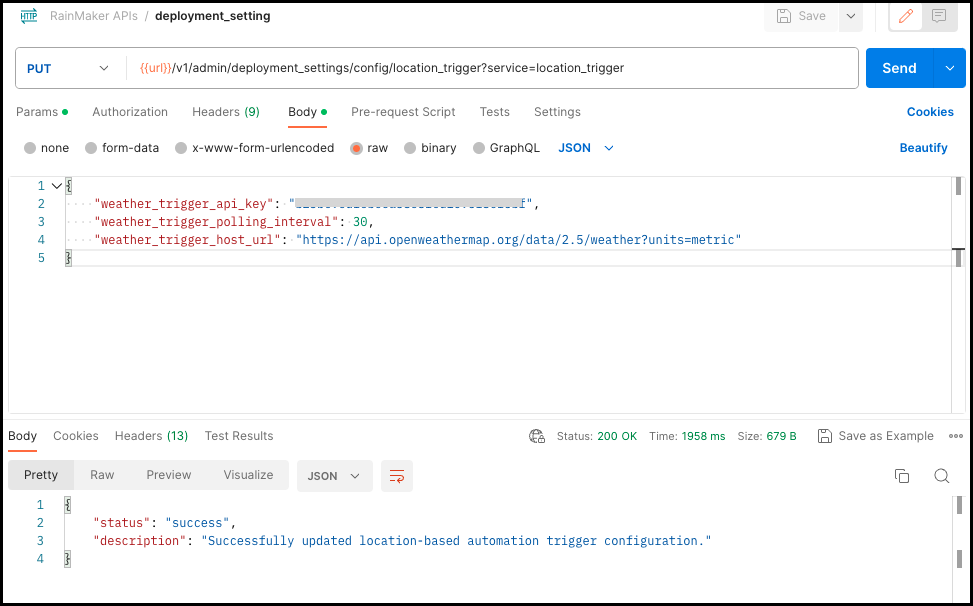
In Postman, create new API request PUT -
{HTTP_BASE_URL}/v1/admin/deployment_settings/config/location_trigger(Follow Get Base Url steps to fetch the base URL)Params -
Key Value service location_trigger Header -
Key Value Authorization {access_token}Body -
select raw, click on down down menu & select json Add below JSON in the body & click on send
{
   "weather_trigger_api_key": "<add_your_key>",

   "weather_trigger_polling_interval": 30,

   "weather_trigger_host_url": "https://api.openweathermap.org/data/2.5/weather?units=metric"

}
Refer below screenshot
Using Triggers
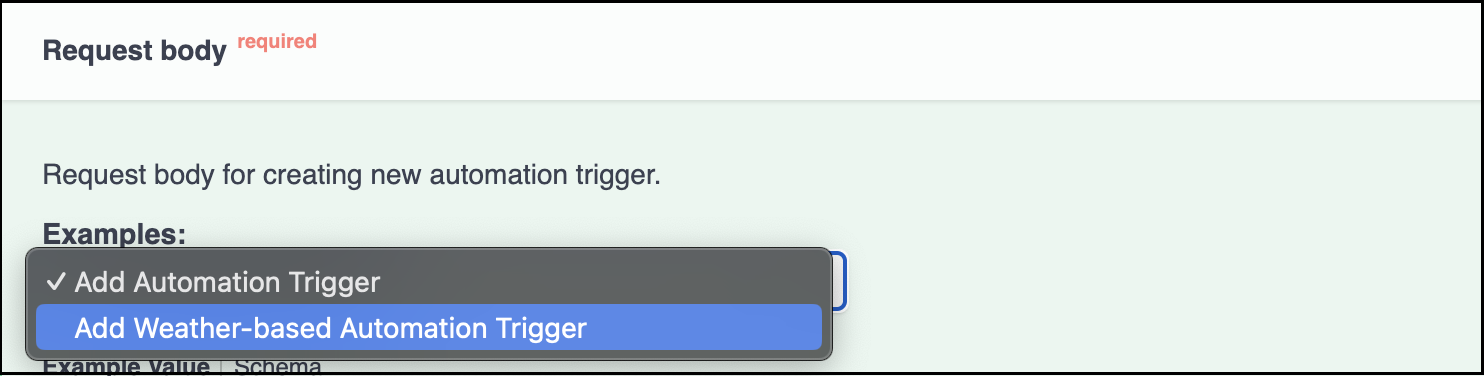
- To get sample request, visit link: https://swaggerapis.rainmaker.espressif.com/#/Automation%20Trigger%20and%20Actions/addAutomationTriggerAction
Under the Request Body, click on drop down menu & select the Add Weather-based Automation trigger
-
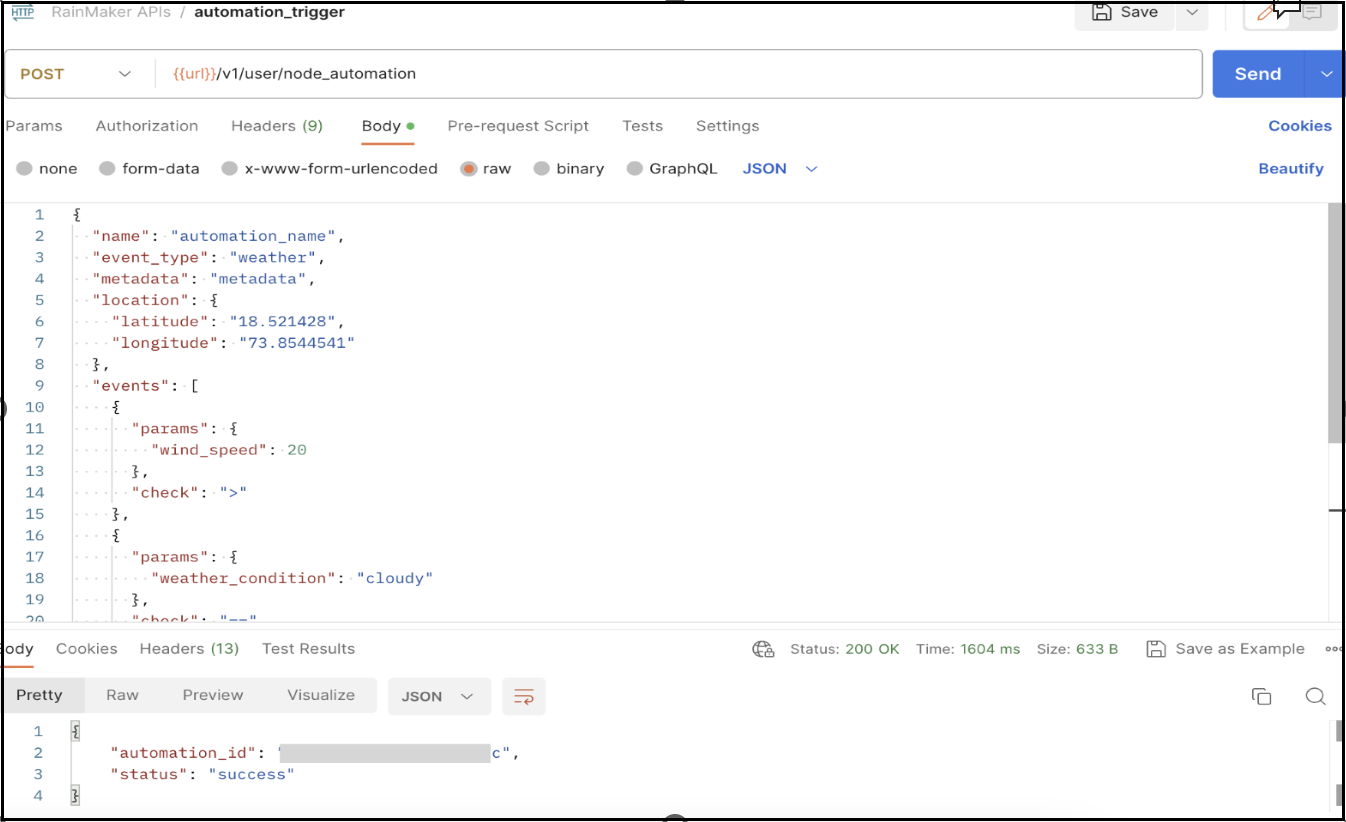
Create new postman API request POST -
{HTTP_BASE_URL}/v1/user/node_automationHeader -
Key Value Authorization {access_token}Body - Change the node_id value according to the node on which you want to apply automation trigger.
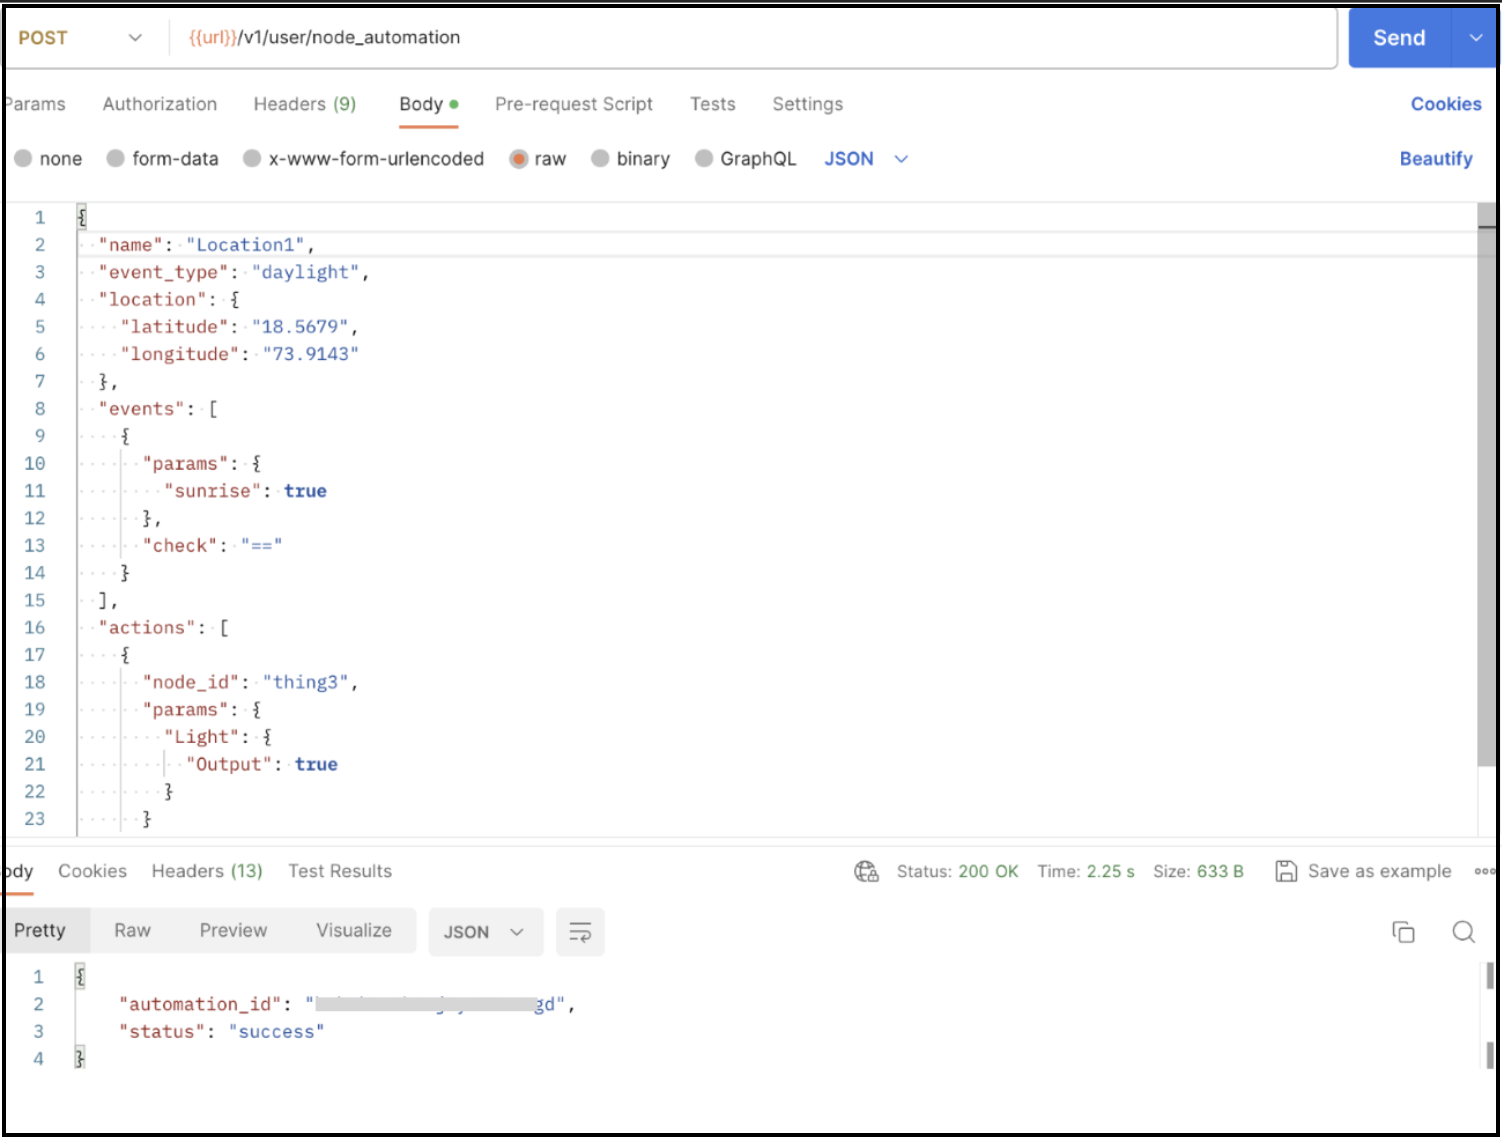
Using Daylight-based Automation triggers
- To get sample request, visit link: https://swaggerapis.rainmaker.espressif.com/#/Automation%20Trigger%20and%20Actions/addAutomationTriggerAction Under the Request Body, click on drop down menu & select the Add Weather-based Automation trigger

-
Create new postman api request
POST - {{url}}/v1/user/node_automationHeader –Key Value Authorization {{access_key}}Body -
Change the node_id value according to the node on which you want to apply automation trigger.