Deploying Voice Assistant Integrations (Optional)
Overview
This guide covers the deployment of 3P-Integration stacks to integrate Alexa and Google Voice Assistants with RainMaker, using AWS SAM and CloudFormation StackSets. Key integrations include Cognito App Clients for Alexa and Google, Lambda functions for voice assistant directives, and essential add-ons for certification requirements.
Component Description
It consolidately consists of below stacks:
- AWS Cognito App Clients for Alexa and Google Voice Assistant (ESP-RainMaker-3p-CognitoClients)
- The deployment will create AWS Cognito App Clients for the Alexa Skill and Google Actions.
- Alexa Smart Home Skill and Google Smart Home Action in 3 regions (ESP-RainMaker-3P-Integrations)
- The lambda functions handling the directives from Alexa and Google Voice Assistant will be deployed.
Alexa Smart Home Skill and Google Action AddOn Extension
Google Actions: Addons repo provides the webhook handler that proactively reports the changes in node state to Google's Home Graph database. For more information, check Google Smart Home Action Report State. Proactive reporting is required for certifying your Google action.
Alexa Skills: Addons repo provides the API endpoints required to set up Alexa App to App account linking. Alexa App to App account linking makes it possible to link account starting from your app. For more information, check Alexa App to App Account Linking. It is required to implement App to App account linking for Alexa skill to get Works with Alexa (WWA) certification for your product.(WWA certification is different from Alexa skill certification and publication).
For Alexa and Google Action certification, it is necessary to have the above functionalities, hence it is required to deploy this repository.
Pre-requisites
ESP-RainMaker-3p-CognitoClients
- Ensure that Cognito domain is created using steps given in Cognito Domain Configurations.
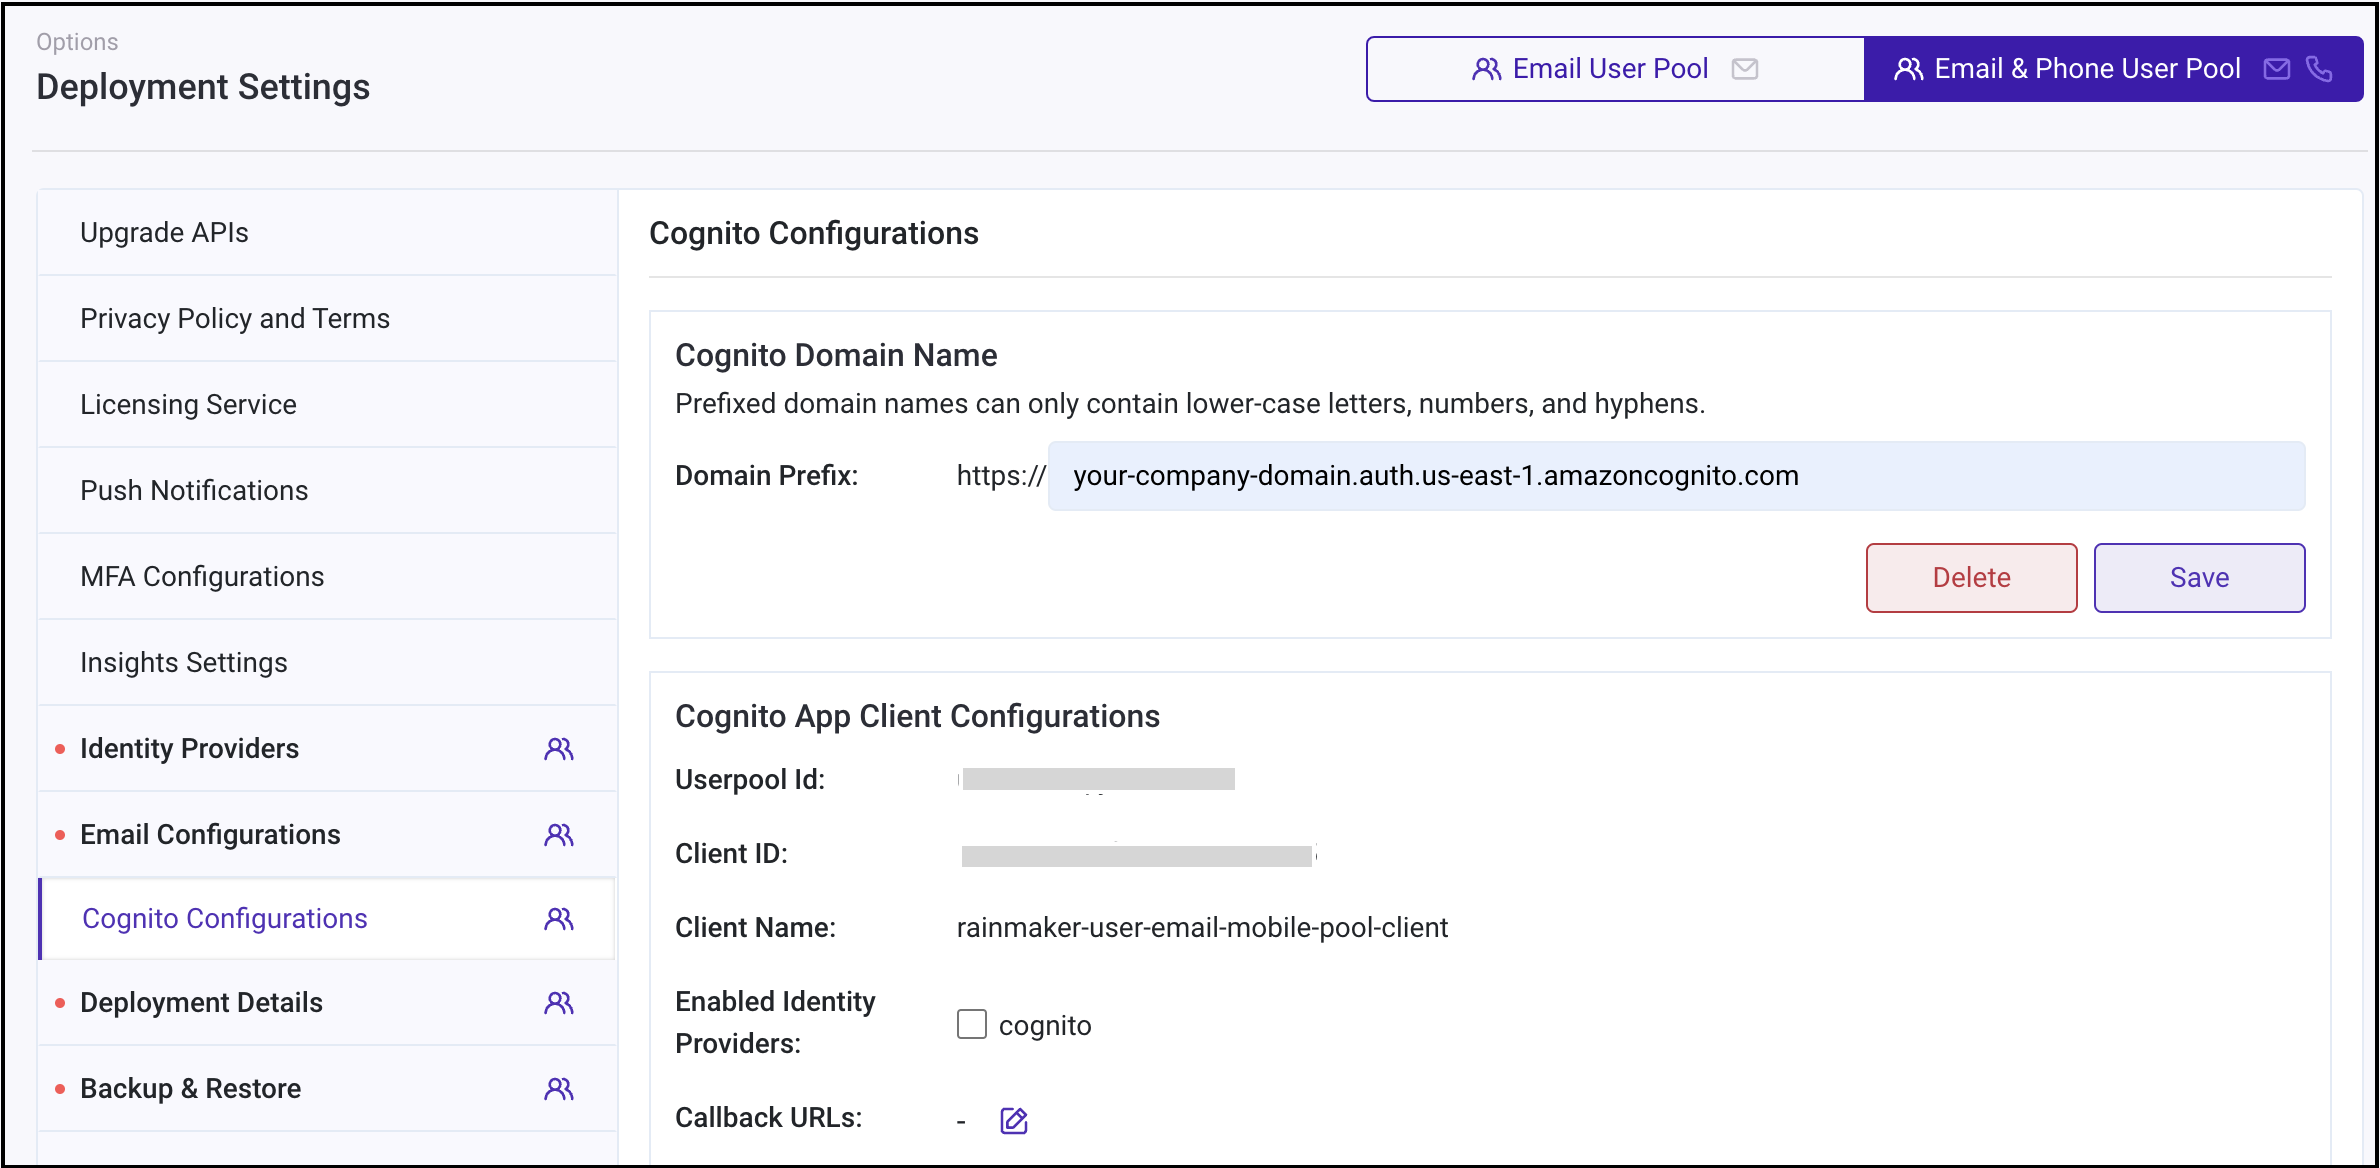
- Note down the Identity Providers
To obtain the list of the configured Identity providers in the RainMaker deployment, go to the RainMaker Dashboard and click on the Deployment Settings tab in the left nav-bar.
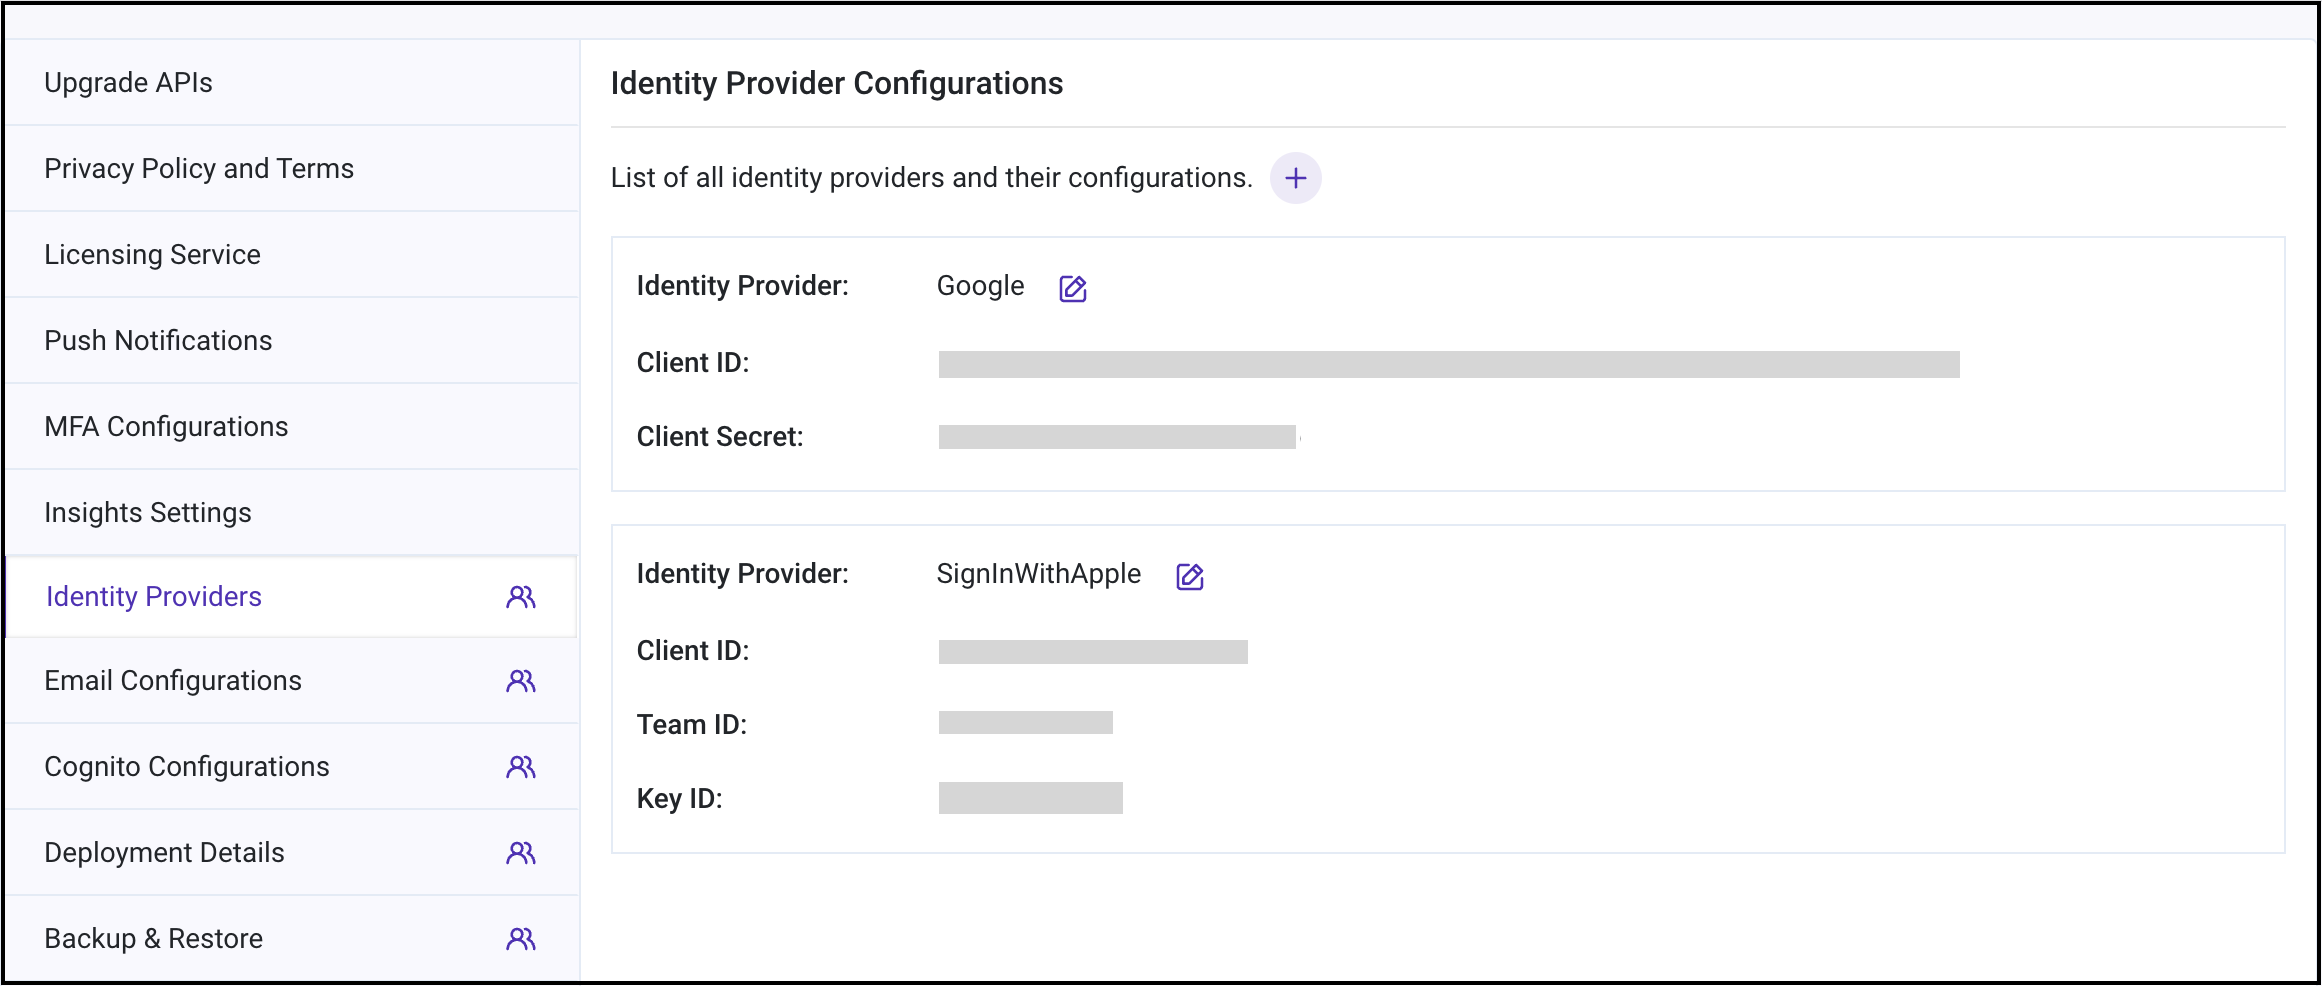
Then click on the Identity providers tab.
Note down the Identity Providers.
If Google, GitHub, and SignInWithApple are configured, then the corresponding values in the SkillIdentityProviders while deploying the ESP-RainMaker-3p-CognitoClients SAR Application will be Google, GitHub, SignInWithApple, COGNITO.
Note: If no identity provider is configured, then the default value will be set to only COGNITO.
Note down AlexaCognitoCallbackURLs and SkillId as described in the Alexa skill creation step.
Note down GVACallbackURLs as described in the Google Action creation step.
ESP-RainMaker-3P-Integrations
- Alexa GVA handlers call the RainMaker API endpoint URL for device information. Thus, the RainMaker API URL needs to be given as input to the ESP-RainMaker-3P-Integrations Application.
- Follow Get Base Url steps to fetch the RainmakerAPIUrl.
- Rainmaker Backend API Endpoint URL:
<RainmakerAPIUrl>/v1/. - Please note down this value, it will be used as the APIEndPointURL in the next step.
Google Voice Assistant: Enabling Google Asynchronous messaging and getting Google messaging client details
GVA requires the handler to report the state to the Homegraph service in the Google Cloud. Thus, it is required to create and add the credentials of a Google Service Account into the handler.
If you want to deploy Google Action integration, follow the below steps to get these credentials.
- Enable the Homegraph API in your account. Detailed steps are given below.
- Go to Google Homegraph page.
- On the drop-down menu at the top, select your smart home project created in previous steps.
- Click on Enable.
- Create a Service Account Key file.
- Go to Google Service Account page.
- Select your smart home project created in the previous step.
- Click on the "Create Service Account" option.
- In the Service account Name field, enter a suitable name.
- In the description, enter "Service Account for report state token creation"
- Click on Create and Continue.
- In the next step, select the role type "Service Accounts" and select the role "Service Account token creator".
- Click Continue and then click on Done.
- Service Account is created, now you need to add the key to use the service account.
- Click on the created service account email.
- Go to the Keys option and click on Add Key.
- Select the "Create Key" option.
- Select the JSON key type.
- A file will be downloaded with the required credentials details.
- Open the downloaded service account file. The file will have the required credentials.
- Note down the values for GVAClientID (client_id), GVAClientEmail (client_email), GVAPrivateKey (private_key), GVAPrivateKeyID (private_key_id) & GVAProjectID (project_id) in the key file.
Alexa Skills: Enabling Alexa asynchronous messaging and getting Alexa messaging client details
For Works with Alexa certification, the device state is reported to Alexa. Thus, it is required to enable Asynchronous messaging.
If you want to deploy Alexa skills integration, enable Alexa Asynchronous messages and copy the AlexaClientId and AlexaClientSecret. The detailed steps are as below:
Login to Alexa Developer Console.
Select the smart home skill that you created in the previous steps.
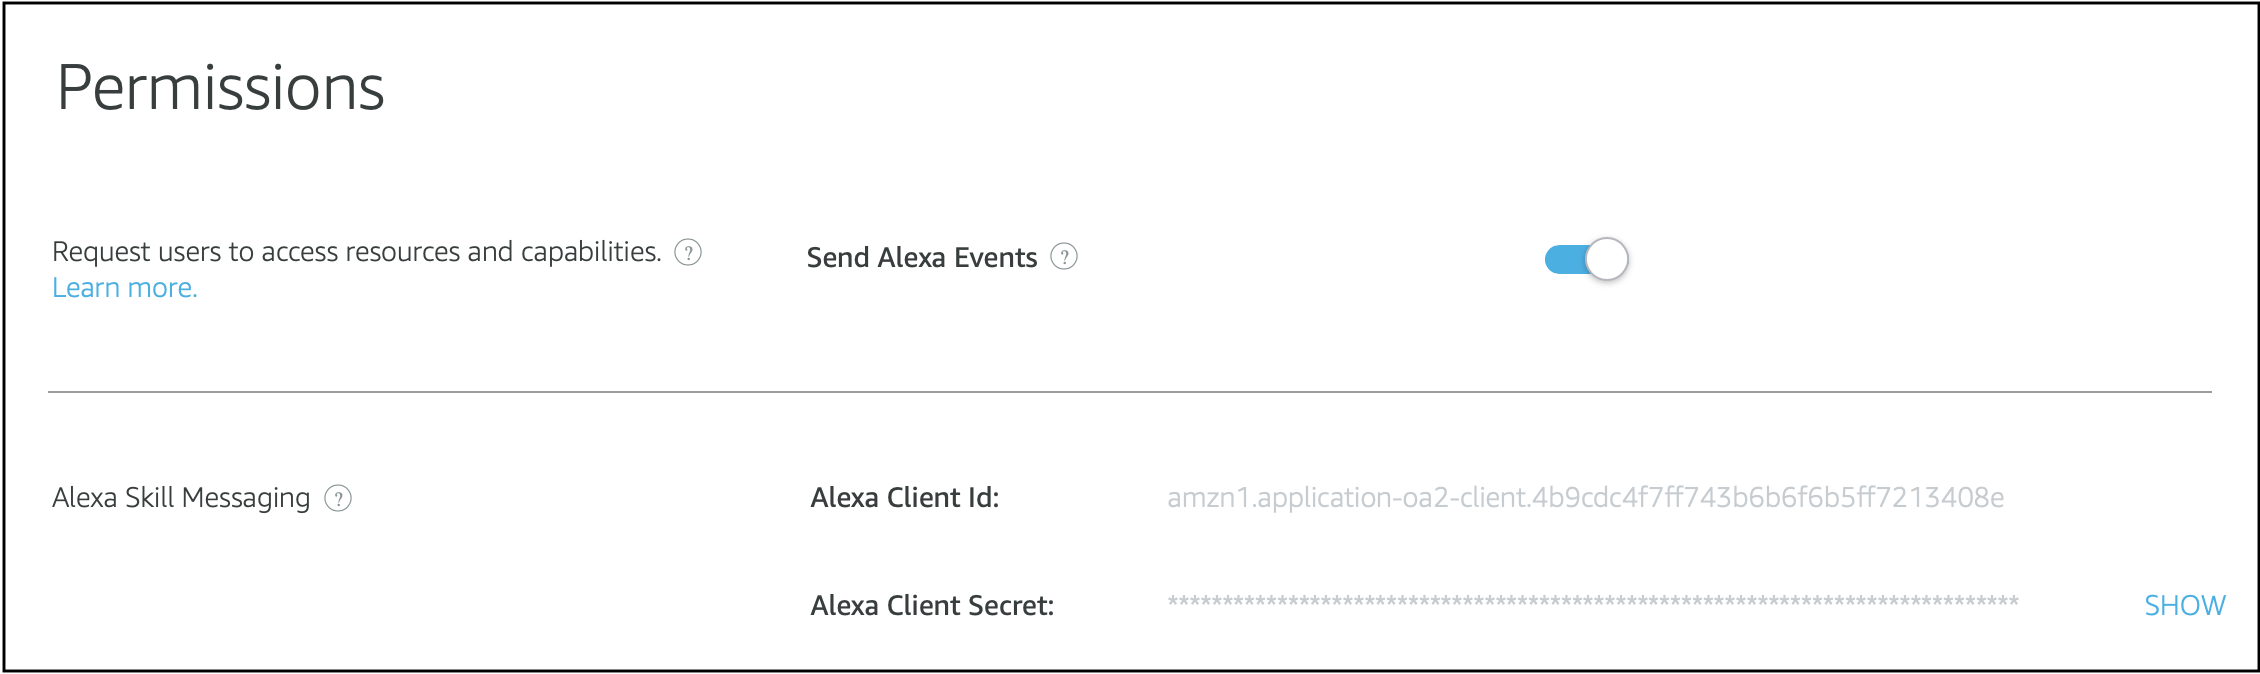
Go to the "permissions" tab from the left nav bar, and enable the "Send Alexa Events" option.

After you enable the "Send Alexa Events" option, a new section "Alexa Skill Messaging" will be visible.
Note down the values of Alexa Client Id and Alexa Client Secret.
Deployment Steps
To deploy the Alexa and GVA Voice integration components, we will use the CloudFormation multi-region stackset. This will deploy the following modules:
- ESP-RainMaker-3p-CognitoClients
- ESP_RainMaker-3P-Integrations-Addons
- ESP-RainMaker-3P-Integrations(Regions: us-east-1, eu-west-1, us-west-2)
Go to AWS Management Console
- Search for CloudFormation in the Services menu and click on it.

Create a Stackset
- Click on "Create stackset" in the CloudFormation service.

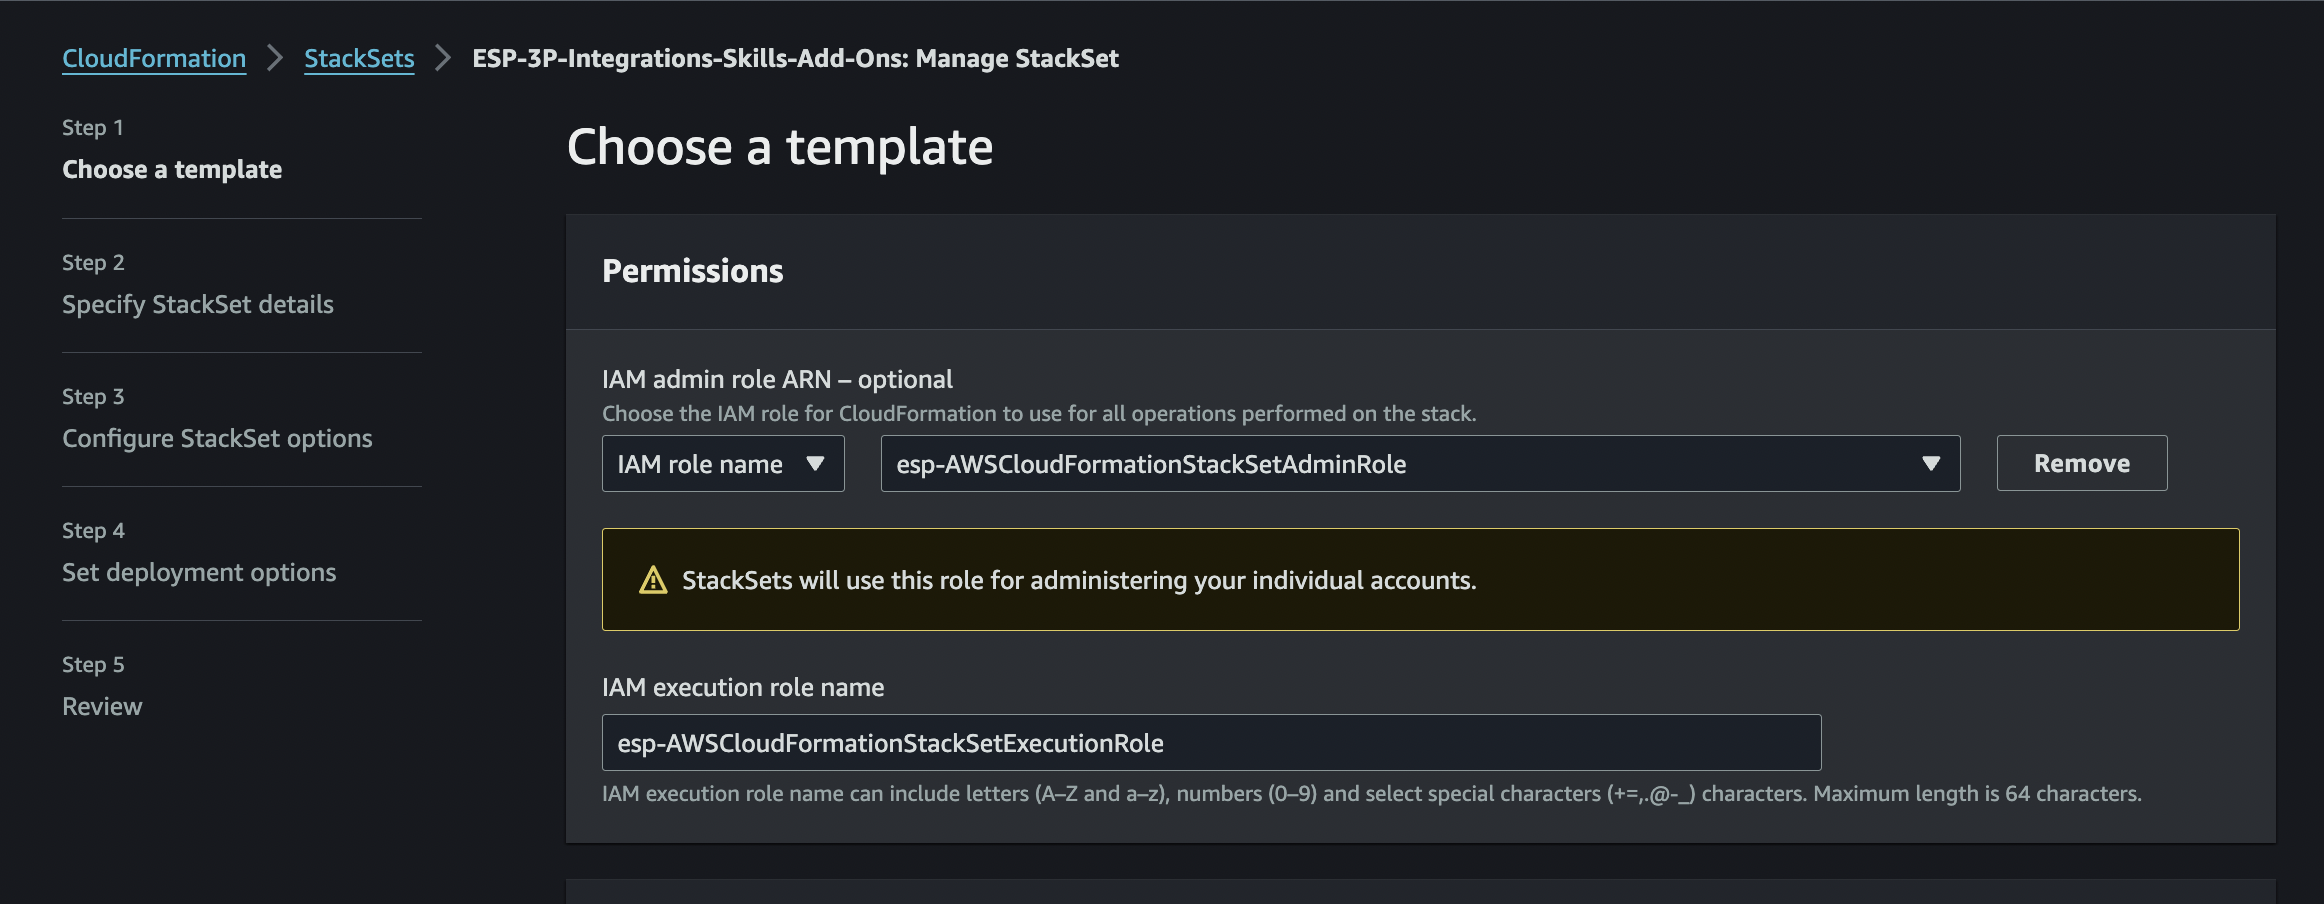
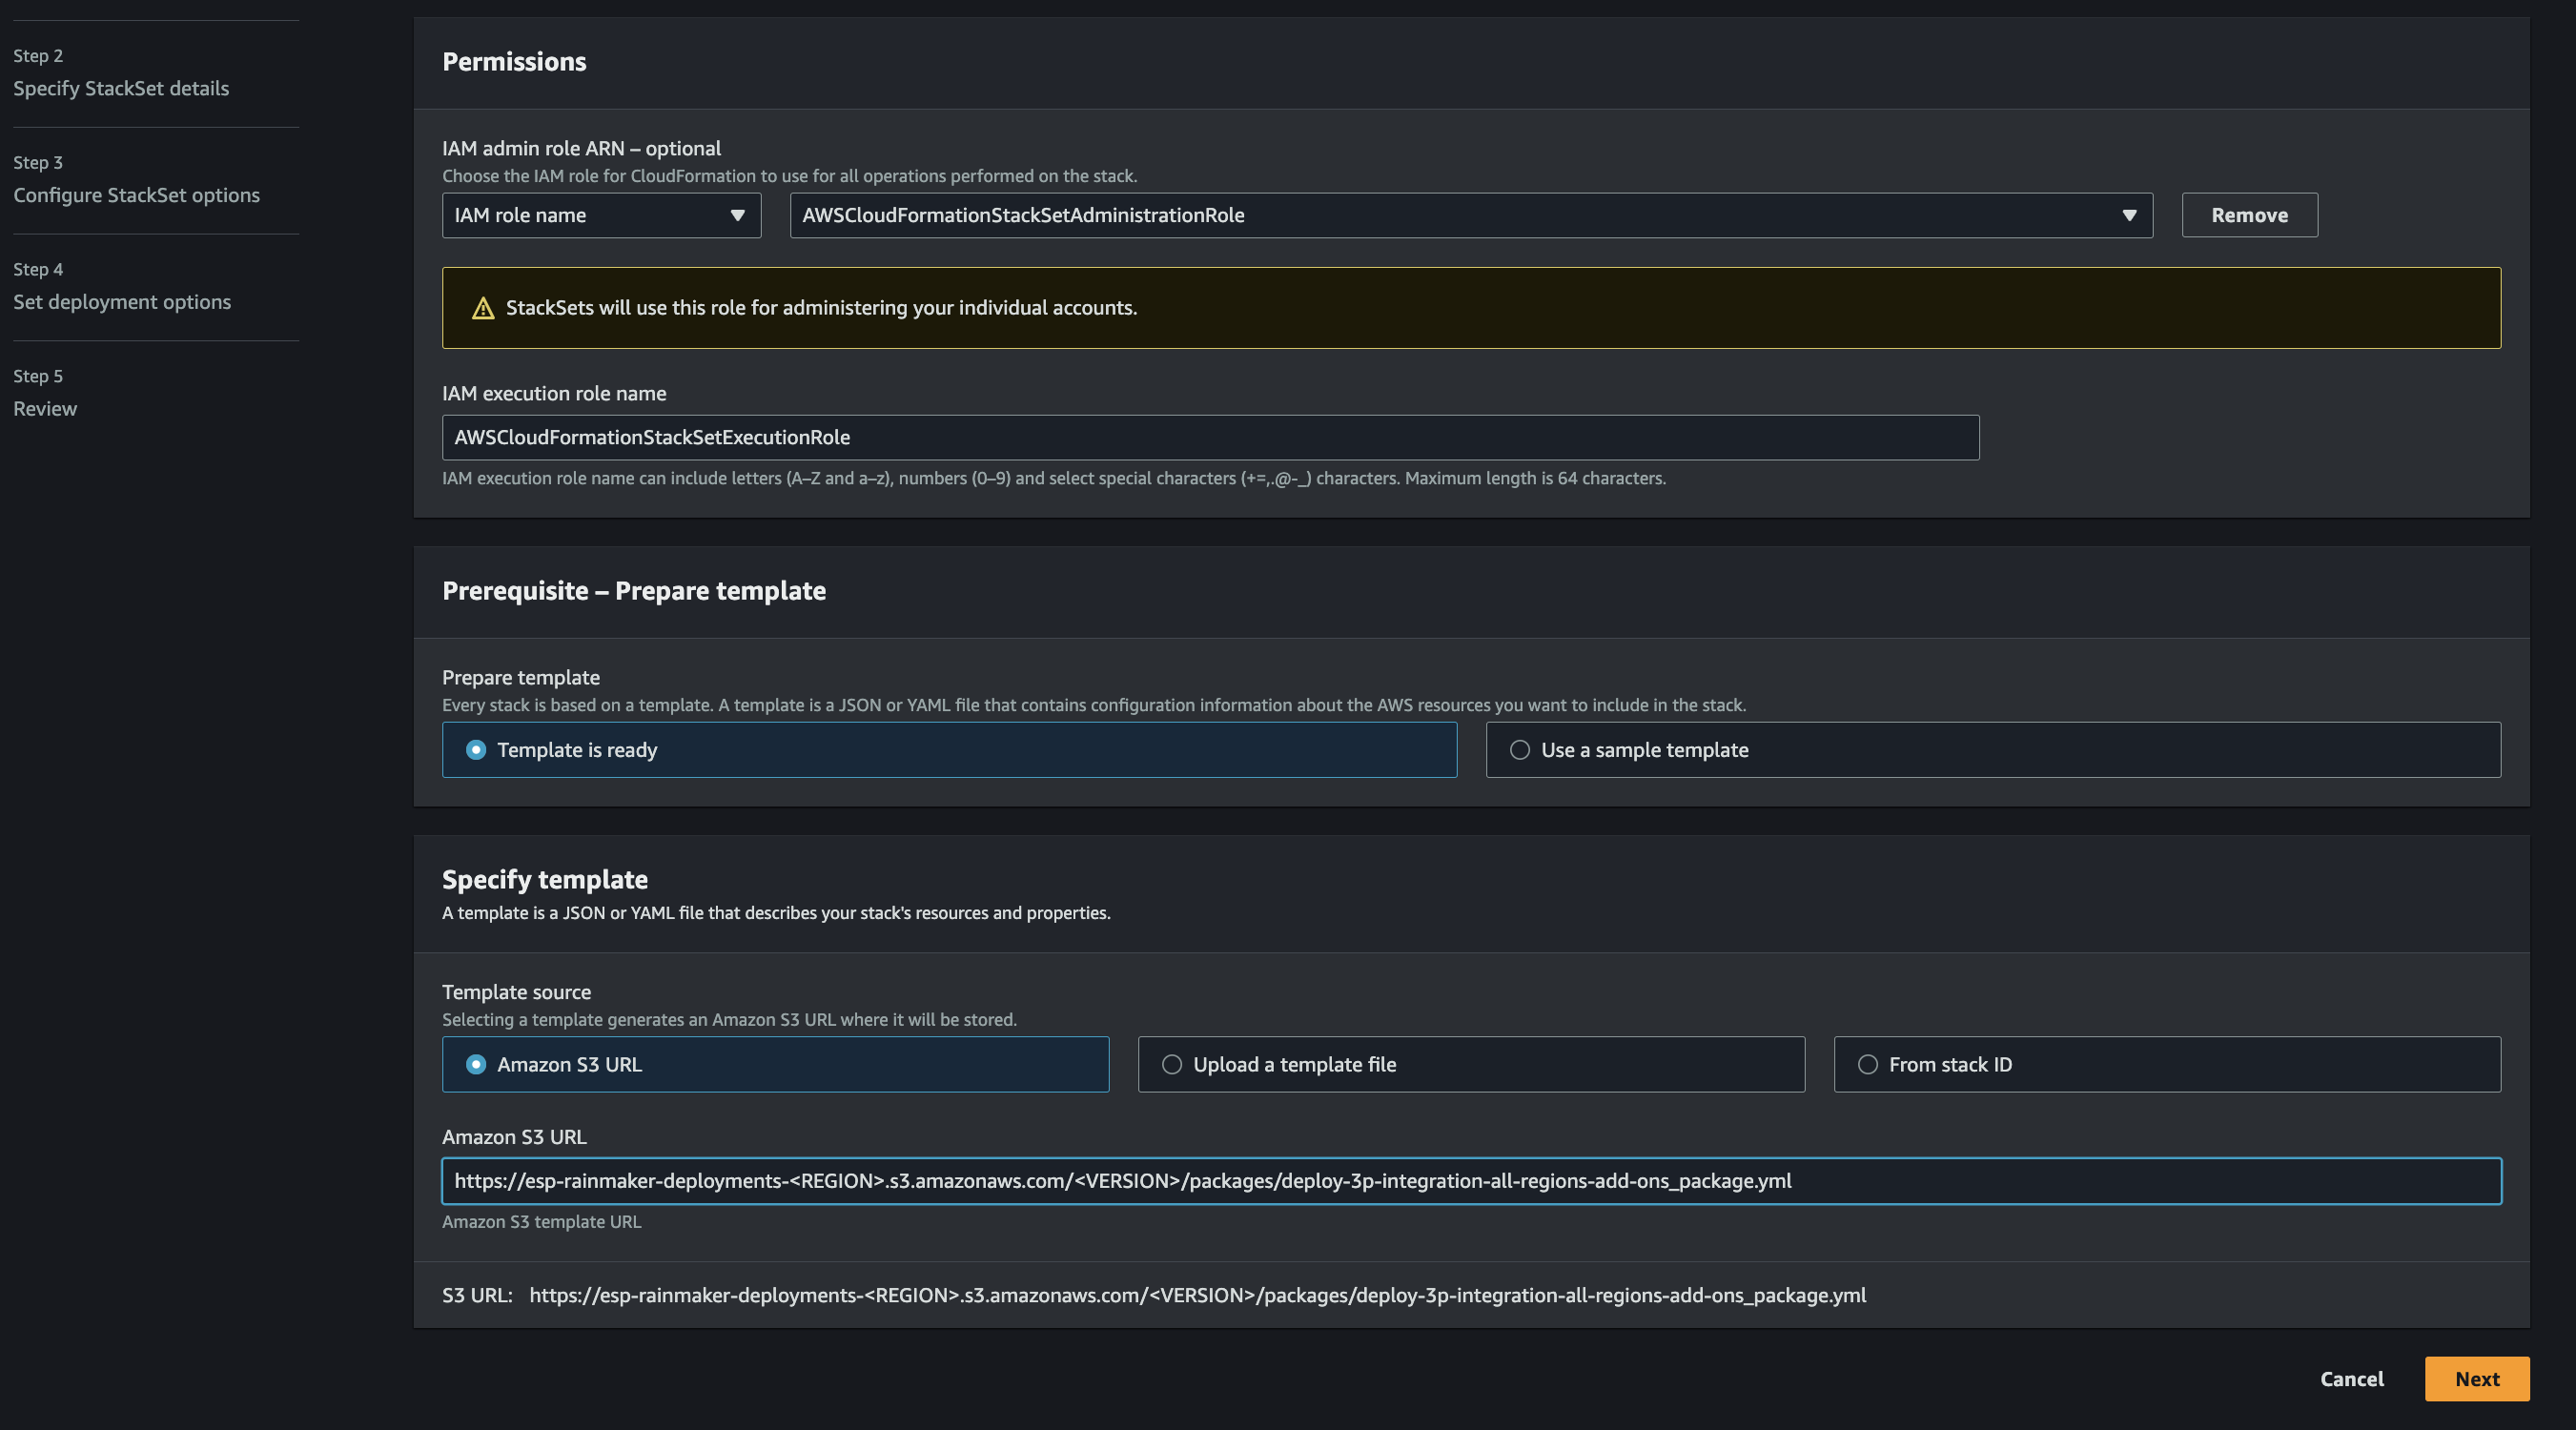
Select IAM Roles
- The required IAM roles will be automatically created. Choose the appropriate roles and click "Next". Rolename for Admin: esp-AWSCloudFormationStackSetAdminRole Rolename for Execution: esp-AWSCloudFormationStackSetExecutionRole
Select Template
- Construct the S3 URL Template from here
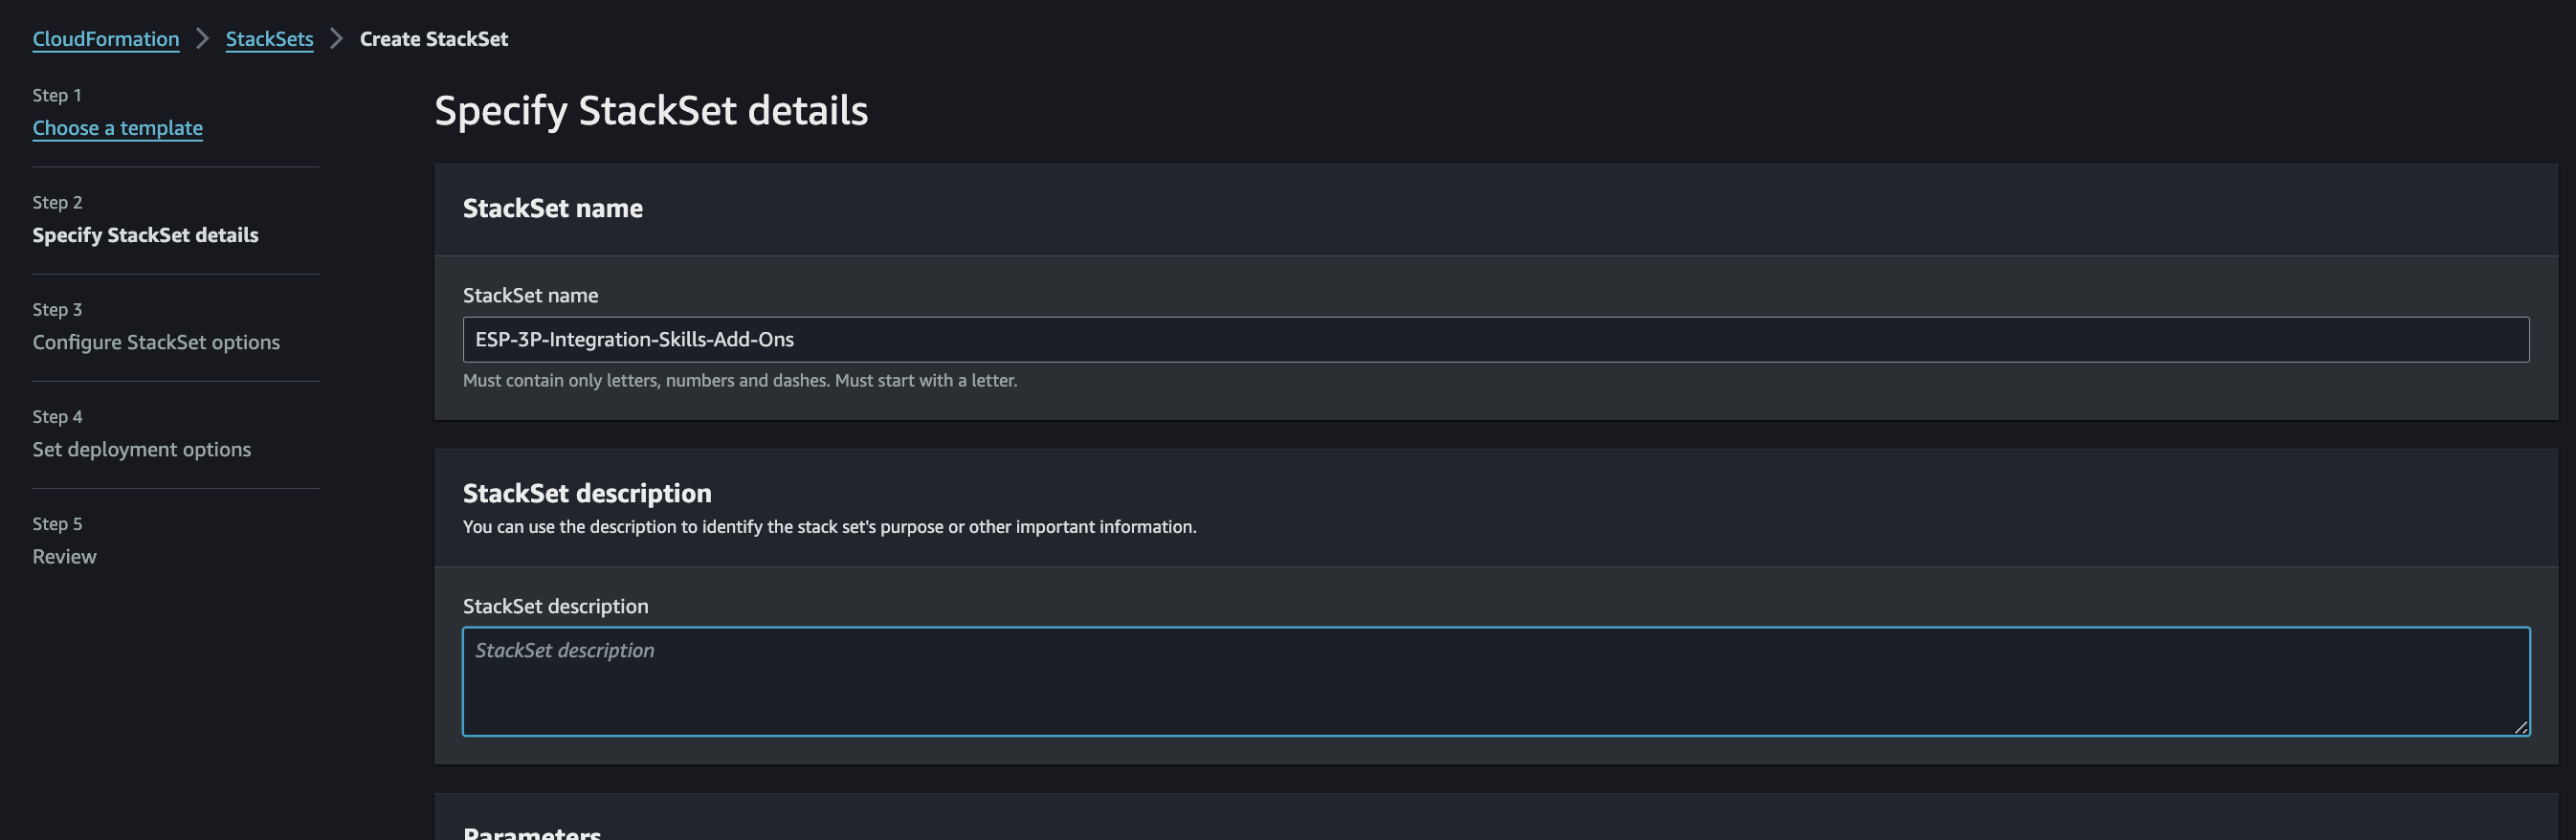
Enter Stack Name
- Enter the stack name as ESP-3P-Integrations-Skills-Add-Ons.
Enter Input Parameters
- Provide the required input parameters for Alexa and GVA integration. You can refer to their respective module sections for descriptions.
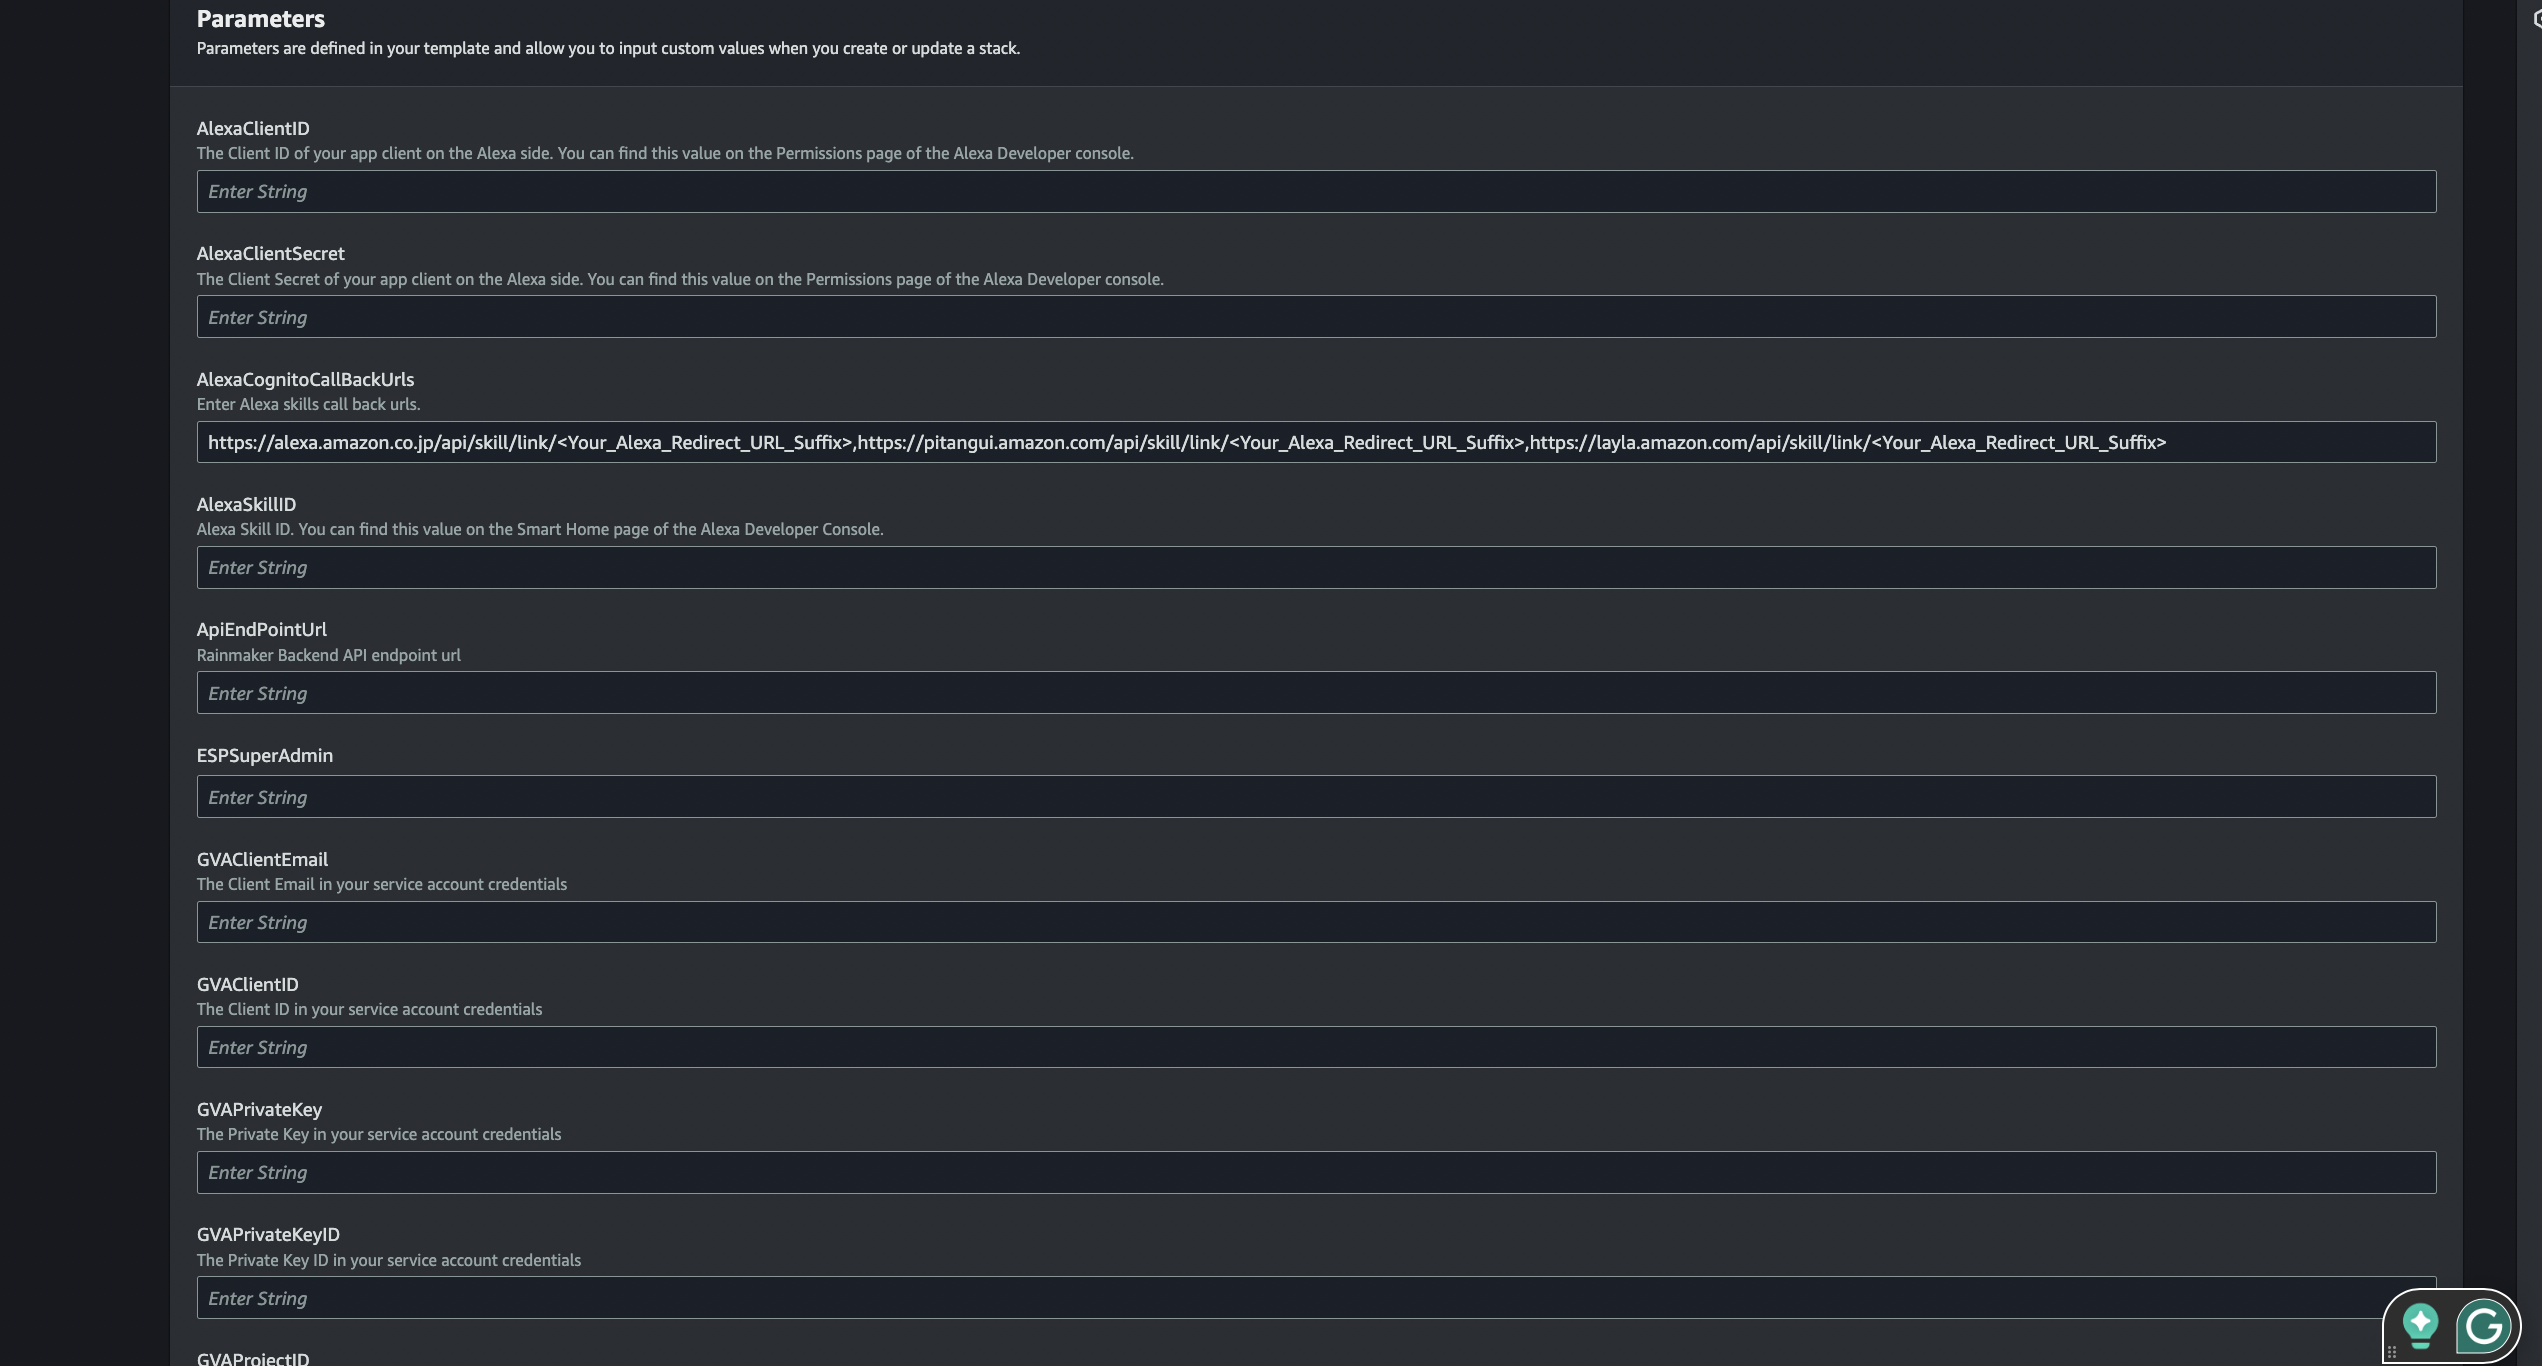
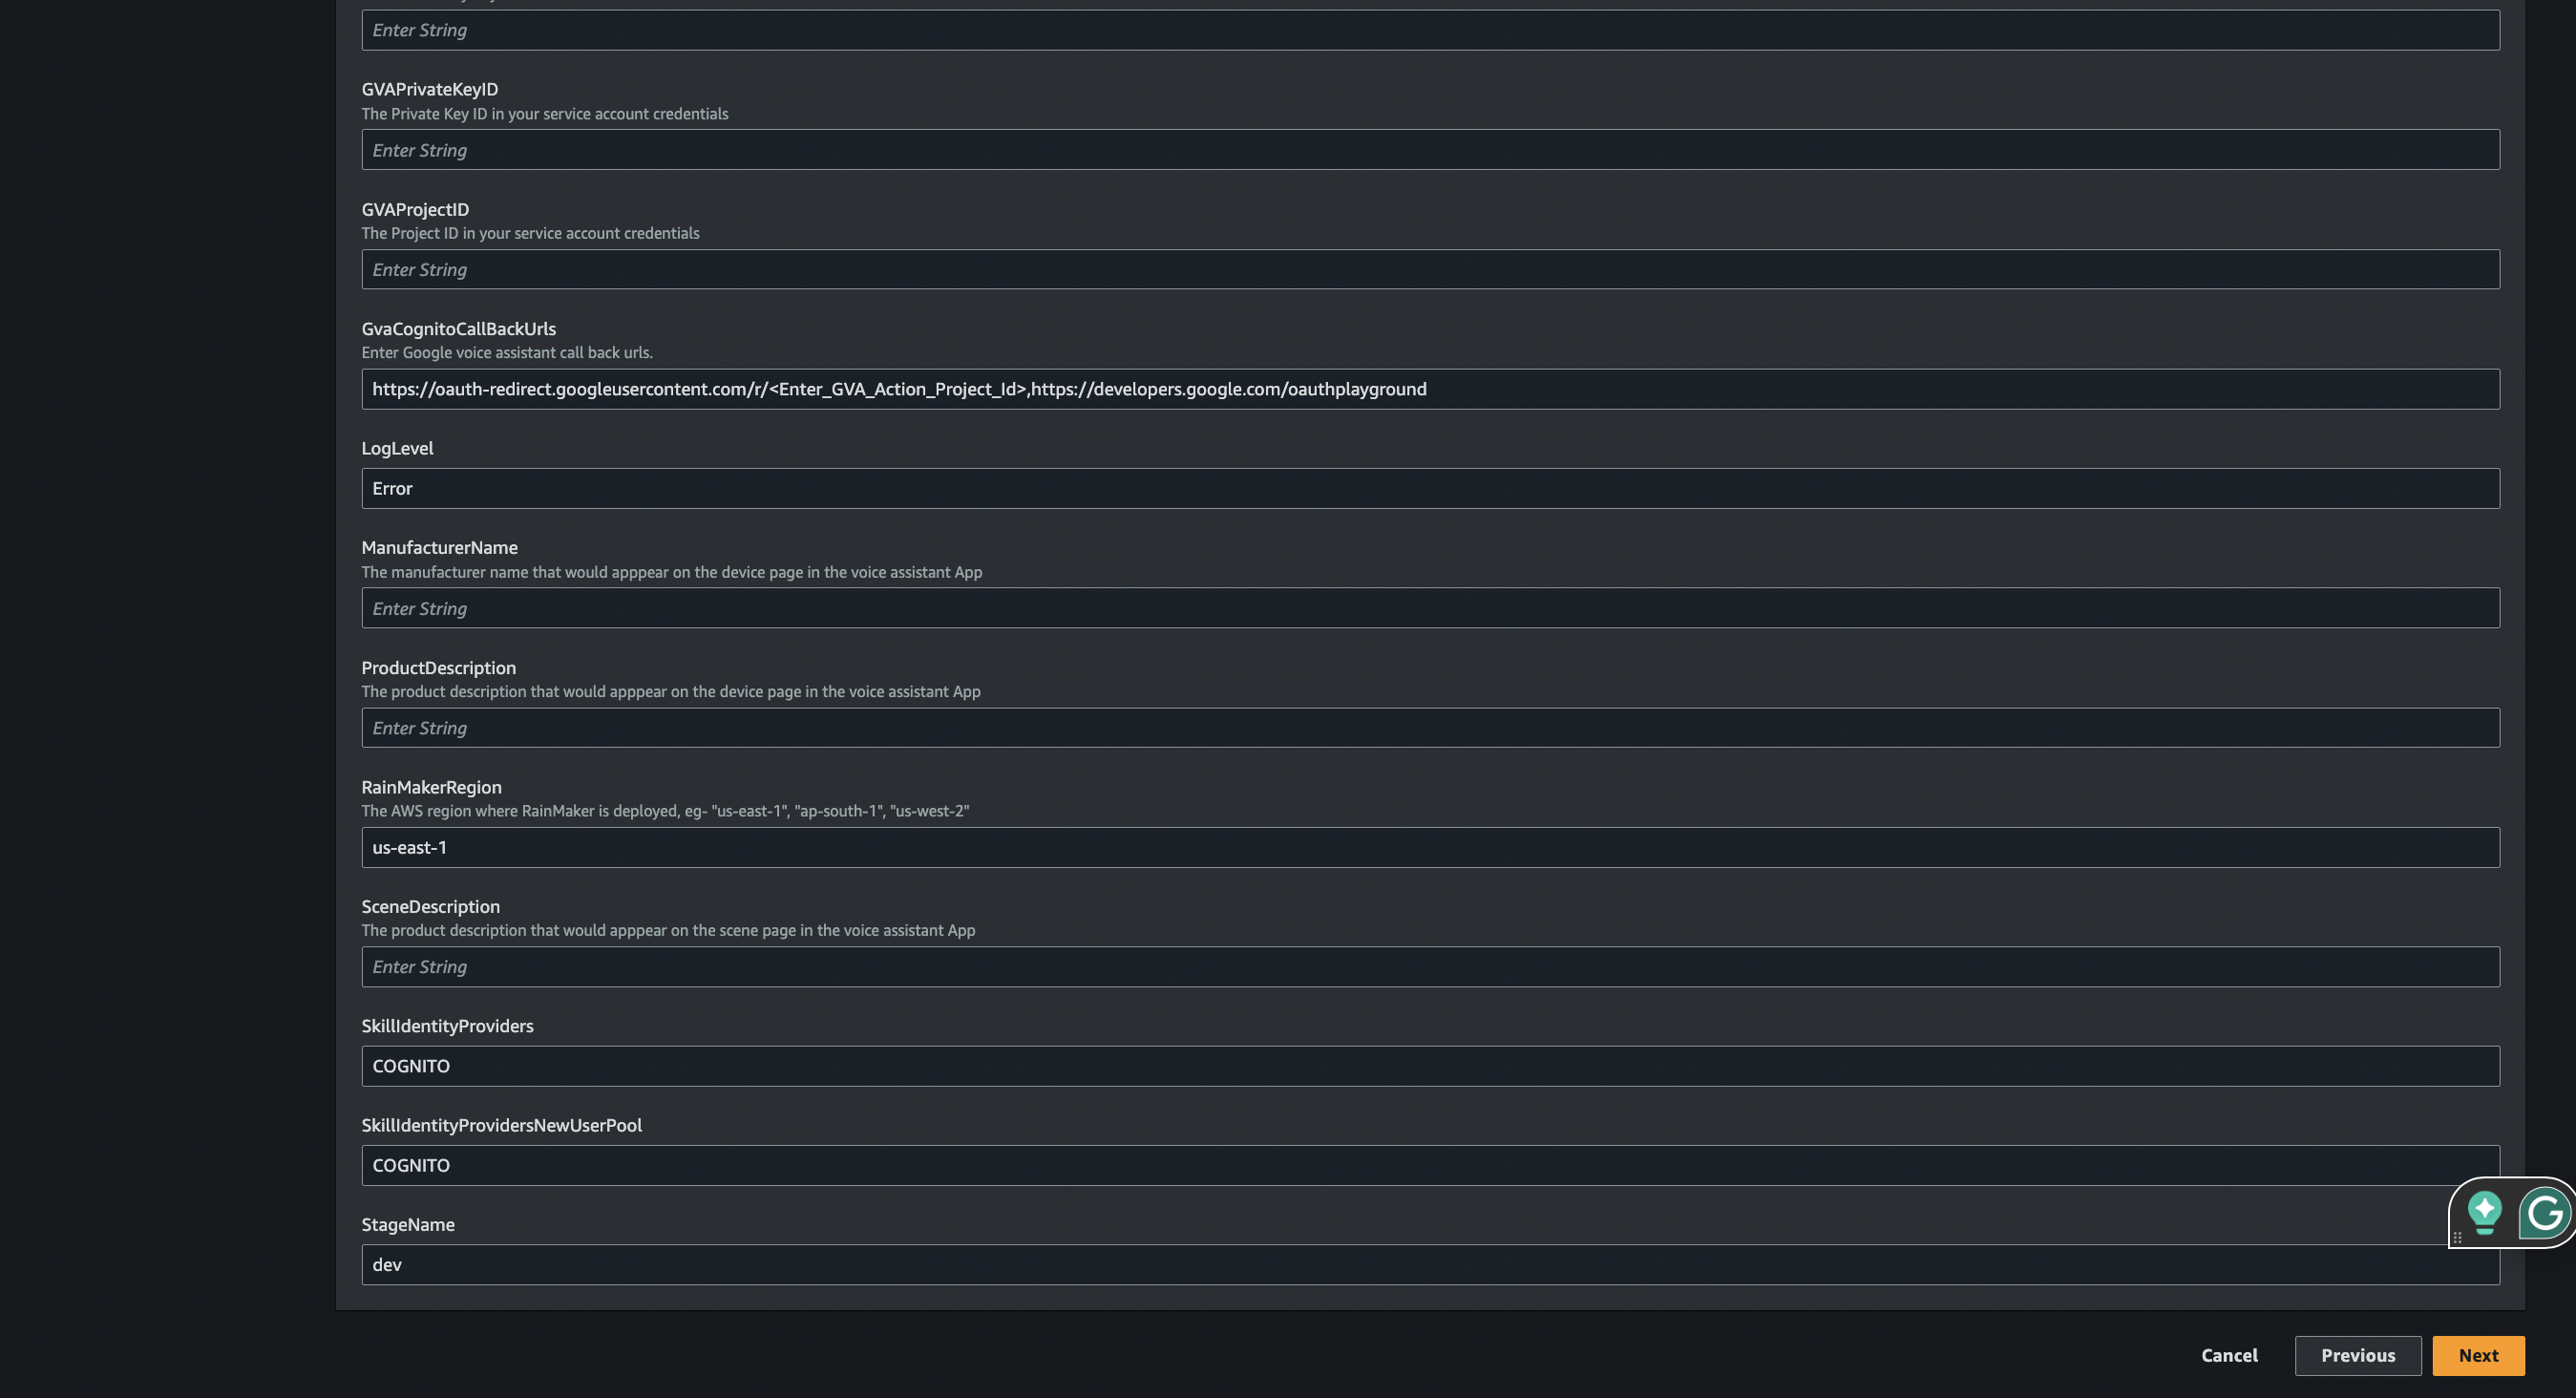
- Click "Next" to proceed.
Parameter Name Description AlexaCognitoCallBackUrlsThe value for this parameter can be found in the section - Create an Alexa Smart Home Skill GVACognitoCallBackUrlsThe value for this parameter can be found in the section - Create a Google Smart Home Action SkillIdentityProvidersNewUserPoolEnter the identity providers noted down in the section, Creating the AWS Cognito App Clients for Alexa and Google Voice Assistant SkillIdentityProvidersKeep default values.If Google, GitHub, and SignInWithApple are configured, then the corresponding values in the SkillIdentityProviders will be Google, GitHub, SignInWithApple, COGNITO. APIEndPointURLThe RainMaker Backend API Endpoint URL noted down in the section Getting the value of API Endpoint URL. This URL will be used by both Alexa and GVA handlers to communicate with the RainMaker backend. AlexaClientIDThe Alexa Client ID noted down from the previous section. This will be used to get the Alexa refresh token for users. AlexaClientSecretThe Alexa Client Secret noted down from the previous section. AlexaSkillIDYour Alexa skill ID noted down from the previous sections. RainMakerRegionEnter the region where RainMaker is deployed (e.g., us-east-1).ManufacturerNameEnter the manufacturer name for your product. This will be visible for all scenes and products connected via your application. ProductDescriptionEnter the description of your product. SceneDescriptionEnter the description of scenes associated with your product. GVAClientIDGoogle Client ID from Service Account as copied from the service account key file. GVAClientEmailGoogle Client Email from Service Account as copied from the service account key file. GVAPrivateKeyGoogle Private Key from Service Account as copied from the service account key file. GVAPrivateKeyIDGoogle Private Key ID from Service Account as copied from the service account key file. GVAProjectIDGoogle Project ID as copied from the service account key file. - Provide the required input parameters for Alexa and GVA integration. You can refer to their respective module sections for descriptions.
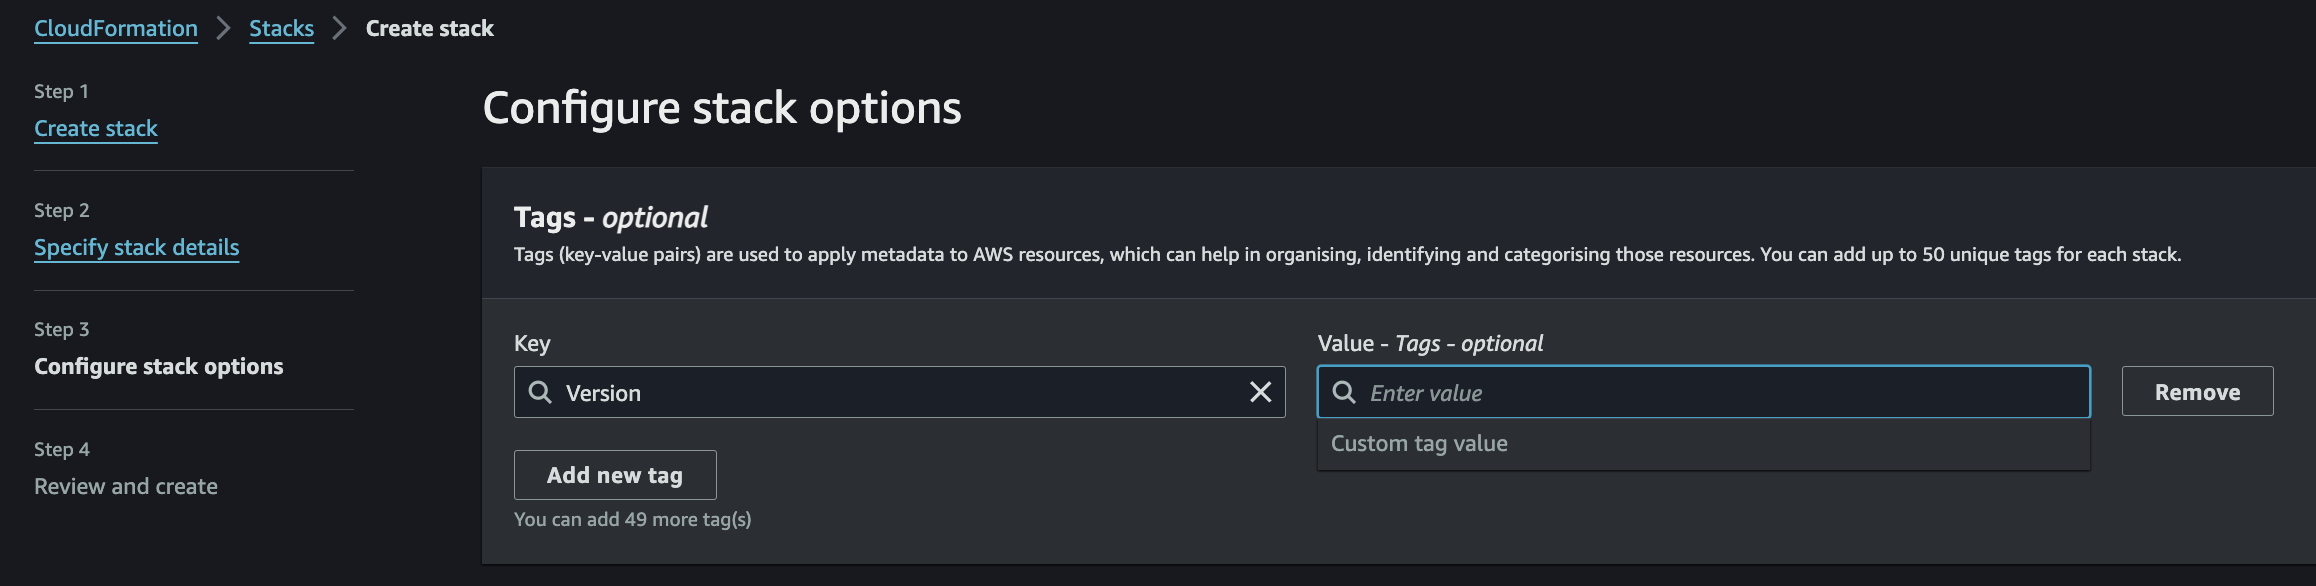
Add Tags
- Add a version tag by entering the following details:
- Key: Version
- Value:
<VERSION>(replace with your selected version)
- Click on Add new tag and leave the rest as default. Click "Next".
- Add a version tag by entering the following details:
Enter Account ID and Select Regions
- Enter your Account ID in place of
<ACCOUNT_ID>. - Alexa requires a multi-region deployment to support invocations from all geographies.Hence Select the following regions:
- US East 1 (N. Virginia)
- US West 2 (Oregon)
- EU West 1 (Ireland)
- If your Rainmaker region differs, select the appropriate Rainmaker region as well from the dropdown.
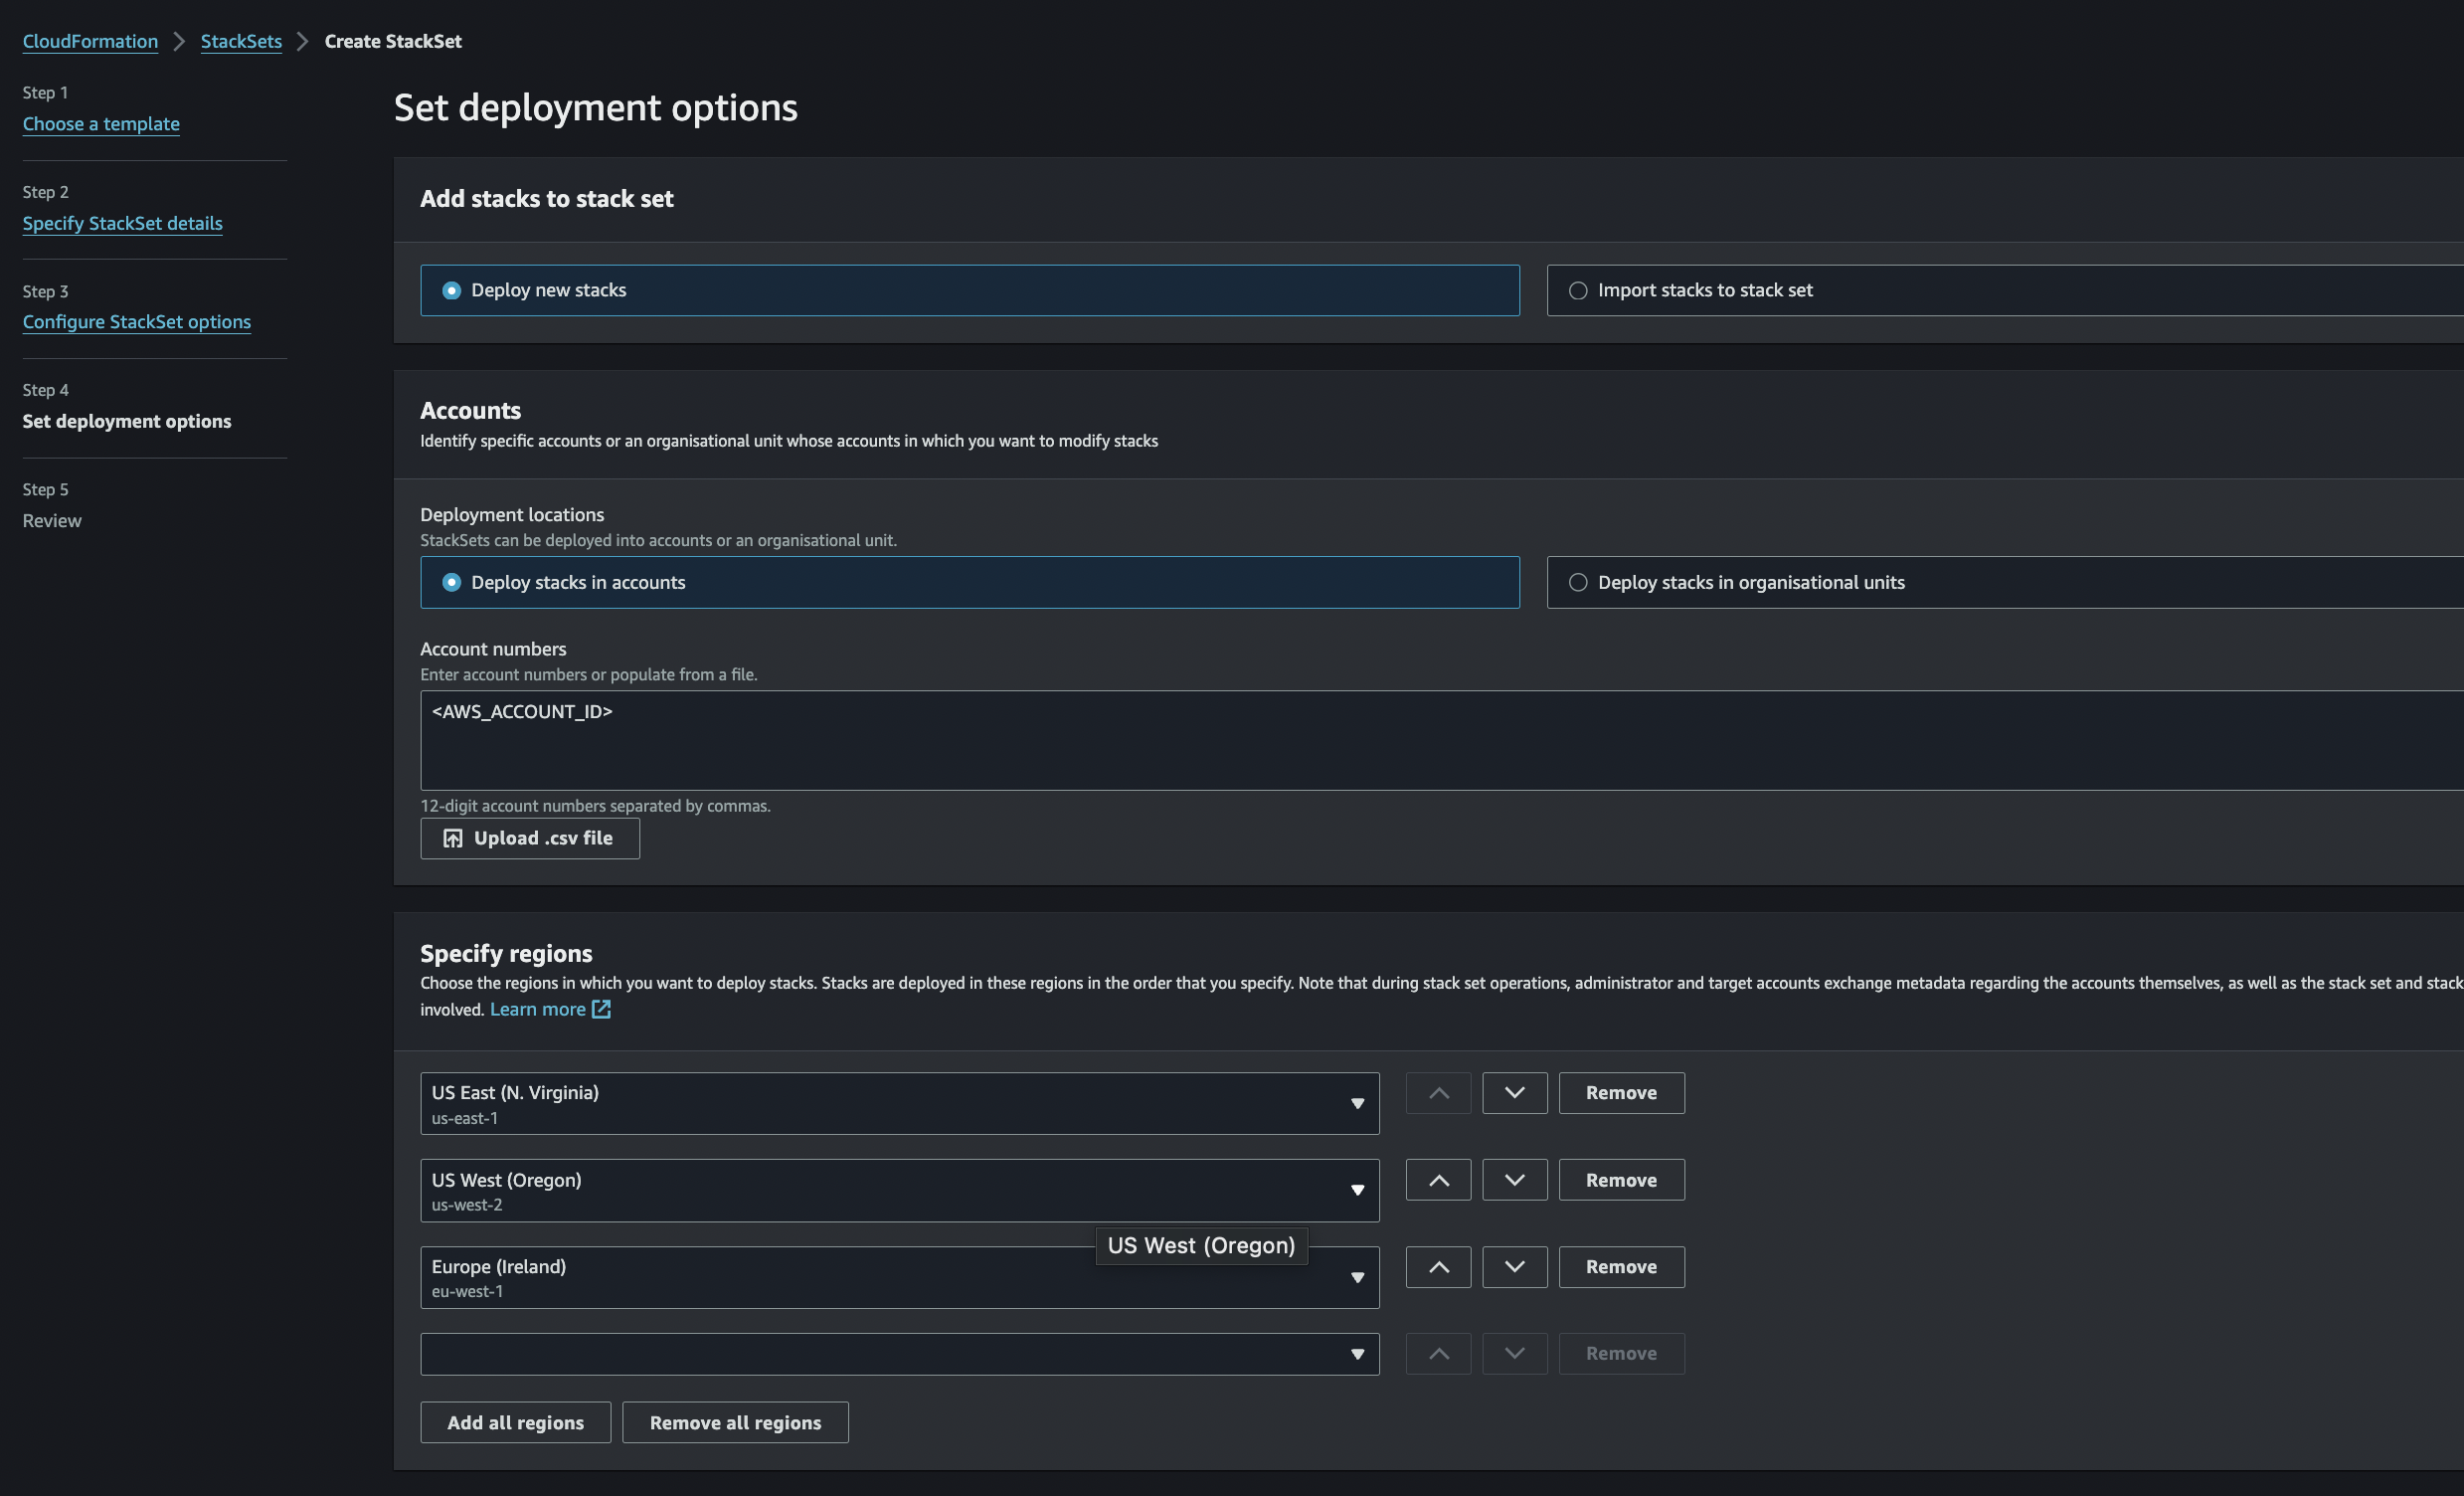
- Enter your Account ID in place of
Review and Create
- Select the following options:
- I acknowledge that AWS CloudFormation might create IAM resources.
- I acknowledge that AWS CloudFormation might create IAM resources with custom names.
- I acknowledge that AWS CloudFormation might require the capability: CAPABILITY_AUTO_EXPAND.
- Click on Create stackset.
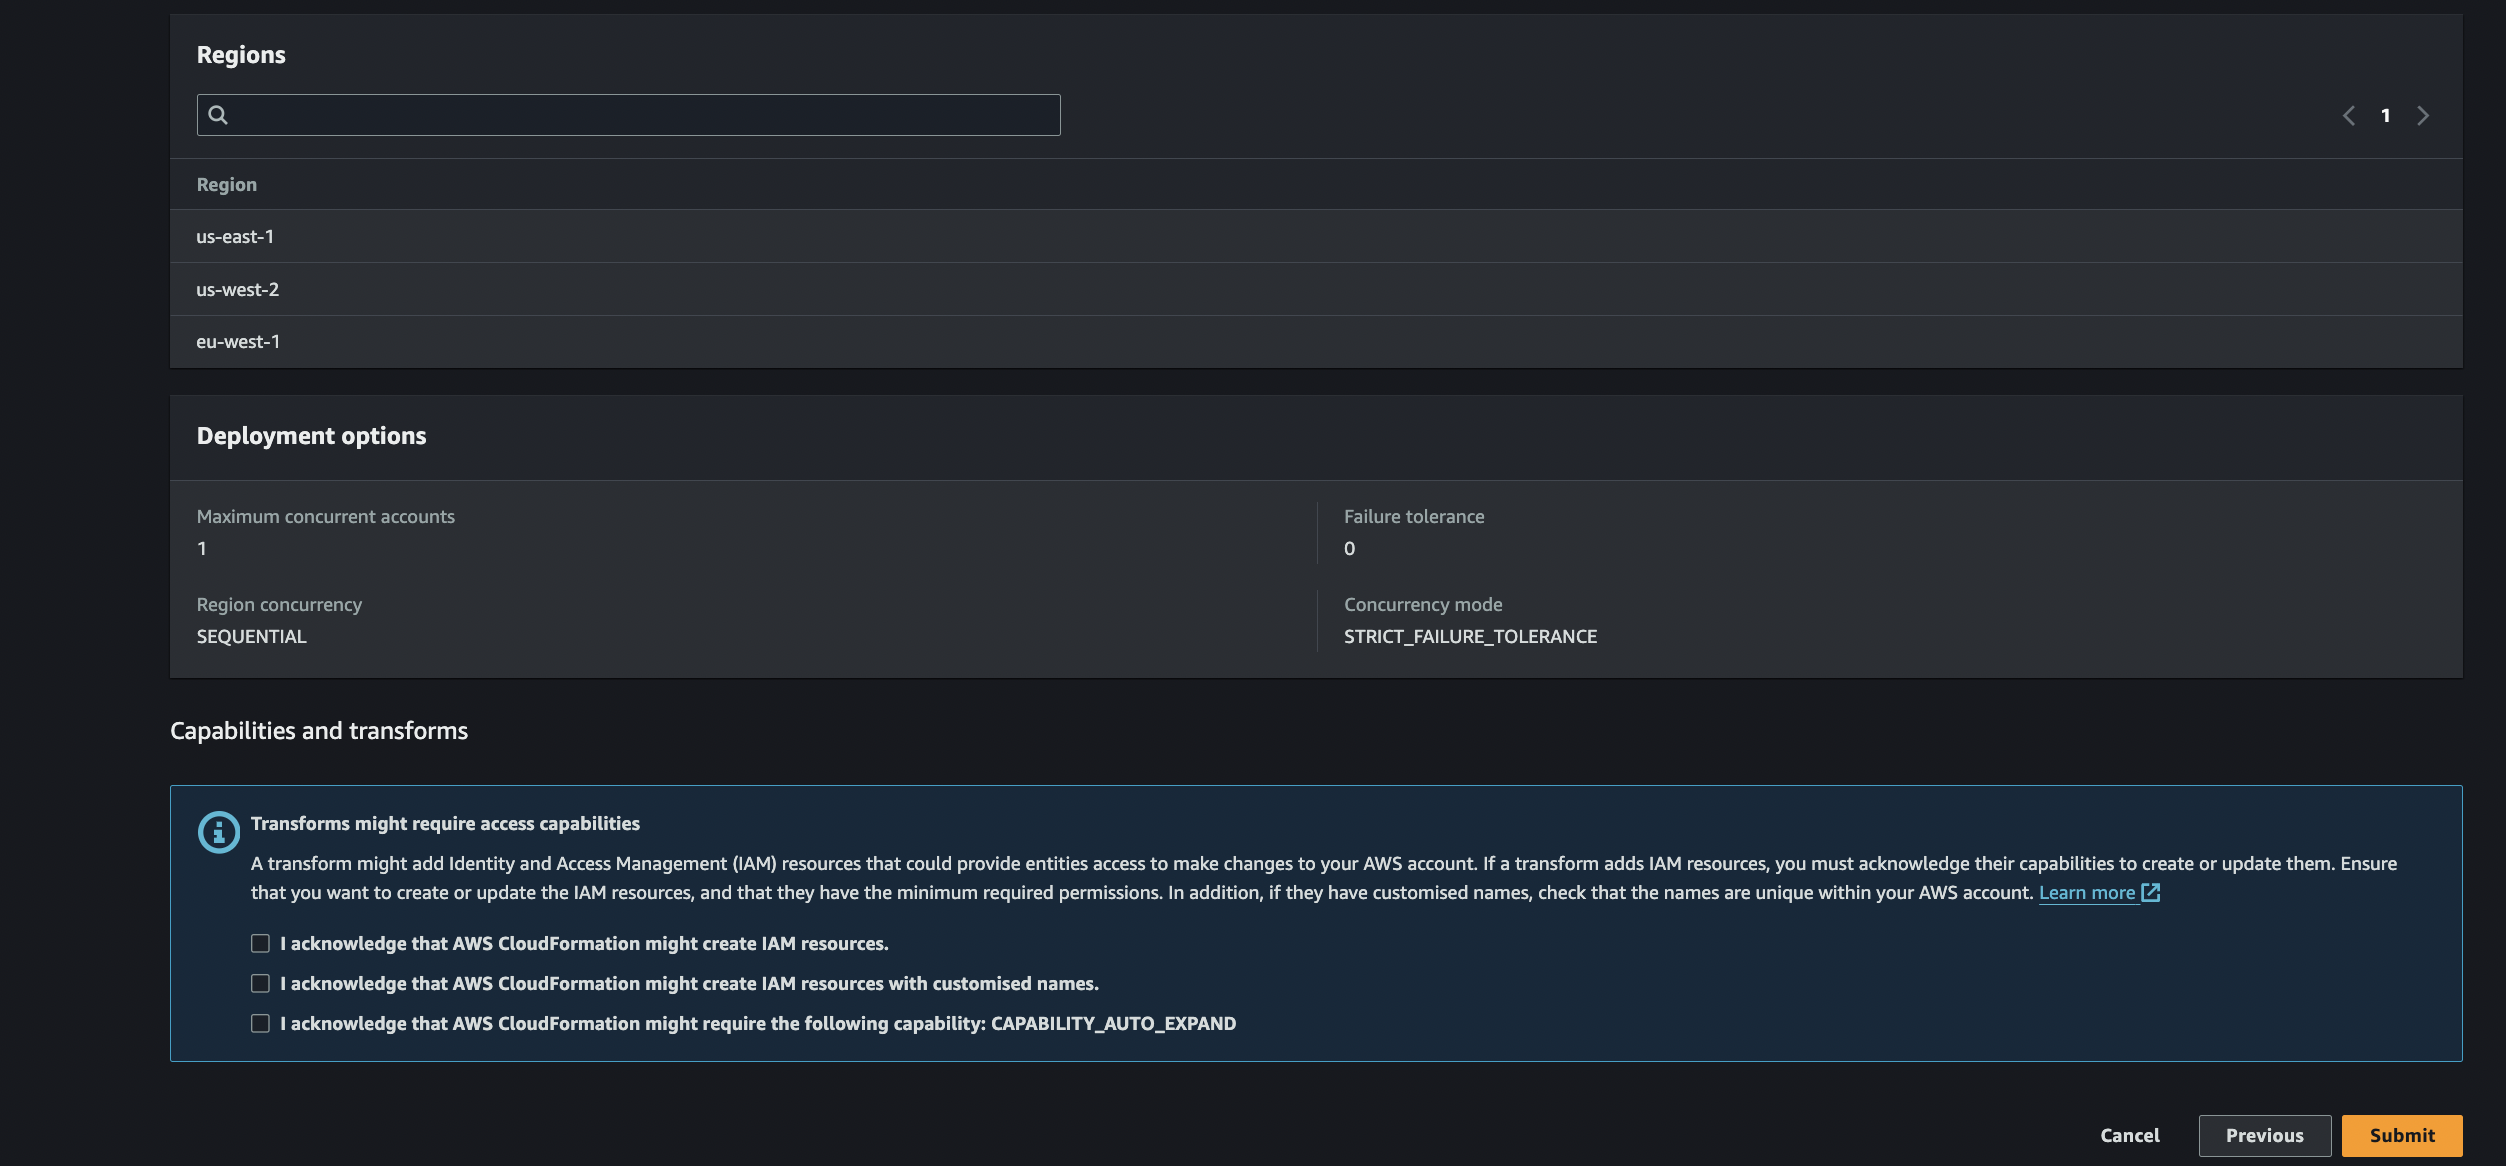
- Select the following options:
Wait for Completion
- Wait for the stackset to be created in all selected regions. This process will take approximately 15-20 minutes.
